WPF像素瓷砖背景

3

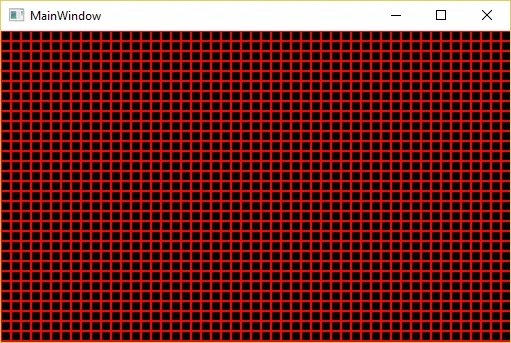
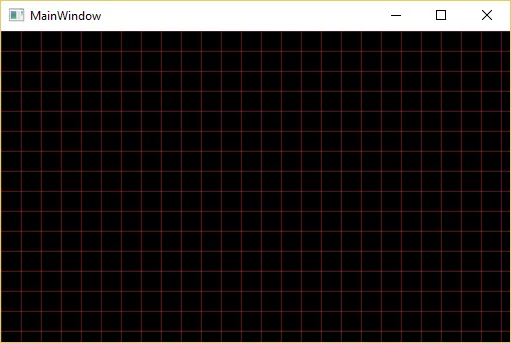
我正在尝试相对于像素大小平铺我的画布背景。这是我目前的代码...

enter image description here

我希望它看起来像这样... 我只想使用代码创建平铺的网格背景,而不想使用png或图像文件创建该网格。

enter image description here

<Window x:Class="graph_view.MainWindow"
        xmlns="http://schemas.microsoft.com/winfx/2006/xaml/presentation"
        xmlns:x="http://schemas.microsoft.com/winfx/2006/xaml"
        xmlns:d="http://schemas.microsoft.com/expression/blend/2008"
        xmlns:mc="http://schemas.openxmlformats.org/markup-compatibility/2006"
        xmlns:local="clr-namespace:graph_view"
        mc:Ignorable="d"
        Title="MainWindow" Height="200" Width="200">
    <Grid >
        <Grid.RowDefinitions>
            <RowDefinition Height="20"/>
            <RowDefinition Height="*"/>
        </Grid.RowDefinitions>

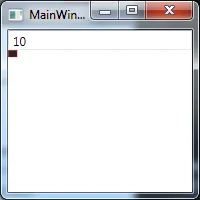
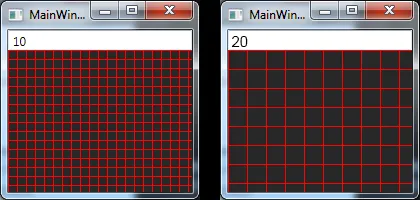
        <TextBox Grid.Row="0" Text="10"></TextBox>
        <Canvas Grid.Row="1">
            <Canvas.Background>
                <DrawingBrush TileMode="Tile" Viewbox="0,0,20,20" ViewportUnits="RelativeToBoundingBox" AlignmentX="Left" AlignmentY="Top">
                    <DrawingBrush.Drawing>
                        <GeometryDrawing Brush="sc# 1.0, 0.02, 0.02, 0.02">
                            <GeometryDrawing.Geometry>
                                <GeometryGroup>
                                    <RectangleGeometry Rect="0,0,20,20" />
                                </GeometryGroup>
                            </GeometryDrawing.Geometry>
                            <GeometryDrawing.Pen>
                                <Pen Thickness="1" Brush="red"/>
                            </GeometryDrawing.Pen>
                        </GeometryDrawing>
                    </DrawingBrush.Drawing>
                </DrawingBrush>
            </Canvas.Background>
        </Canvas>
    </Grid>
</Window>
2个回答

4
<Canvas>
    <Canvas.Background>
        <VisualBrush TileMode="Tile" Stretch="Uniform" Viewport="10,10,10,10" ViewportUnits="Absolute">
            <VisualBrush.Visual>
                <Rectangle Width="10" Height="10" Fill="Black" Stroke="Red"/>
            </VisualBrush.Visual>
        </VisualBrush>
    </Canvas.Background>
</Canvas>

在此输入图片描述

将矩形的StrokeThickness值更改为更厚的网格线。将ViewPortWidthHeight更改为更大的网格。

<Canvas >
    <Canvas.Background>
        <VisualBrush TileMode="Tile" Stretch="Uniform" Viewport="20,20,20,20" ViewportUnits="Absolute">
            <VisualBrush.Visual>
                <Rectangle Width="20" Height="20" Fill="Black" Stroke="Red" StrokeThickness="0.1"/>
            </VisualBrush.Visual>
        </VisualBrush>
    </Canvas.Background>
</Canvas>

enter image description here


2

首先,在XAML中命名您的网格。

在您的代码后台文件中,创建一个循环实际宽度和高度的方法。

在宽度循环内,将向网格添加新列,在高度循环内,将添加新行,然后添加具有黑色背景和红色边框的新边框。

在初始化后的构造函数中调用该方法。

只需将宽度传递给该方法即可提供网格行和列的宽度和高度属性。

这也可以使用XAML轻松完成。


为何要费这么多功夫,当画布本身就有一个tile属性呢? - JokerMartini
tile属性可以控制画布中图像的显示方式。问题明确要求不使用图像。有许多方法可以在画布中创建网格。我的方法只是一个想法,但与任何其他元素一样灵活。这就是WPF的美妙之处。 - EricM
这是非常正确的。这就是使 WPF 如此强大的原因。您能演示一下如何使用 XAML 实现您所描述的内容吗? - JokerMartini

网页内容由stack overflow 提供, 点击上面的
可以查看英文原文,
原文链接