为什么需要将ImageView包装在FrameLayout中?

29

这里是一个简单的布局:

      <RelativeLayout
            android:layout_width="match_parent"
            android:layout_height="wrap_content">

            <ImageView
                android:id="@+id/companyIcon"
                android:layout_width="wrap_content"
                android:layout_height="40dp" <!-- notice I've limited a height -->
                android:scaleType="fitStart"
                android:adjustViewBounds="true"
                android:layout_alignParentLeft="true" />

            <TextView
                android:id="@+id/companyName"
                android:layout_width="wrap_content"
                android:layout_height="wrap_content"
                android:layout_toRightOf="@id/companyIcon"
                android:layout_marginLeft="3dp"
                android:layout_centerVertical="true"
                android:textStyle="bold"
                android:textColor="#20526d" />
        </RelativeLayout>

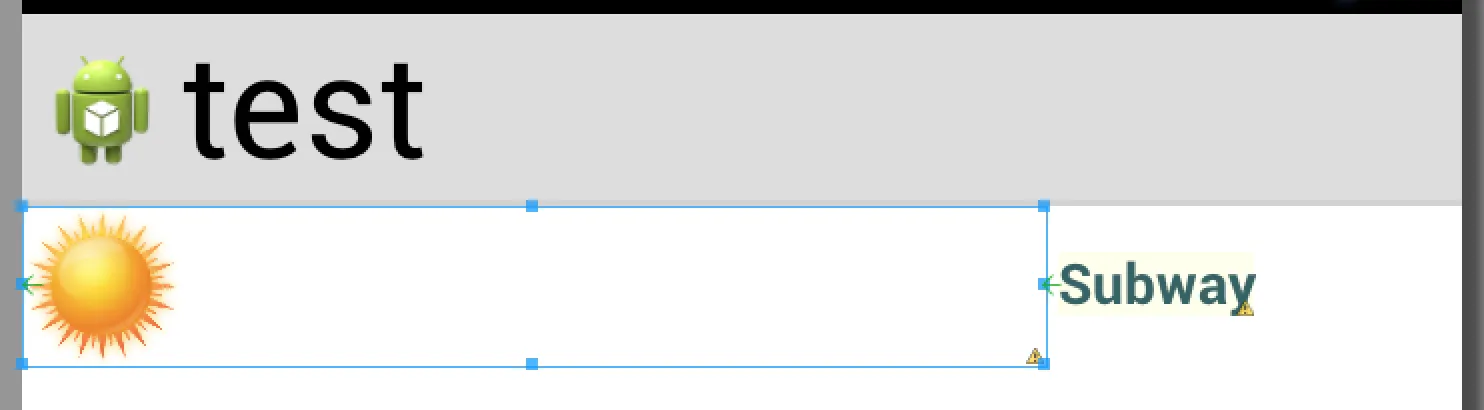
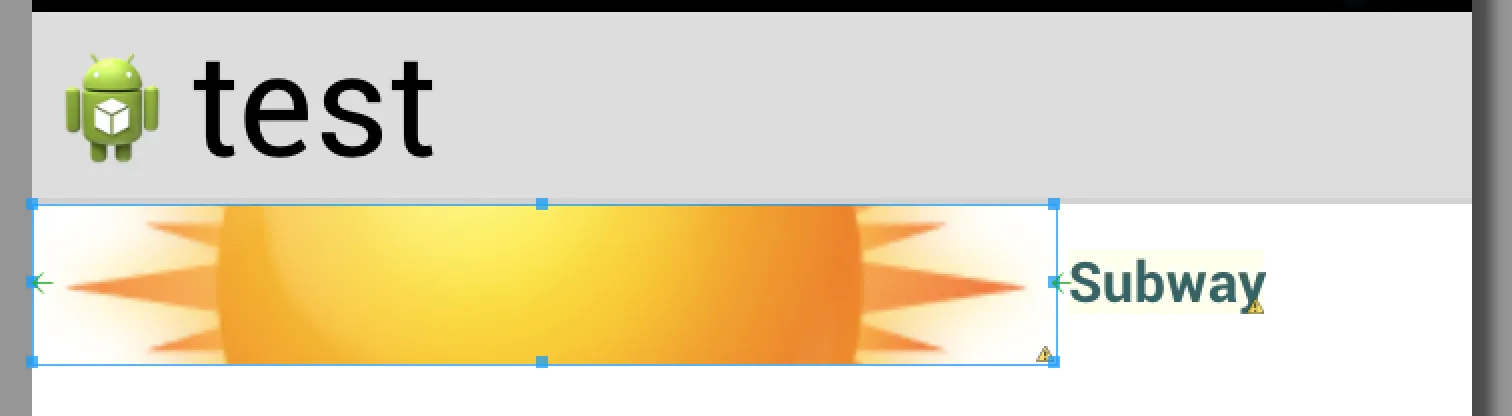
我使用setImageBitmap()来设置图像的高度超过了40dp。 在这个布局中,ImageViewTextView之间有额外的空间,这是从哪里来的呢? enter image description here

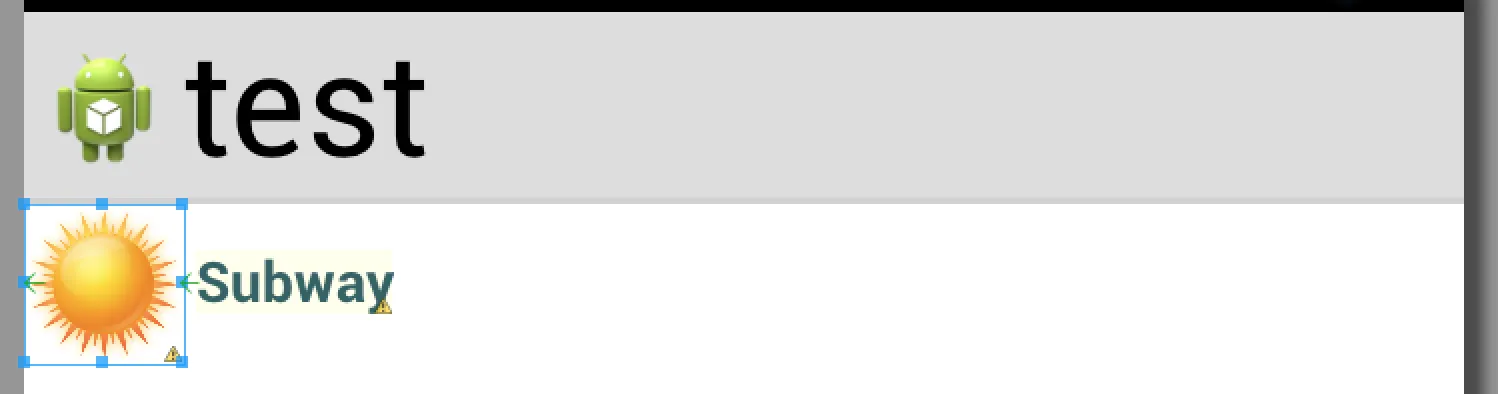
但是当我将ImageView包装在FrameLayout中时,就没有这个不必要的额外空间了:

<RelativeLayout
            android:layout_width="match_parent"
            android:layout_height="wrap_content">

            <FrameLayout
                android:id="@+id/image_container"
                android:layout_width="wrap_content"
                android:layout_height="wrap_content">

                <ImageView
                    android:id="@+id/companyIcon"
                    android:layout_width="wrap_content"
                    android:layout_height="40dp"
                    android:scaleType="fitStart"
                    android:adjustViewBounds="true"
                    android:layout_alignParentLeft="true" />
            </FrameLayout>

            <TextView
                android:id="@+id/companyName"
                android:layout_width="wrap_content"
                android:layout_height="wrap_content"
                android:layout_toRightOf="@id/image_container"
                android:layout_marginLeft="3dp"
                android:layout_centerVertical="true"
                android:textStyle="bold"
                android:textColor="#20526d" />
        </RelativeLayout>

结果如下:

在此输入图像描述

你们能解释一下为什么我要把ImageView放入FrameLayout才能按预期显示吗?非常感谢。


你能否尝试使用LinearLayout作为父布局,而不是RelativeLayout。RelativeLayout在许多情况下都会出现错误。 - Sherif elKhatib
你需要将android:layout_width="80dp或100dp"分配给你的ImageView。不用担心,你的图片不会被拉伸/压缩。 - Umer Abid
6个回答

31

我将使用setImageBitmap()设置的图片高度超过了40dp。使用此布局,ImageView与TextView之间有额外的空间,它从哪里来?

由于android:layout_height="40dp"且android:scaleType="fitStart",图像被缩小(并向左/开始方向)以适应高度,因此这个“额外的空间”实际上是图像的原始宽度,因为android:layout_width="wrap_content"。我用比40dp更大的自己的图像重新创建了您的布局。当您选择ImageView时,可以看到其范围延伸到图像的原始宽度。

Original Layout

为进一步证明这一点,如果我设置android:scaleType="center",则不会应用fit,您可以看到ImageView的原始宽度。

Original Layout not scaled to fit

你们能解释一下为什么我要将ImageView放入FrameLayout中才能得到预期的效果吗?

似乎由于您的FrameLayout使用android:layout_width="wrap_content",所以在android:adjustViewBounds="true"导致ImageView缩放后,它从ImageView获取正确的缩小宽度。奇怪的是ImageView本身使用android:layout_width="wrap_content",但显示原始图像的宽度,而不是缩放后的宽度。我的猜想是ImageView的高度和宽度在缩放之前被设置,因此ImageView获取原始图像的宽度,但父FrameLayout将其ImageView子元素的缩放宽度获取为其缩放后的宽度。这可能不是真的,但对我来说看起来是这样。

但是,您可以通过在ImageView上使用android:maxHeight="40dp"解决未缩放宽度问题(无需使用FrameLayout)。然后可以设置android:layout_height="wrap_content",以便如果图像较小,则图像可以小于40dp。

<ImageView
    android:id="@+id/companyIcon"
    android:layout_width="wrap_content"
    android:layout_height="wrap_content"
    android:layout_alignParentLeft="true"
    android:adjustViewBounds="true"
    android:maxHeight="40dp"
    android:scaleType="fitStart" />

使用最大高度的原始布局


4

这适用于几乎所有的视图,但是考虑到特别是ImageView,以下是指导设置高度和宽度的三个选项:

  1. 高度和宽度都设置为"WRAP_CONTENT"
  2. 高度和宽度都设置为"FILL_PARENT"
  3. 高度和宽度都设置为"FIXED SIZE"

    *避免混合使用,比如Width=WRAP_CONTENT and Height=FILL_PARENT

ImageView ScaleType设置指南

ScaleType有什么作用?

它缩放你设置给ImageView的图片,而不是缩放ImageView本身,所以当你将其设置为fitStart时,它会将您的图像缩放并显示在右侧,但您的imageView在高度和宽度方面仍然与您指定的大小相同。

如果你使用WRAP_CONTENT来设置高度和宽度,你不需要指定ScaleType,因为你的ImageView将自动变成与你的图片一样大。

如果你使用FILL_PARENT来设置高度和宽度,你可以选择在中心、开始、结束或全屏显示图片,所以你可以根据这个选择ScaleType。

如果你使用FIXED_SIZE来设置高度和宽度,你应该选择scaletype=FITXY


将图像设置到ImageView的指南

如果你在XML中静态地设置图像,那么你手上只有一张图片,所以你可以根据你的布局设计创建所需大小的图像,并简单地使用WRAP_CONTENT

如果你在运行时从某个地方下载并设置图像,则需要下载图像并创建所需大小的位图,然后将其设置为ImageView。


针对你的情况

你可以看到你的图像被拉伸得很厉害,文本也无法读取,这是因为你下载并设置了原始大小的图像,而没有根据较小的高度和宽度进行处理。相反,你应该这样做:

在XML文件中将ImageView的高度和宽度设置为WRAP_CONTENT

                    <ImageView
                    android:id="@+id/companyIcon"
                    android:layout_width="wrap_content"
                    android:layout_height="wrap_content"
                    android:layout_alignParentLeft="true" />

下载您需要的图像大小,例如50X100。以下是示例代码:

class LoadPics extends AsyncTask<Void, Bitmap, Bitmap> {
    String urlStr;
    ImageView iv;
    int width, height;

    public LoadPics(ImageView iv, String url, int width, int height) {
        this.iv = iv;
        this.urlStr = url;
        this.width = width;
        this.height = height;
    }

    @Override
    protected Bitmap doInBackground(Void... params) {
        try {
                InputStream in = null;
                try {
                    URL url = new URL(urlStr);
                    URLConnection urlConn = url.openConnection();
                    HttpURLConnection httpConn = (HttpURLConnection) urlConn;
                    httpConn.connect();
                    in = httpConn.getInputStream();
                } catch (MalformedURLException e) {
                    e.printStackTrace();
                } catch (IOException e) {
                    e.printStackTrace();
                }

                BitmapFactory.Options o = new BitmapFactory.Options();
                o.inJustDecodeBounds = true;

                int scale = 2;
                if (o.outHeight > width || o.outWidth > height) {
                    scale = 2 ^ (int) Math.ceil(Math.log(width
                            / (double) Math.max(o.outHeight, o.outWidth))
                            / Math.log(0.5));
                }

                if (scale <= 1 && o.outHeight > 150) {
                    scale = 5;
                }

                BitmapFactory.Options o2 = new BitmapFactory.Options();
                o2.inSampleSize = scale;
                Bitmap b1 = BitmapFactory.decodeStream(in, null, o2);
                b1 = Bitmap.createScaledBitmap(b1, width, height, true);
                loader.addToCache(urlStr, b1);
                publishProgress(b1);

        } catch (Exception e) {
            e.printStackTrace();
        }
        return null;
    }

    @Override
    protected void onProgressUpdate(Bitmap... values) {
        super.onProgressUpdate(values);
        iv.setImageBitmap(values[0]);
    }
}

使用您的参数调用此方法:

new LoadPics(ivUser,imgURL,100,50).execute();

表述得很好,关于ImageView的解释也很好。虽然我认为真正的问题是:“为什么添加FrameLayout会解决问题?” - Sherif elKhatib
是的,使用FrameLayout它可以正常工作。我不太明白,但这是我的做法,所以我发了帖子。顺便说一句,谢谢你的点赞@SherifelKhatib。 - MKJParekh

1

尝试将android:scaleType="fitStart"替换为android:scaleType="fitXY"


编辑

在您的图像视图中,您应该将imagView的宽度设置为wrap-content,这将采用图像的大小。如果您硬编码imageView的宽度(就像您通过给出40dp的宽度所做的那样),则在其他Android移动设备上看起来不太好。

如果您仍然想这样做,请尝试加载分辨率较低的图像。如果此图像的分辨率为200X100,则请尝试在您的ImageView中加载100X50的图像。


1
如果我设置fitXY,比例就不会保持,因此它会被拉伸。 - Eugene

0

在第一张图片中出现额外的空间,因为您在图像容器布局中设置了match parent。但是在第二个FrameLayout中使用了wrap content,这是图像容器。

我的建议是在相对布局内创建线性布局,并应用layout_weight属性,以便在两个视图中比例相同。


0
尝试将比例类型设置为center_inside。

0

如果你使用android:scaleType="FIT_END",没有使用FrameLayout,那么地铁图片是否会靠近“Subway”文本?我在想,因为你在里面有android:layout_alignParentLeft="true"。我认为,在没有FrameLayout的情况下,ImageView缩放前的原始大小可能会影响布局。

这可能并不太重要,但是为了实现你想要的效果,需要一些处理来缩放和调整图像大小。如果可行的话,我会自己调整图像大小,而不是依赖XML。如果我想适应多个尺寸,我会制作几个不同的布局。当然,这可能对你的目的来说有点过度设计,我不知道。


android:adjustViewBounds="true" 应该在缩放后重新调整视图的边界,但实际上它似乎并没有按照它所说的那样做。 - Jason Robinson

网页内容由stack overflow 提供, 点击上面的
可以查看英文原文,
原文链接