在SwiftUI中从导航栏中移除返回按钮文本

28

我最近开始使用SwiftUI,得出结论:与导航一起工作还不够好。我想要实现的是以下内容。我终于设法在不使应用程序崩溃的情况下摆脱了半透明背景,但现在我遇到了下一个问题。如何去除navbaritem内部的“返回”文本?

enter image description here

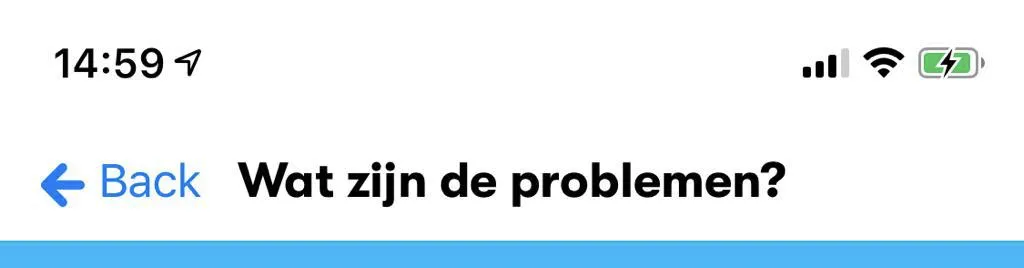
我通过在SceneDelegate.swift文件中设置默认外观来实现上述视图,如下所示。

let newNavAppearance = UINavigationBarAppearance()
newNavAppearance.configureWithTransparentBackground()
newNavAppearance.setBackIndicatorImage(UIImage(named: "backButton"), transitionMaskImage: UIImage(named: "backButton"))
newNavAppearance.titleTextAttributes = [
    .font: UIFont(name: GTWalsheim.bold.name, size: 18)!,
    .backgroundColor: UIColor.white

]

UINavigationBar.appearance().standardAppearance = newNavAppearance

我能够通过覆盖导航栏项来实现这一目标,但这种方法有一个缺点(SwiftUI定制NavigationView的返回按钮文本),正如此问题的创建者所说,覆盖导航栏项后,返回手势将停止工作。同时,我也想知道如何设置返回按钮的foregroundColor。它现在具有默认的蓝色,但我想用另一种颜色来覆盖它。
12个回答

53
在@Pitchbloas提供的解决方案基础上,这种方法只涉及将backButtonDisplayMode属性设置为.minimal
extension UINavigationController {

  open override func viewWillLayoutSubviews() {
    super.viewWillLayoutSubviews()
    navigationBar.topItem?.backButtonDisplayMode = .minimal
  }

}

我不知道'backButtonDisplayMode',谢谢! - user8354447
这是一个很好的选择!只是提醒其他人需要iOS 14+。 - LordParsley
2
发现这是一个不错的解决方案,但在设置按钮显示模式之前应该调用 super.viewWillLayoutSubviews() - D. Greg
1
这将改变您应用程序中每个返回按钮的行为。如果这正是您想要的,那么这是一个很好且简单的解决方案,否则请查看其他答案... - Daniel

40

其实非常简单。以下解决方案是我制作的最快、最干净的。

例如,将此放在您的SceneDelegate底部。

extension UINavigationController {
    // Remove back button text 
    open override func viewWillLayoutSubviews() {
        navigationBar.topItem?.backBarButtonItem = UIBarButtonItem(title: "", style: .plain, target: nil, action: nil)
    }
}

这将从您的应用程序中的每个NavigationView(UINavigationController)中删除返回按钮文本。


1
谢谢!我已经寻找像这样简单的解决方案好几天了。 - eagerMoose
3
这应该是被接受的答案。 - Devo

20

我发现了一种只使用SwiftUI的简单方法来删除后退按钮文本,并保留原始的箭头。

通过添加拖动手势来模仿经典导航后退按钮,当用户想要向右滑动返回时。接下来,创建一个View扩展来创建类似SwiftUI修改器。

以下是如何在代码中使用它:

import SwiftUI

struct ContentView: View {

  var body: some View {
    ZStack {
      // Your main view code here with a ZStack to have the
      // gesture on all the view.
    }
    .navigationBarBackButtonTitleHidden()
  }
}

这是如何创建navigationBarBackButtonTitleHidden()修饰符的方法:

import SwiftUI

extension View {

  func navigationBarBackButtonTitleHidden() -> some View {
    self.modifier(NavigationBarBackButtonTitleHiddenModifier())
  }
}

struct NavigationBarBackButtonTitleHiddenModifier: ViewModifier {

  @Environment(\.dismiss) var dismiss

  @ViewBuilder @MainActor func body(content: Content) -> some View {
    content
      .navigationBarBackButtonHidden(true)
      .navigationBarItems(
        leading: Button(action: { dismiss() }) {
          Image(systemName: "chevron.left")
            .foregroundColor(.blue)
          .imageScale(.large) })
      .contentShape(Rectangle()) // Start of the gesture to dismiss the navigation
      .gesture(
        DragGesture(coordinateSpace: .local)
          .onEnded { value in
            if value.translation.width > .zero
                && value.translation.height > -30
                && value.translation.height < 30 {
              dismiss()
            }
          }
      )
  }
}

这太棒了!我要提一下,在一个项目中,presentation.wrappedValue.dismiss 有时会成为一个头疼的问题,在特定情况下可能导致应用程序崩溃。 - Alex Hartford
谢谢。这可以重构为自定义修饰符:https://gist.github.com/janodev/9d765a827ba3af407e70cc380cffeb80 - Jano
@Jano,我已经根据你的建议更新了代码。 - Roland Lariotte

5

如果您想要:

  • 全局实现
  • 保留标准返回按钮(同时具有自定义行为,如长按后能够导航到前几个屏幕)
  • 避免引入任何第三方框架

您可以通过外观设置返回按钮文本颜色为“清晰颜色”来实现:

let navigationBarAppearance = UINavigationBarAppearance()

let backButtonAppearance = UIBarButtonItemAppearance(style: .plain)
backButtonAppearance.focused.titleTextAttributes = [.foregroundColor: UIColor.clear]
backButtonAppearance.disabled.titleTextAttributes = [.foregroundColor: UIColor.clear]
backButtonAppearance.highlighted.titleTextAttributes = [.foregroundColor: UIColor.clear]
backButtonAppearance.normal.titleTextAttributes = [.foregroundColor: UIColor.clear]

navigationBarAppearance.backButtonAppearance = backButtonAppearance

//Not sure you'll need both of these, but feel free to adjust to your needs.
UINavigationBar.appearance().standardAppearance = navigationBarAppearance
UINavigationBar.appearance().scrollEdgeAppearance = navigationBarAppearance

当应用程序启动时,您可以执行一次操作并忘记它。

潜在的缺点(取决于您的喜好)是,当您移动到另一个窗口时,当前窗口的标题向左滑动,清晰颜色的过渡是动画效果。

您还可以尝试不同的文本属性。

演示


4

我最终找到了以下实际可行的解决方案。我这样覆盖了导航栏项目:

.navigationBarItems(leading:
    Image("backButton")
        .foregroundColor(.blue)
        .onTapGesture {
            self.presentationMode.wrappedValue.dismiss()
    }
)

唯一的问题是返回手势不起作用,可以通过扩展UINavigationController来解决。
extension UINavigationController: UIGestureRecognizerDelegate {
    override open func viewDidLoad() {
        super.viewDidLoad()
        interactivePopGestureRecognizer?.delegate = self
    }

    public func gestureRecognizerShouldBegin(_ gestureRecognizer: UIGestureRecognizer) -> Bool {
        return viewControllers.count > 1
    }
}

现在它看起来正是我想要的样子,解决方案有点狡猾...但现在它能够工作了,希望SwiftUI会更加成熟,这样做会更容易。


这样做会在向后滑动时给您重复的导航和返回按钮,对我来说就是这种情况。因此,我最终使用工具栏增加了导航标题的宽度。 - Prafulla

3
使用Introspect框架,您可以轻松访问底层导航项并将backButtonDisplayMode设置为minimal。
以下是在被推送的视图中如何使用它。
var body: some View {
    Text("Your body here")
        .introspectNavigationController { navController in
            navController.navigationBar.topItem?.backButtonDisplayMode = .minimal
        }
}

3

标准的返回按钮标题取自上一个屏幕导航栏标题。

可以使用以下方法来获取所需效果:

演示

struct TestBackButtonTitle: View {
    @State private var hasTitle = true
    var body: some View {
        NavigationView {
            NavigationLink("Go", destination:
                Text("Details")
                    .onAppear {
                        self.hasTitle = false
                    }
                    .onDisappear {
                        self.hasTitle = true
                    }
            )
            .navigationBarTitle(self.hasTitle ? "Master" : "")
        }
    }
}

7
好的,是的,这是一个可能的解决方案,但它非常麻烦,如果我必须在每个屏幕上都这样做,那会很烦人和粗糙。我正在寻找一种全局禁用此文本的方法。 - Jordy

2

适用于iOS 16

上述解决方案对我无效。我想针对特定视图进行更改,而不涉及任何全局(外观或扩展),并且使用最少的样板代码。

由于您可以在View的init中更新NavigationItem,因此可以通过以下2个步骤解决:

  1. 获取可见的视图控制器。
// Get Visible ViewController
extension UIApplication {
    
    static var visibleVC: UIViewController? {
        var currentVC = UIApplication.shared.windows.first { $0.isKeyWindow }?.rootViewController
        while let presentedVC = currentVC?.presentedViewController {
            if let navVC = (presentedVC as? UINavigationController)?.viewControllers.last {
                currentVC = navVC
            } else if let tabVC = (presentedVC as? UITabBarController)?.selectedViewController {
                currentVC = tabVC
            } else {
                currentVC = presentedVC
            }
        }
        return currentVC
    }
    
}
  1. 在视图的init中更新NavigationItem。
struct YourView: View {
    
    init(hideBackLabel: Bool = true) {
        if hideBackLabel {
            // iOS 14+
            UIApplication.visibleVC?.navigationItem.backButtonDisplayMode = .minimal
            
            // iOS 13-
            let button = UIBarButtonItem(title: "", style: .plain, target: nil, action: nil)
            UIApplication.visibleVC?.navigationItem.backBarButtonItem = button
        }
    }

}

2

你可以使用.toolbarRole(.editor)


在这些答案中,最简单和清晰的方式是: - undefined
1
虽然这只适用于iOS 16及以上版本,但仍然是最好的选择。 - undefined

0

我通过在推送详细屏幕之前更改主屏幕的标题,然后在其重新出现时将其设置回来来实现这一点。唯一的注意事项是当您返回到主屏幕时,标题的重新出现会有些明显。

摘要:

  • 在主视图中添加状态变量(例如isDetailShowing),用于存储详细屏幕是否正在显示

  • 在主视图中使用navigationTitle修饰符,根据isDetailShowing的当前值设置标题

  • 在主视图中使用onAppear修饰符,将isDetailShowing的值设置为false

  • 在主屏幕的NavigationLink中使用simultaneousGesture修饰符,将isDetailShowing设置为true

  • struct MasterView: View {
      @State var isDetailShowing = false
    
      var body: some View {
    
          VStack {
              Spacer()
                  .frame(height: 20)
              Text("主屏幕")
                  .frame(maxWidth: .infinity, alignment: .leading)
              Spacer()
                  .frame(height: 20)
    
              NavigationLink(destination: DetailView()) {
                  Text("进入详细屏幕")
              }
              .simultaneousGesture(TapGesture().onEnded() {
                  isDetailShowing = true
              })
          }
          .navigationBarTitleDisplayMode(.inline)
          .navigationTitle(isDetailShowing ? "" : "主屏幕标题")
          .onAppear() {
              isDetailShowing = false
          }
      }
    }
    
    struct DetailView: View {
      var body: some View {
          Text("这是详细屏幕")
          .navigationBarTitleDisplayMode(.inline)
          .navigationTitle("详细屏幕标题")
      }
    }
    

网页内容由stack overflow 提供, 点击上面的
可以查看英文原文,
原文链接