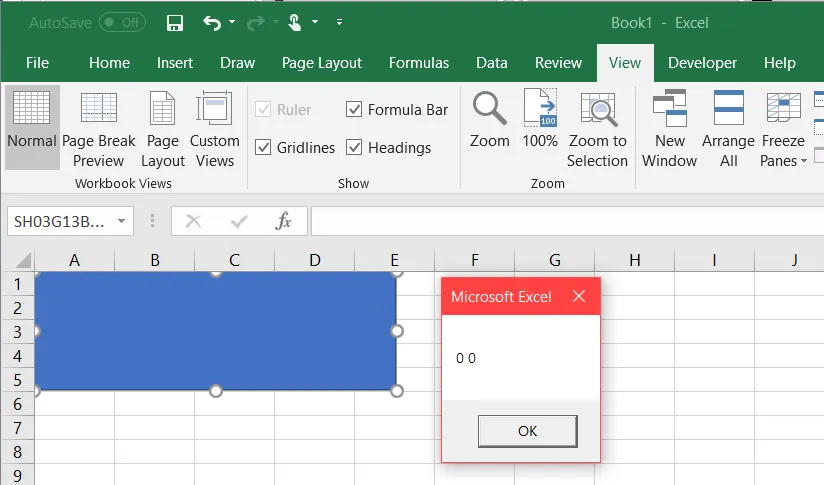
在矩形内获取光标位置

4
如何获取光标位置相对于矩形的坐标(我用来调用宏的那个矩形)?目前为止,我得到了以下内容:
首先:我使用这个函数:
Declare PtrSafe Function GetCursorPos Lib "user32" (Point As POINTAPI) As Long
Type POINTAPI
   X As Long
   Y As Long
End Type

获取屏幕上鼠标光标的坐标。这些值是由以下方法返回的:

Point.X 'pixels to the left of the screen
Point.Y 'pixels to the top of the screen

第二步:我创建了一个这样的矩形:

a rectangle on a spreadsheet

并将以下宏设置为它:
Sub SH03G13()
    Dim Point As POINTAPI: GetCursorPos Point
    Dim rectang As Shape: Set rectang = ThisWorkbook.Sheets("Sheet1").Shapes("SH03G13BACK")
    Dim ABCISSA As Long: ABCISSA = Point.X - rectang.Left
    Dim ORDENAD As Long: ORDENAD = Point.Y - rectang.Top

    MsgBox ABCISSA & " " & ORDENAD

End Sub

在我做这件事时,我确信我正在获取绿色矩形内光标的坐标。然而,当我点击下一张图片上的黑点时:

a rectangle with a black spot on a spreadsheet

我的计划返回的坐标并不是我预期的接近0的坐标。

Output message box

然后我意识到GetCursorPos返回的是光标相对于屏幕的位置,而我的脚本中的rectang.Leftrectang.Top命令返回的是矩形相对于电子表格的位置。因此,Point.X - rectang.LeftPoint.X - rectang.Left这两行代码肯定是不正确的。
你有什么想法可以得到正确的坐标吗?即如何通过单击黑点获取靠近0的正确坐标?非常感谢您的任何帮助。并且,如往常一样,提前感谢大家。

也许这个链接可以帮到你:https://excel.tips.net/T003421_Determining_Mouse_Cursor_Coordinates_On_a_Graphic.html - Luuklag
形状与单元格不对齐的原因是什么,或者这是否可能?我认为这将极大地简化事情。 - Luuklag
是的 @Luuklag。形状与单元格对齐。实际上,它们是通过以前的宏对齐的。因此,该形状与一系列单元格完全对齐。 - Pspl
抱歉@BrakNicku,但这个问题涉及到工作相关的问题,我不能明确说明此事的细节。它真的不可能是一个ActiveX控件。然而,在经过数天的研究和沮丧的尝试后,我认为我找到了解决方案。我很快会发布它。 - Pspl
但是当所有内容过期时,如果它是最受欢迎的答案,它将默认进入那里。 - Luuklag
显示剩余8条评论
5个回答

5

就像我所说的,通过将矩形与单元格范围对齐,我实现了@Luuklag提供给我的想法并得到了我想要的结果。

首先,我将以下代码放在一个不同的模块中(只是为了代码组织的好):

Option Explicit
Type RECT
    Left As Long: Top As Long: Right As Long: Bottom As Long
End Type
Type POINTAPI
    X As Long: Y As Long
End Type
Declare PtrSafe Function GetDC Lib "user32" (ByVal hwnd As Long) As Long
Declare PtrSafe Function ReleaseDC Lib "user32" (ByVal hwnd As Long, ByVal hDC As Long) As Long
Declare PtrSafe Function GetSystemMetrics Lib "user32.dll" (ByVal nIndex As Long) As Long
Declare PtrSafe Function GetDeviceCaps Lib "gdi32" (ByVal hDC As Long, ByVal nIndex As Long) As Long
Declare PtrSafe Function GetCurrentThreadId Lib "kernel32" () As Long
Declare PtrSafe Function GetCursorPos Lib "user32" (Point As POINTAPI) As Long
Function ScreenDPI(bVert As Boolean) As Long
    Static lDPI&(1), lDC&
    If lDPI(0) = 0 Then
        lDC = GetDC(0)
        lDPI(0) = GetDeviceCaps(lDC, 88&)
        lDPI(1) = GetDeviceCaps(lDC, 90&)
        lDC = ReleaseDC(0, lDC)
    End If
    ScreenDPI = lDPI(Abs(bVert))
End Function
Function PTtoPX(Points As Single, bVert As Boolean) As Long
    PTtoPX = Points * ScreenDPI(bVert) / 72
End Function
Sub GetRangeRect(ByVal rng As Range, ByRef rc As RECT)
    Dim wnd As Window: Set wnd = rng.Parent.Parent.Windows(1)
    With rng
        rc.Left = PTtoPX(.Left * wnd.Zoom / 100, 0) + wnd.PointsToScreenPixelsX(0)
        rc.Top = PTtoPX(.Top * wnd.Zoom / 100, 1) + wnd.PointsToScreenPixelsY(0)
        rc.Right = PTtoPX(.Width * wnd.Zoom / 100, 0) + rc.Left
        rc.Bottom = PTtoPX(.Height * wnd.Zoom / 100, 1) + rc.Top
    End With
End Sub

接下来,我使用下一个宏设置矩形:

Sub SH03G13()
    With ThisWorkbook.Sheets("Sheet1")
        Dim AreaRng As Range: Set AreaRng = .Range(.Cells(2, 2), .Cells(13, 10))
        Dim rectang As Shape: Set rectang = .Shapes("SH03G13BACK")
            rectang.Height = AreaRng.Height
            rectang.Width = AreaRng.Width
            rectang.Top = AreaRng.Top
            rectang.Left = AreaRng.Left
            DoEvents
        Dim Point As POINTAPI: GetCursorPos Point
        Dim rc As RECT: Call GetRangeRect(.Cells(2, 2), rc)
        Dim ABCISSA As Long: ABCISSA = Point.X - rc.Left
        Dim ORDENAD As Long: ORDENAD = Point.Y - rc.Top
    End With

    MsgBox "x: " & ABCISSA & ", y: " & ORDENAD

End Sub

先前的宏将矩形SH03G13BACK定位和调整到.Cells(2, 2), .Cells(13, 10)范围内。完成后,Point.X - rc.LeftPoint.Y - rc.Top命令给出了精确的坐标,相对于该矩形(并与之相关),无论Excel窗口是否最大化/最小化、缩放值、Excel命令选项卡的大小/内容或屏幕本身的大小/分辨率如何。这很完美:

黑点的坐标

我意识到这有点作弊(我知道GetRangeRect子程序给出了相对于.Cells(2,2)位置的坐标)。不过,对于这个问题,这个技巧可以轻松解决。

这仍然无法与我提到的一些用户首选项设置一起使用,例如分割窗格或冻结窗格,您的坐标将相对于窗格,举个例子,您永远不能假设用户会像您希望他们那样使用您的程序。但是,只要它不是旨在生产就绪的代码,它是一个很好的开始和良好的解决方法。 - soulshined
实际上,它确实可以。所涉及的工作表没有拆分或冻结窗格,并且已受到保护。文件的用户将无法编辑这些内容。因此,在这种特定情况下,这个解决方案将起作用(事实上,它已经连续两天运行良好,没有任何问题)。 - Pspl
没错,但我只是举了那个特定设置作为例子,还有许多客户端设置会改变你的结果。但如果它符合你的需求,那就是最重要的。 - soulshined
也许还有一种方法来处理这个问题... 说实话我没有去检查过。 - Pspl
不确定,即使您像上面提到的那样保护工作表并且只允许“编辑对象”,也无法阻止用户按照自己的意愿使用应用程序选项/设置,受保护的工作表仅限制与电子表格的交互。应用程序设置(如分割窗格)不受受保护特权的约束。但我喜欢这个答案,它是一个可靠的解决方法。干得好。 - soulshined
显示剩余2条评论

2
你的第一个问题是Points.X和Points.Y与文档或客户端单独的监视器设置无关,忘记多监视器设置。例如,如果光标位置=(1000,500),但应用程序不是全屏,你必须考虑Application.Left / Application.Top值。
即使如此,这并不是你的形状真正所在位置的真实描述。rectang.Left / rectang.Top与你提到的电子表格不相关,它们是相对于电子表格对象或窗口的。也就是说,如果你将矩形移动到电子表格的最左侧和最上方,它将是(0,0)。如下所示:

enter image description here

现在,假设我们从ActiveWindow对象中删除列标题以及公式栏,坐标仍然保持不变,如下所示:

enter image description here

显然,应用程序环境的大小已经改变,而不是矩形左侧的位置。话虽如此,除非考虑到所有这些运行时情况,否则Application.Top + rectang.Top的光标位置将永远不会真正表示矩形顶部的位置。
假设你确实考虑了这些情况,并且可以访问ActiveWindow对象的一些设置,例如Application.ActiveWindow.DisplayHeadings,并且你确保尽力省略了这些问题。你仍然需要考虑大量用户首选项,例如显示的滚动条、选项卡、实际功能区可能在不同客户端上大小不一、最小化或最大化、页面布局,仅当前缩放级别就可能导致冲突,还有内容窗格。让我们以格式化形状窗格为例,将其移动到应用程序的左侧并将其调整为由用户定义的过度宽度:

enter image description here

这段话的意思是:坐标仍然保持它们的相对位置,无论您有哪些属性访问权限,它都不会与光标位置相关,因为它始终取决于用户的环境设置。目前,我的答案是,没有合理的“开箱即用”方法来完成这个任务,还有一个简单的原因是,在Excel中,形状对象没有像onclick这样的事件处理程序,另外,据我所知,Worksheet.SelectionChange不会针对选择形状而触发。您可以通过运行循环来不断检查当前选择等方式找到一种“hacky”的方法,但自然而然地,出于性能原因,这是不可取的。作为内置的完成此操作的手段,在为形状对象添加事件处理程序之前,最好的选择可能是将其移植到COM AddIn中或在工作表中填充某种VBA窗体,在窗体中进行所有形状操作,然后在用户完成时将最终产品添加到电子表格中。

我使用了单元格对齐的想法来解决这个问题。很快我会将其发布为答案。不过,感谢您的解释。非常详尽... - Pspl

1

新编辑版本

请看以下代码。核心思路是使用RangeFromPoint,它返回在指定屏幕坐标对应位置的Shape或Range对象。

逻辑步骤如下:
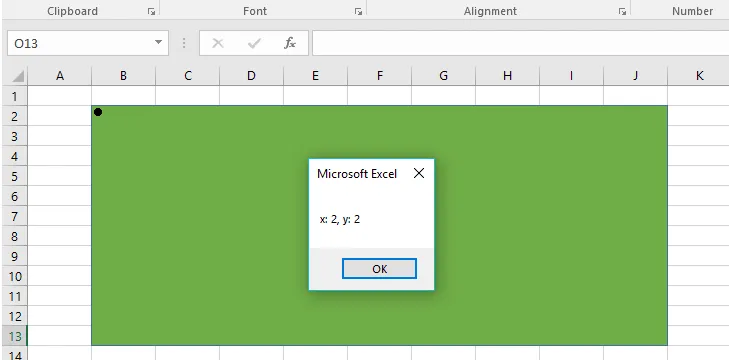
1) 获取点击位置和屏幕尺寸(以像素为单位)。
2) 获取可见范围内属于不同行/列的前两个单元格,并获取它们的“Excel”位置以及它们的像素位置。
3) 计算“Excel单位”和像素之间的关系。
4) 扫描工作表中的所有形状,获取它们的Excel位置并计算它们的像素位置。

虽然有点冗长(如果删除写入变量到工作表的所有行,则不会太长),但我认为代码相当直观,无需将形状定位到单元格上或检查缩放或类似内容。您可以在工作表中拥有许多形状,并将代码分配给它们中的所有形状。

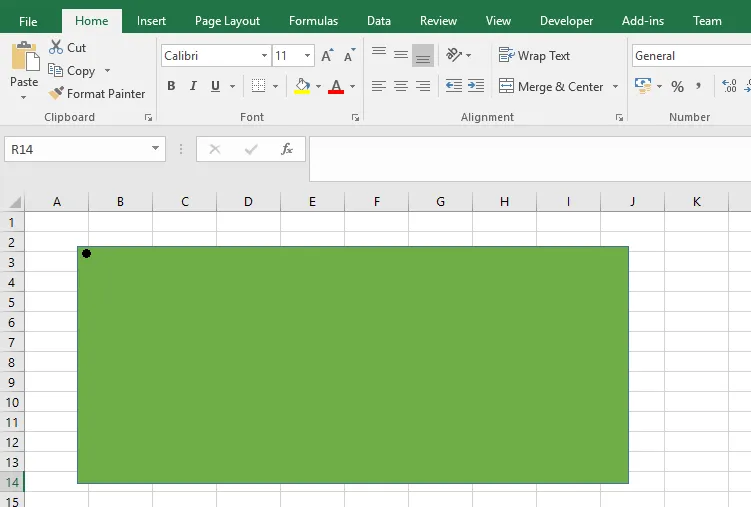
唯一的要求是可见窗口左上角的四个单元格不能被形状覆盖。

下面的代码是将不同的变量写入表格,仅为了清晰明了。
Private Declare Function GetCursorPos Lib "user32" (ByRef lpPoint As POINT) As Long

Private Type POINT
    x As Long
    y As Long
End Type

Public Declare Function GetSystemMetrics Lib "user32.dll" (ByVal index As Long) As Long
Public Const SM_CXSCREEN = 0
Public Const SM_CYSCREEN = 1

Sub GetPixelsFromImageBorder()
    Dim pLocation As POINT
    Dim objShape As Object
    Dim ScreenWidth As Integer
    Dim ScreenHeight As Integer
    Dim xPix As Integer, yPix As Integer
    Dim Cell_1_X As Double, Cell_1_Y As Double
    Dim Cell_2_X As Double, Cell_2_Y As Double
    Dim Cell_1_Row As Integer, Cell_1_Col As Integer
    Dim Cell_2_Row As Integer, Cell_2_Col As Integer
    Dim Cell_1_X_Pix As Double, Cell_1_Y_Pix As Double
    Dim Cell_2_X_Pix As Double, Cell_2_Y_Pix As Double
    Dim Y0 As Double, X0 As Double
    Dim SlopeX As Double, SlopeY As Double
    Dim flg1 As Boolean, flg2 As Boolean, flg3 As Boolean
    Dim WhichWS As Worksheet
    Dim w As Window, r As Range, cll As Range
    Dim Shp As Shape

    Call GetCursorPos(pLocation)

    Set WhichWS = Worksheets("Sheet1")
    WhichWS.Range("A1:H20").ClearContents

    ScreenWidth = GetSystemMetrics(SM_CXSCREEN)
    ScreenHeight = GetSystemMetrics(SM_CYSCREEN)

    ClickX = pLocation.x
    ClickY = pLocation.y

    WhichWS.Cells(3, 1) = "Variable"
    WhichWS.Cells(3, 1).Font.Bold = True
    WhichWS.Cells(3, 2) = "X"
    WhichWS.Cells(3, 2).Font.Bold = True
    WhichWS.Cells(3, 3) = "Y"
    WhichWS.Cells(3, 3).Font.Bold = True

    WhichWS.Cells(4, 1) = "Screen (in pixels): "
    WhichWS.Cells(4, 2) = ScreenWidth
    WhichWS.Cells(4, 3) = ScreenHeight

    WhichWS.Cells(5, 1) = "Mouse clicked on (in pixels): "
    WhichWS.Cells(5, 2) = ClickX
    WhichWS.Cells(5, 3) = ClickY

    Set w = ActiveWindow
    Set r = w.VisibleRange
    i = 1
    For Each cll In r.Cells
        If i = 1 Then
            'get top and right pos (in excel units) of first cell in visible range
            'also get row and column of that cell
            Cell_1_Y = cll.Top
            Cell_1_X = cll.Left
            Cell_1_Row = cll.Row
            Cell_1_Col = cll.Column
            i = i + 1
        ElseIf cll.Row > Cell_1_Row And cll.Column > Cell_1_Col Then
            'get top and right pos (in excel units) of second cell in visible range
            'also get row and column of that cell
            Cell_2_Y = cll.Top
            Cell_2_X = cll.Left
            Cell_2_Row = cll.Row
            Cell_2_Col = cll.Column
            Exit For
        End If
    Next

    On Error Resume Next
    flg1 = False
    flg2 = False
    flg3 = False
    For yPix = 1 To ScreenHeight
        For xPix = 1 To ScreenWidth
            Set objShape = ActiveWindow.RangeFromPoint(xPix, yPix)
            If Not objShape Is Nothing Then
                If TypeName(objShape) = "Range" Then
                    If objShape.Column = Cell_1_Col And objShape.Row = Cell_1_Row Then
                        'get top and right pos (in pix) of first cell in visible range
                        If flg2 = False Then
                            Cell_1_X_Pix = xPix
                            Cell_1_Y_Pix = yPix
                            flg2 = True
                        End If
                    ElseIf objShape.Column = Cell_2_Col And objShape.Row = Cell_2_Row Then
                        'get top and right pos (in pix) of second cell in visible range
                        If flg3 = False Then
                            Cell_2_X_Pix = xPix
                            Cell_2_Y_Pix = yPix
                            flg3 = True
                            flg1 = True 'exit of outer loop
                            Exit For 'exit inner loop (this)
                        End If
                    End If
                End If
            End If
        Next
        If flg1 = True Then Exit For
    Next

    'Calculate the relation between pixels and 'excel position'

    SlopeY = (Cell_2_Y_Pix - Cell_1_Y_Pix) / (Cell_2_Y - Cell_1_Y)
    Y0 = Cell_1_Y_Pix - SlopeY * Cell_1_Y

    SlopeX = (Cell_2_X_Pix - Cell_1_X_Pix) / (Cell_2_X - Cell_1_X)
    X0 = Cell_1_X_Pix - SlopeX * Cell_1_X

    'print some variables in sheet

    WhichWS.Cells(6, 1) = "Variable"
    WhichWS.Cells(6, 1).Font.Bold = True
    WhichWS.Cells(6, 2) = "X Pos (excel units)"
    WhichWS.Cells(6, 2).Font.Bold = True
    WhichWS.Cells(6, 3) = "Y Pos (excel units)"
    WhichWS.Cells(6, 3).Font.Bold = True
    WhichWS.Cells(6, 4) = "X Pos (pixels)"
    WhichWS.Cells(6, 4).Font.Bold = True
    WhichWS.Cells(6, 5) = "Y Pos (pixels)"
    WhichWS.Cells(6, 5).Font.Bold = True
    WhichWS.Cells(6, 6) = "X Dist. from click (pixels)"
    WhichWS.Cells(6, 6).Font.Bold = True
    WhichWS.Cells(6, 7) = "Y Dist. from click (pixels)"
    WhichWS.Cells(6, 7).Font.Bold = True


    i = 7
    For Each Shp In WhichWS.Shapes
        WhichWS.Cells(i, 1) = Shp.Name
        WhichWS.Cells(i, 2) = Shp.Left
        WhichWS.Cells(i, 3) = Shp.Top

        PosInPixX = X0 + Shp.Left * SlopeX
        PosInPixY = Y0 + Shp.Top * SlopeY
        DistFromClickX = ClickX - PosInPixX
        DistFromClickY = ClickY - PosInPixY

        WhichWS.Cells(i, 4) = Round(PosInPixX, 2)
        WhichWS.Cells(i, 5) = Round(PosInPixY, 2)
        WhichWS.Cells(i, 6) = DistFromClickX
        WhichWS.Cells(i, 7) = DistFromClickY
        i = i + 1
    Next Shp

End Sub

抱歉...这会让我的Excel关闭...没有恢复选项。天啊! - Pspl
如何找到单元格A1开始的像素,并确定Excel单位和像素之间的比率。然后,您可以计算形状所在的像素。 - Luuklag
@Luuklag,你可以通过在for循环中添加“step”来调整精度。 - CMArg
如果你以第25步为例,然后一旦找到了,就向后退回到不再处于该形状的第1步,那将是一个有趣的问题@CMArg。 - Luuklag
你需要计算以下这些内容:WhatWS.Cells(5, 1) = "形状位置(以'Excel单位'表示):" WhatWS.Cells(5, 2) = Xrect WhatWS.Cells(5, 3) = Yrect。如果你知道这些内容如何转换为像素,并且你知道单元格A1左上角的像素位置(在Excel单位中为(0,0)),那么你可以计算出形状的位置,而不必一直循环到工作表。 - Luuklag
显示剩余6条评论

1

这个解决方案生成形状屏幕坐标,按照以下步骤进行:

  1. 确保形状工作表处于活动状态 (应用程序窗口状态可以是xlNormal或xlMaximized)
  2. 设置形状对象
  3. 设置形状范围屏幕坐标
  4. 通过扫描形状范围屏幕坐标设置形状屏幕坐标

此解决方案不需要将形状对齐到单元格。

已成功测试以下情况:

a) 笔记本电脑屏幕中的Excel窗口,WindowState=xlNormal

b) 笔记本电脑屏幕中的Excel窗口,WindowState=xlMaximized

c) 替代屏幕中的Excel窗口,WindowState=xlNormal

d) 替代屏幕中的Excel窗口,WindowState=xlMaximized

以下是具体步骤:

Option Explicit

Public Type RgCrds
    Top As Long
    Left As Long
    Right As Long
    Bottom As Long
    End Type

Public Declare Function GetDC Lib "user32" (ByVal hwnd As Long) As Long
Public Declare Function ReleaseDC Lib "user32" (ByVal hwnd As Long, ByVal hDC As Long) As Long
Public Declare Function SetCursorPos Lib "user32" (ByVal x As Long, ByVal y As Long) As Long
Public Declare Function GetDeviceCaps Lib "gdi32" (ByVal hDC As Long, ByVal nIndex As Long) As Long


Public Function Shape_ƒCoordinates_Get(uSpCrds As RgCrds, sp As Shape) As Boolean
Dim wd As Window, rg As Range, oj As Object
Dim uSpOutput As RgCrds, uRgCrds As RgCrds
Dim lX As Long, lY As Long
Dim blX As Boolean, blY As Boolean
Dim b As Byte
On Error GoTo Exit_Err

    Rem Set Shape Worksheet Window
    sp.TopLeftCell.Worksheet.Activate
    Set wd = ActiveWindow

    Application.EnableEvents = False
    Application.ScreenUpdating = False
    Application.Calculation = xlCalculationManual

    Rem Set Shape Range
    Set rg = Range(sp.TopLeftCell, sp.BottomRightCell)

    Rem Get Shape Range Coordinates
    Call Range_ScreenCoordinates_Get(uRgCrds, rg)

    Rem Set Shape Coordinates Limites
    With uSpOutput
        .Top = uRgCrds.Bottom
        .Left = uRgCrds.Right
        .Right = uRgCrds.Left
        .Bottom = uRgCrds.Top
    End With

    Rem Scan Shape Range to Get Shape Coordinates - [TopLeft Corner]
    blX = False: blY = False
    For lX = uRgCrds.Left To uRgCrds.Right
        For lY = uRgCrds.Top To uRgCrds.Bottom
            Set oj = wd.RangeFromPoint(lX, lY)
            If TypeName(oj) <> "Range" Then
                If oj.ShapeRange.Type = sp.Type And oj.Name = sp.Name Then
                    Shape_ƒCoordinates_Get = True
                    With uSpOutput
                        If lY < .Top Then .Top = lY Else blX = True
                        If lX < .Left Then .Left = lX Else blY = True
                        If blX And blY Then Exit For

    End With: End If: End If: Next: Next

    Rem Scan Shape Range to Get Shape Coordinates [BottomRight Corner]
    blX = False: blY = False
    For lX = uRgCrds.Right To uRgCrds.Left Step -1
        For lY = uRgCrds.Bottom To uRgCrds.Top Step -1
            Set oj = wd.RangeFromPoint(lX, lY)
            If TypeName(oj) <> "Range" Then
                If oj.ShapeRange.Type = sp.Type And oj.Name = sp.Name Then
                    Shape_ƒCoordinates_Get = True
                    With uSpOutput
                        If lX > .Right Then .Right = lX Else: blX = True
                        If lY > .Bottom Then .Bottom = lY Else: blY = True
                        If blX And blY Then Exit For

    End With: End If: End If: Next: Next

    Rem Coordinates Fine-Tuning
    ' The RangeFromPoint Method recognizes the Shapes,
    ' as soon as any part of the cursor is over the shape,
    ' therefore some fine-tuning is required in order
    ' to place the entire mouse inside the Shape's body
    b = 15  'change as required
    With uSpOutput
        .Top = .Top + b
        .Left = .Left + b
        .Right = .Right - b
        .Bottom = .Bottom - b
    End With

    Rem Set Results
    uSpCrds = uSpOutput
    Shape_ƒCoordinates_Get = True

Exit_Err:
    Application.Calculation = xlCalculationAutomatic
    Application.ScreenUpdating = True
    Application.EnableEvents = True

    End Function

Public Sub Range_ScreenCoordinates_Get(uOutput As RgCrds, ByVal rg As Range)
Dim wd As Window
    With rg

        Rem Activate range's worksheet window
        .Worksheet.Activate
        Application.Goto .Worksheet.Cells(1), 1
        Set wd = ActiveWindow

        Rem Set Range Screen Coordinates
        uOutput.Top = Points_ƒToPixels(.Top * wd.Zoom / 100, 1) + wd.PointsToScreenPixelsY(0)
        uOutput.Left = Points_ƒToPixels(.Left * wd.Zoom / 100, 0) + wd.PointsToScreenPixelsX(0)
        uOutput.Right = Points_ƒToPixels(.Width * wd.Zoom / 100, 0) + uOutput.Left
        uOutput.Bottom = Points_ƒToPixels(.Height * wd.Zoom / 100, 1) + uOutput.Top

    End With

    End Sub

Private Function Points_ƒToPixels(sgPoints As Single, blVert As Boolean) As Long
    Points_ƒToPixels = sgPoints * Screen_ƒDPI(blVert) / 72
    End Function

Private Function Screen_ƒDPI(blVert As Boolean) As Long
Static lDPI(0 To 1) As Long, lDC As Long
    If lDPI(0) = 0 Then
        lDC = GetDC(0)
        lDPI(0) = GetDeviceCaps(lDC, 88&)
        lDPI(1) = GetDeviceCaps(lDC, 90&)
        lDC = ReleaseDC(0, lDC)
    End If
    Screen_ƒDPI = lDPI(Abs(blVert))
    End Function

将上述步骤复制到标准模块中,然后将此过程复制到单独的模块中。

Option Explicit    

Sub Shape_Coordinates_Get_TEST()
Dim ws As Worksheet
Dim sp As Shape
Dim uSpCrds As RgCrds

    Rem Set Target Worksheet Active Window
    Set ws = ThisWorkbook.Worksheets("SO_Q50293831")  'replace as required
    With ws
        .Activate
        Set sp = .Shapes("SH03G13BACK")
    End With

    Rem Get Shape Coordinates
    If Not (Shape_ƒCoordinates_Get(uSpCrds, sp)) Then Exit Sub  'might want to add a message

    Rem Apply Shape Coordinates
    With uSpCrds
        SetCursorPos .Left, .Top: Stop         ' Mouse is now at the Shape's TopLeft corner
        SetCursorPos .Left, .Bottom: Stop      ' Mouse is now at the Shape's LeftBottom corner
        SetCursorPos .Right, .Top: Stop        ' Mouse is now at the Shape's RightTop corner
        SetCursorPos .Right, .Bottom: Stop     ' Mouse is now at the Shape's BottomRigh corner
    End With

    End Sub

有关所使用资源的其他信息,请访问以下页面:

GetDeviceCaps函数

GetDC函数

ReleaseDC函数

获取/设置光标位置的Visual Basic过程


该解决方案包括对形状范围的高效扫描。 - EEM

0

你的代码已经接近完成了。然而,Excel应用程序有一个占据一定空间的功能区。在这种情况下,ActiveWindow.PointsToScreenPixelsX(0)ActiveWindow.PointsToScreenPixelsY(0)将返回您的工作表相对于屏幕的起始像素。

现在,(鼠标位置) - (工作表位置) - (形状左侧和顶部的像素)将给出相对于您的形状的鼠标位置。

尝试这段代码:

Public Function SH03G13()
    Dim point As POINTAPI: GetCursorPos point
    Dim rectang As Shape: Set rectang = ThisWorkbook.Sheets("Sheet1").Shapes("SH03G13BACK")

    Debug.Print "Mouse pointer relative to screen:", point.X, point.Y
    Debug.Print "Mouse pointer relative to app:", (point.X - ActiveWindow.PointsToScreenPixelsX(0)), (point.Y - ActiveWindow.PointsToScreenPixelsY(0))
    Debug.Print "Mouse pointer relative to shape:", ((point.X - ActiveWindow.PointsToScreenPixelsX(0)) - PointToPixel(rectang.Left)), ((point.Y - ActiveWindow.PointsToScreenPixelsY(0)) - PointToPixel(rectang.Top))
    Dim ABCISSA As Long: ABCISSA = point.X - rectang.Left
    Dim ORDENAD As Long: ORDENAD = point.Y - rectang.Top

'Debug.Print ABCISSA & " " & ORDENAD


End Function

Public Function PointToPixel(point As Double) As Double
'Converts points to pixel
    If point > 0 Then PointToPixel = Round((1.33333333333333 * point), 2) Else PointToPixel = 0
End Function

你的立即窗口中的结果将是:

Mouse pointer relative to screen:          410           356 
Mouse pointer relative to app:             384           313 
Mouse pointer relative to shape:           0             0 

注意:您可能会得到-1的坐标,这是因为即使您点击形状稍微偏离了一点,单击事件仍然会触发。您可以在函数中轻松捕获此问题。


网页内容由stack overflow 提供, 点击上面的
可以查看英文原文,
原文链接