如何在OS X Cocoa应用程序中使用Google授权用户
5
- kisileno
1
1我相信Google Sign-In SDK是为iOS构建的,因此cocoapods安装程序无法在OS X上工作。因此,Google的OAuth 2可能是唯一的选择 - 尽管该链接中的示例已经过时了。如果有更好的OS X支持,那将是非常棒的。 - Jay
3个回答
3
使用GTMOAuth2 pod,可以将Firebase auth与Google登录集成在OS X上。
import Cocoa
import GTMOAuth2
import Firebase

class MainWindowController: NSWindowController {

let ref = Firebase(url: "https://xyz.firebaseio.com")

override func windowDidLoad() {
    super.windowDidLoad()


    let frameworkBundle = NSBundle(forClass: GTMOAuth2WindowController.self)
    let windowController = GTMOAuth2WindowController(scope: "", clientID: clientID, clientSecret: clientSecret, keychainItemName: keychainName, resourceBundle: frameworkBundle)
    windowController.signInSheetModalForWindow(window, delegate: self, finishedSelector: #selector(MainWindowController.didFinishWithAuth(windowController:auth:error:)))

}

func didFinishWithAuth(windowController wc:GTMOAuth2WindowController, auth: GTMOAuth2Authentication, error: NSError?) {
    if error != nil {
        print(error)
    } else {
        print(auth)
        ref.authWithOAuthProvider("google", token: auth.accessToken, withCompletionBlock: { err, auth in
            if err != nil {
                print(err)
            } else {
                print(auth)
            }
        })
      }
  }
}
需要注意的几点事项,正如上面brainless所提到的,您必须使用凭据管理器中的other选项创建OAuth Api密钥。您必须记得在Firebase项目中将您的clientID加入白名单。
- Chris
1
我无法在控制台中找到其他选项。请帮忙。 - M Afham
2
使用Cocoapods,可以通过GTMOAuth2在Objective-C中获取Google OAuth 2令牌。
pod 'GTMOAuth2'
GTMOAuth2库需要带有other应用程序类型的客户端ID。可以在Google开发人员控制台中创建一个:
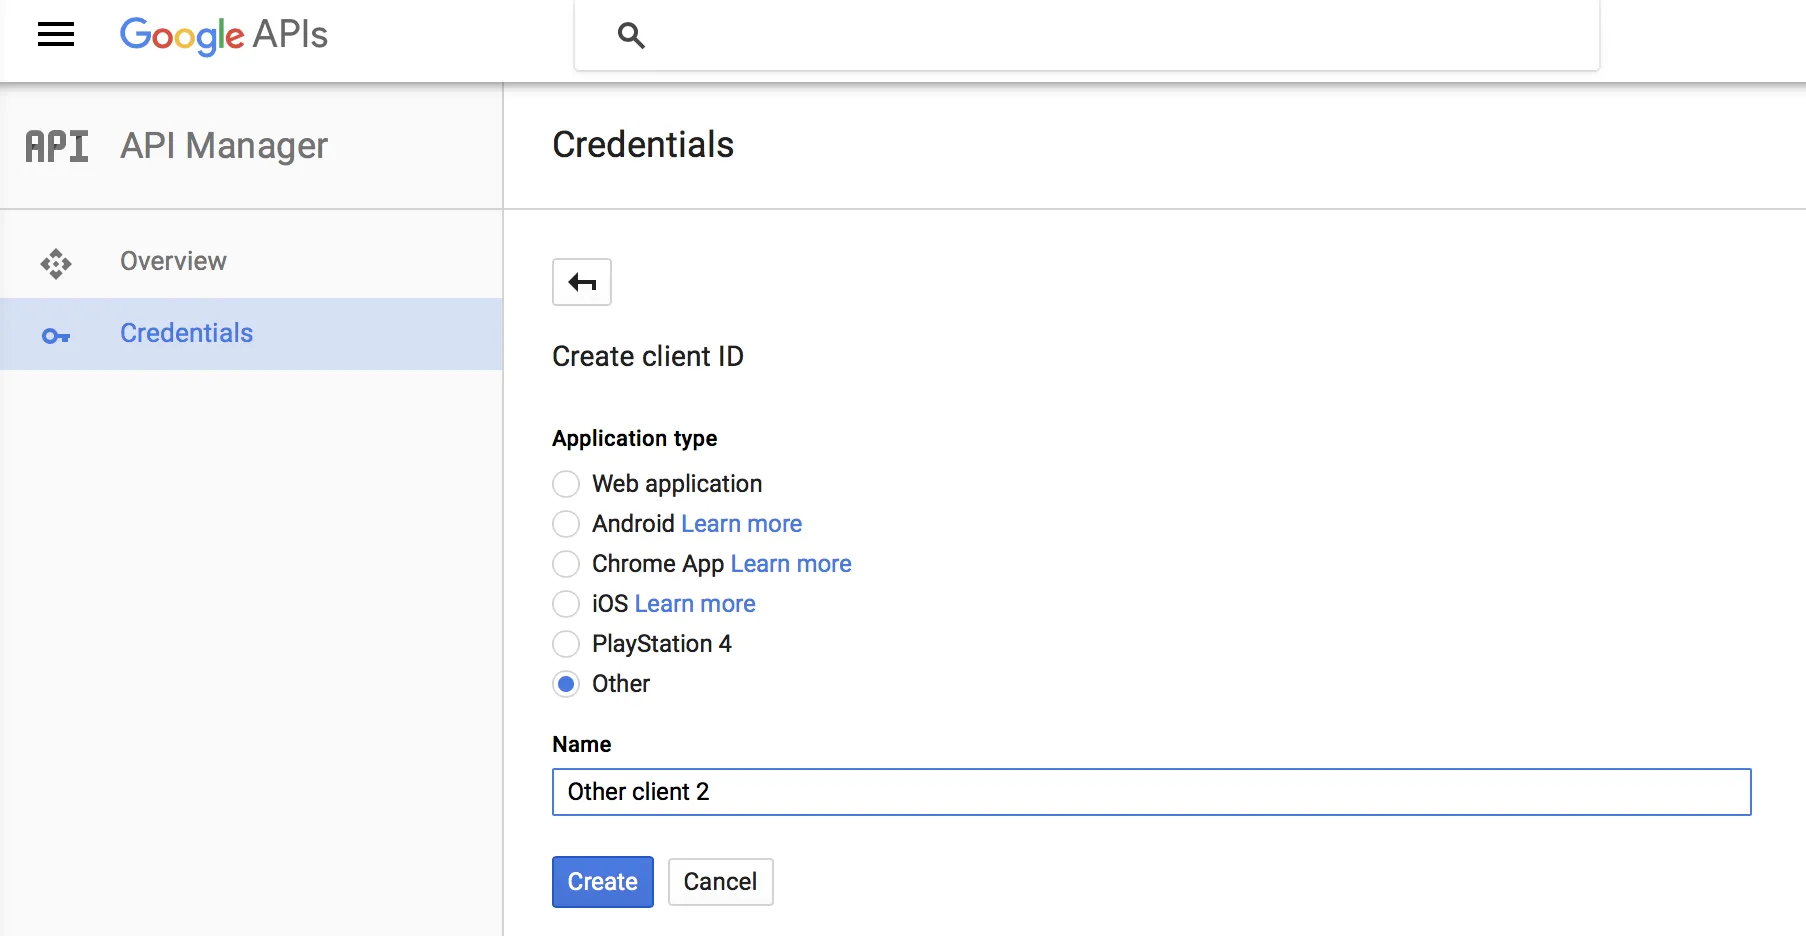
这是一个描述如何使用此库的代码示例:
#import "GTMOAuth2Authentication.h"
#import "GTMOAuth2WindowController.h"

...

- (void) applicationDidFinishLaunching:(NSNotification *) aNotification {
    GTMOAuth2Authentication * = [GTMOAuth2WindowController
               authForGoogleFromKeychainForName: @"where-to-store-token-in-a-keychain"
                                       clientID: @"client-id"
                                   clientSecret: @"client-secret"];

    if (authorizer.canAuthorize) {
        NSLog(@"Your authorizer was restored from key chain and can be autorized. Authorozer: %@", authorizer);
    }
    else {
        NSBundle * frameworkBundle = [NSBundle bundleForClass:[GTMOAuth2WindowController class]];
        GTMOAuth2WindowController * windowController;
        windowController = [GTMOAuth2WindowController controllerWithScope: @"" //scope url here, empty is just email and profile
                                                             clientID: clientID
                                                         clientSecret: clientSecret
                                                     keychainItemName: kKeychainItemName
                                                       resourceBundle: frameworkBundle];

        [windowController signInSheetModalForWindow: [self window]
                              completionHandler: ^(GTMOAuth2Authentication * auth, NSError * error) {
                                                    if (error == nil) {
                                                        authorizer = auth;
                                                        NSLog(@"Successfully signed in.");
                                                    } else {
                                                        NSLog(@"Failed to sign in.");
                                                    }
                              }];
}
在首次启动时,它将创建一个带有Google授权页面的弹出窗口,并使用钥匙串中存储的"token"进行后续运行。
优点
此授权器可与几乎所有Google服务一起使用。
缺点
看起来无法轻松地与Firebase集成。
- kisileno
2
1我在下面添加了一个答案,可能会有所帮助。 - Chris
另一个选项现在不再可用。该怎么办? - M Afham
1
已更新
针对最近版本的Firebase进行了代码更新。使用Google OAuth进行登录以在Firebase中进行身份验证。
func someFunc {
    let frameworkBundle = Bundle(for: GTMOAuth2WindowController.self)
    let windowController = GTMOAuth2WindowController(scope: "https://www.googleapis.com/auth/plus.me", clientID: YOUR_CLIENT_ID, clientSecret: YOUR_CLIENT_SECRET, keychainItemName: "OAuth2 APP_NAME: Google+", resourceBundle: frameworkBundle)

    guard let window = self.view.window else { return }

    windowController?.signInSheetModal(for: window, delegate: self, finishedSelector: #selector(didFinishWithAuth(windowController:auth:error:)))
}

  @objc func didFinishWithAuth(windowController:GTMOAuth2WindowController, auth: GTMOAuth2Authentication, error: NSError?) {
    if error != nil {
      print(error?.localizedDescription ?? String())
    } else {

      let credential = OAuthProvider.credential(withProviderID: GoogleAuthProviderID, accessToken: auth.accessToken)

        Auth.auth().signIn(with: credential) { (auth, error) in
          if let error = error {
            print(error.localizedDescription)
            return
          }

          // Successful sign in
      }
    }
  }
- Keagan Strydom
1
1这个更新是基于现有答案之一吗?如果是的话,值得承认它是基于谁的答案,以帮助分享应得的荣誉。 - Jeremy Caney
网页内容由stack overflow 提供, 点击上面的可以查看英文原文,
原文链接
原文链接
- 相关问题
- 5 Mac OS X Cocoa 单窗口应用程序架构
- 4 如何将Google地图添加到OS X Cocoa应用程序
- 16 Mac OS X上的Cocoa应用程序架构
- 6 如何在Mac OS X上将命令行应用程序转换为Cocoa GUI应用程序?
- 3 如何在Cocoa OS X中复制图像到NSPasteBoard?
- 4 OS X 应用程序授权
- 3 如何在OS X Cocoa中获取应用程序的运行时间?
- 5 如何在OS X下使用Applescript调用Cocoa方法
- 3 如何在Cocoa Mac OS X 10.5中强制结束另一个应用程序
- 5 如何在使用Swift Cocoa编写的OS X中检测用户不活动?