自动增强扫描图像

31

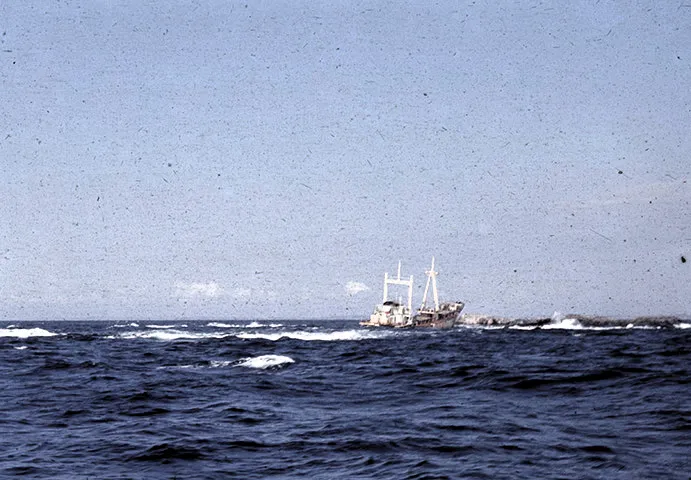
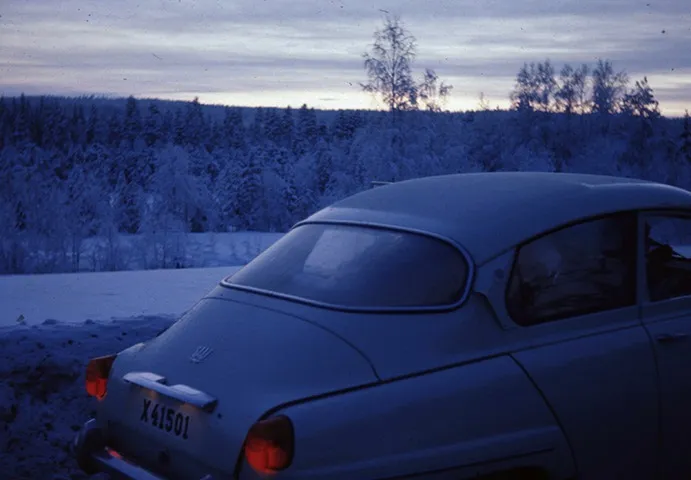
我正在开发一种自动增强扫描的35毫米幻灯片的例行程序。 我正在寻找一种良好的算法来增加对比度并消除色彩偏移。 该算法必须完全自动化,因为将有数千个图像需要处理。 这是两个样本图像,直接从扫描仪中裁剪和缩小以供网络使用:

A_CroppedB_Cropped

我正在使用AForge.NET库,并尝试了HistogramEqualizationContrastStretch滤镜。 HistogramEqualization可以最大限度地提高局部对比度,但总体效果不理想。 ContrastStretch要好得多,但由于它单独拉伸每个颜色通道的直方图,有时会产生较强的色彩偏移:

A_Stretched

为了减少色彩偏移,我自己创建了一个UniformContrastStretch滤镜,使用ImageStatisticsLevelsLinear类。 这会对所有颜色通道使用相同的范围,以保留颜色,但代价是对比度较低。

    ImageStatistics stats = new ImageStatistics(image);
    int min = Math.Min(Math.Min(stats.Red.Min, stats.Green.Min), stats.Blue.Min);
    int max = Math.Max(Math.Max(stats.Red.Max, stats.Green.Max), stats.Blue.Max);
    LevelsLinear levelsLinear = new LevelsLinear();
    levelsLinear.Input = new IntRange(min, max);
    Bitmap stretched = levelsLinear.Apply(image);

A_UniformStretched

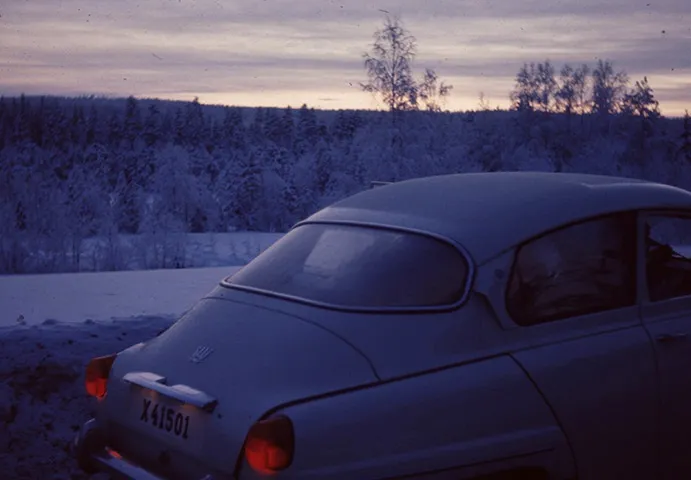
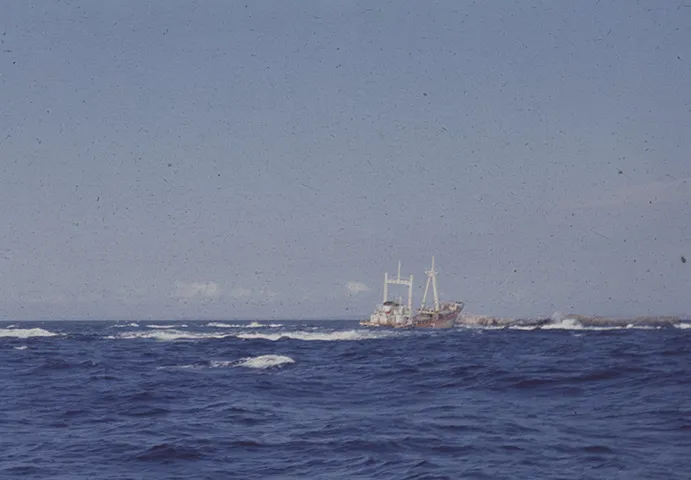
尽管图像仍然有些蓝色,因此我创建了一个ColorCorrection过滤器,首先计算图像的平均亮度。然后为每个颜色通道计算伽马校正值,以使每个颜色通道的平均值等于平均亮度。均匀对比度拉伸图像的平均值为R=70 G=64 B=93,平均亮度为(70 + 64 + 93) / 3 = 76。伽马值计算为 R=1.09 G=1.18 B=0.80,结果得到非常中性的图像,平均值为 R=76 G=76 B=76,如预期所示:

A_UniformStretchedCorrected

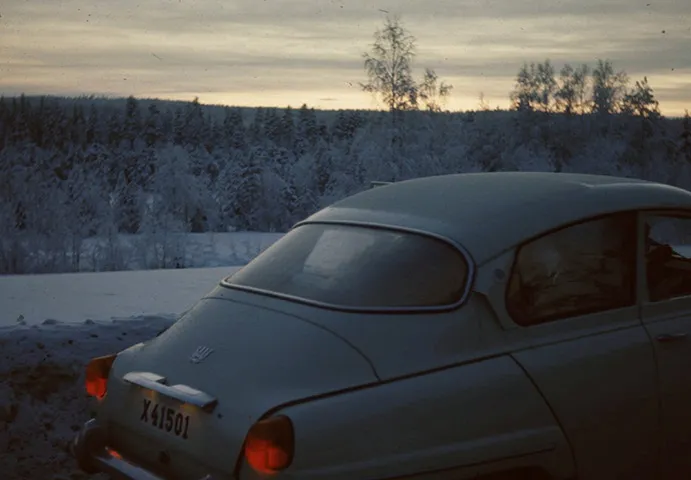
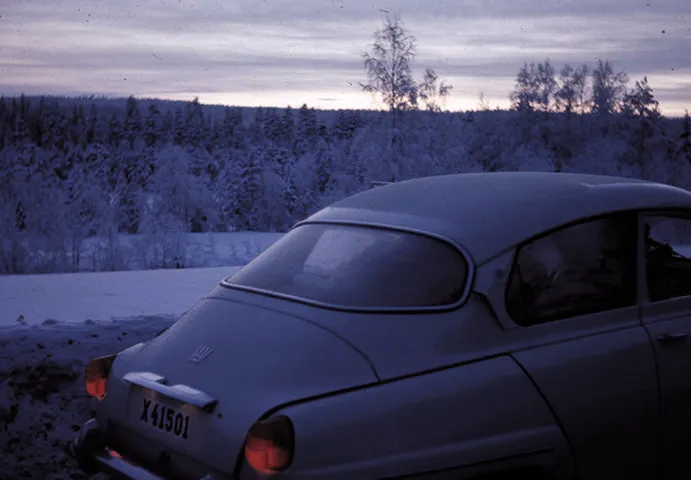
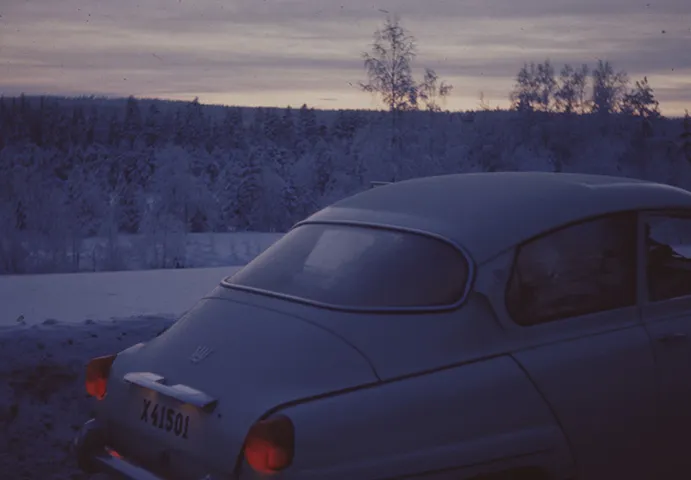
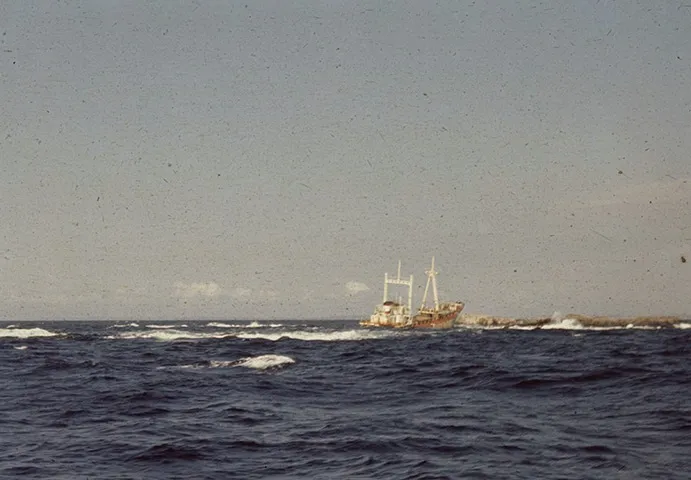
现在,进入真正的问题... 我想校正图像的平均颜色为灰色可能有点过于激进,并且会使一些图像变得相当单调,就像第二个样本(第一个图像是均匀拉伸的,下一个是相同图像经过颜色校正后):

B_UniformStretched B_UniformStretchedCorrected

在照片编辑程序中手动执行颜色校正的一种方法是对已知中性颜色(白色/灰色/黑色)的颜色进行采样,然后调整图像的其余部分。但由于此例程必须完全自动化,因此这不是一个选项。

我想我可以为我的ColorCorrection过滤器添加强度设置,以便强度为0.5将平均值移动到平均亮度的一半。但是另一方面,有些图像可能根本不需要进行任何颜色校正。

有更好的算法想法吗?或者有一些方法可以检测图像是否具有色彩偏差或只是某些颜色很多,例如第二个示例?


4
如果你的图片最亮的部分(没有剪裁)是中性色,那么你可能不需要进行色彩校正。这将对你的船图像有所帮助。 - Mark Ransom
1
如果一个颜色只在一个通道中被剪裁,而其他通道处于适当的范围内,那么这将是颜色偏移的很好证据。想象一下一朵玫瑰的图片,它可能在红色通道上很容易被剪裁,但与此同时其他通道仍然非常暗淡。其他通道需要足够高,以被认为接近白色,但又足够低,以表明存在颜色偏移。 - Mark Ransom
是的,当然,那很有道理。这也使编码更容易。 :-) - Anlo
5
我建议你从 Gasparini 和 Schettini 的论文“利用简单图像统计对数字照片进行颜色平衡” 开始阅读(如果你有权限,可以在 http://www.sciencedirect.com/science/article/pii/S0031320304000068 找到该论文;否则你可以通过搜索引擎找到一个质量较低的版本)。虽然这篇论文不是最新的,但更为健壮。和其他论文一样,它也快速描述了相关研究和问题。 - mmgp
哦,论文中描述的方法使用图像注释来从色偏检测器中移除天空、皮肤、植被和水域区域。不幸的是,有关图像注释的论文没有包括任何训练数据。我已经提出了一个新问题:http://stackoverflow.com/questions/14281026/implementation-of-svm-image-annotation-for-color-cast-removal - Anlo
显示剩余3条评论
5个回答

2
  • 转换为HSV
  • V层通过将值从(min,max)范围缩放到(0,255)范围进行校正
  • 重新组合为RGB
  • 通过与第二步V层相同的思路来校正结果的R,G,B层

没有aforge.net代码,因为它是由php原型代码处理的,但据我所知,使用aforge.net没有任何问题。结果如下:

enter image description here enter image description here


2

使用以下工具将RGB转换为HSL:

    System.Drawing.Color color = System.Drawing.Color.FromArgb(red, green, blue);
    float hue = color.GetHue();
    float saturation = color.GetSaturation();
    float lightness = color.GetBrightness();

根据需要,调整饱和度和亮度

通过以下方式将HSL转换回RGB:

/// <summary>
/// Convert HSV to RGB
/// h is from 0-360
/// s,v values are 0-1
/// r,g,b values are 0-255
/// Based upon http://ilab.usc.edu/wiki/index.php/HSV_And_H2SV_Color_Space#HSV_Transformation_C_.2F_C.2B.2B_Code_2
/// </summary>
void HsvToRgb(double h, double S, double V, out int r, out int g, out int b)
{
  // ######################################################################
  // T. Nathan Mundhenk
  // mundhenk@usc.edu
  // C/C++ Macro HSV to RGB

  double H = h;
  while (H < 0) { H += 360; };
  while (H >= 360) { H -= 360; };
  double R, G, B;
  if (V <= 0)
    { R = G = B = 0; }
  else if (S <= 0)
  {
    R = G = B = V;
  }
  else
  {
    double hf = H / 60.0;
    int i = (int)Math.Floor(hf);
    double f = hf - i;
    double pv = V * (1 - S);
    double qv = V * (1 - S * f);
    double tv = V * (1 - S * (1 - f));
    switch (i)
    {

      // Red is the dominant color

      case 0:
        R = V;
        G = tv;
        B = pv;
        break;

      // Green is the dominant color

      case 1:
        R = qv;
        G = V;
        B = pv;
        break;
      case 2:
        R = pv;
        G = V;
        B = tv;
        break;

      // Blue is the dominant color

      case 3:
        R = pv;
        G = qv;
        B = V;
        break;
      case 4:
        R = tv;
        G = pv;
        B = V;
        break;

      // Red is the dominant color

      case 5:
        R = V;
        G = pv;
        B = qv;
        break;

      // Just in case we overshoot on our math by a little, we put these here. Since its a switch it won't slow us down at all to put these here.

      case 6:
        R = V;
        G = tv;
        B = pv;
        break;
      case -1:
        R = V;
        G = pv;
        B = qv;
        break;

      // The color is not defined, we should throw an error.

      default:
        //LFATAL("i Value error in Pixel conversion, Value is %d", i);
        R = G = B = V; // Just pretend its black/white
        break;
    }
  }
  r = Clamp((int)(R * 255.0));
  g = Clamp((int)(G * 255.0));
  b = Clamp((int)(B * 255.0));
}

/// <summary>
/// Clamp a value to 0-255
/// </summary>
int Clamp(int i)
{
  if (i < 0) return 0;
  if (i > 255) return 255;
  return i;
}

原始代码:


2
您可以尝试使用此链接中的自动亮度和对比度:http://answers.opencv.org/question/75510/how-to-make-auto-adjustmentsbrightness-and-contrast-for-image-android-opencv-image-correction/
void Utils::BrightnessAndContrastAuto(const cv::Mat &src, cv::Mat &dst, float clipHistPercent)
{

    CV_Assert(clipHistPercent >= 0);
    CV_Assert((src.type() == CV_8UC1) || (src.type() == CV_8UC3) || (src.type() == CV_8UC4));

    int histSize = 256;
    float alpha, beta;
    double minGray = 0, maxGray = 0;

    //to calculate grayscale histogram
    cv::Mat gray;
    if (src.type() == CV_8UC1) gray = src;
    else if (src.type() == CV_8UC3) cvtColor(src, gray, CV_BGR2GRAY);
    else if (src.type() == CV_8UC4) cvtColor(src, gray, CV_BGRA2GRAY);
    if (clipHistPercent == 0)
    {
        // keep full available range
        cv::minMaxLoc(gray, &minGray, &maxGray);
    }
    else
    {
        cv::Mat hist; //the grayscale histogram

        float range[] = { 0, 256 };
        const float* histRange = { range };
        bool uniform = true;
        bool accumulate = false;
        calcHist(&gray, 1, 0, cv::Mat(), hist, 1, &histSize, &histRange, uniform, accumulate);

        // calculate cumulative distribution from the histogram
        std::vector<float> accumulator(histSize);
        accumulator[0] = hist.at<float>(0);
        for (int i = 1; i < histSize; i++)
        {
            accumulator[i] = accumulator[i - 1] + hist.at<float>(i);
        }

        // locate points that cuts at required value
        float max = accumulator.back();
        clipHistPercent *= (max / 100.0); //make percent as absolute
        clipHistPercent /= 2.0; // left and right wings
        // locate left cut
        minGray = 0;
        while (accumulator[minGray] < clipHistPercent)
            minGray++;

        // locate right cut
        maxGray = histSize - 1;
        while (accumulator[maxGray] >= (max - clipHistPercent))
            maxGray--;
    }

    // current range
    float inputRange = maxGray - minGray;

    alpha = (histSize - 1) / inputRange;   // alpha expands current range to histsize range
    beta = -minGray * alpha;             // beta shifts current range so that minGray will go to 0

    // Apply brightness and contrast normalization
    // convertTo operates with saurate_cast
    src.convertTo(dst, -1, alpha, beta);

    // restore alpha channel from source 
    if (dst.type() == CV_8UC4)
    {
        int from_to[] = { 3, 3 };
        cv::mixChannels(&src, 4, &dst, 1, from_to, 1);
    }
    return;
}

或者从这个链接应用自动颜色平衡: http://www.morethantechnical.com/2015/01/14/simplest-color-balance-with-opencv-wcode/

void Utils::SimplestCB(Mat& in, Mat& out, float percent) {
    assert(in.channels() == 3);
    assert(percent > 0 && percent < 100);

    float half_percent = percent / 200.0f;

    vector<Mat> tmpsplit; split(in, tmpsplit);
    for (int i = 0; i < 3; i++) {
        //find the low and high precentile values (based on the input percentile)
        Mat flat; tmpsplit[i].reshape(1, 1).copyTo(flat);
        cv::sort(flat, flat, CV_SORT_EVERY_ROW + CV_SORT_ASCENDING);
        int lowval = flat.at<uchar>(cvFloor(((float)flat.cols) * half_percent));
        int highval = flat.at<uchar>(cvCeil(((float)flat.cols) * (1.0 - half_percent)));
        cout << lowval << " " << highval << endl;

        //saturate below the low percentile and above the high percentile
        tmpsplit[i].setTo(lowval, tmpsplit[i] < lowval);
        tmpsplit[i].setTo(highval, tmpsplit[i] > highval);

        //scale the channel
        normalize(tmpsplit[i], tmpsplit[i], 0, 255, NORM_MINMAX);
    }
    merge(tmpsplit, out);
}

或者将CLAHE应用于BGR图像


1

我需要在一个大的视频缩略图库中做同样的事情。我想要一个保守的解决方案,这样我就不必检查缩略图是否完全被破坏。下面是我使用的混乱、拼凑在一起的解决方案。

我首先使用这个类来计算图像中颜色的分布。我首先在HSV颜色空间中进行了一次尝试,但发现基于灰度的方法更快,而且几乎一样好:

class GrayHistogram
  def initialize(filename)
    @hist = hist(filename)
    @percentile = {}
  end

  def percentile(x)
    return @percentile[x] if @percentile[x]
    bin = @hist.find{ |h| h[:count] > x }
    c = bin[:color]
    return @percentile[x] ||= c/256.0
  end

  def midpoint
    (percentile(0.25) + percentile(0.75)) / 2.0
  end

  def spread
    percentile(0.75) - percentile(0.25)
  end

private
  def hist(imgFilename)
    histFilename = "/tmp/gray_hist.txt"

    safesystem("convert #{imgFilename} -depth 8 -resize 50% -colorspace GRAY /tmp/out.png")
    safesystem("convert /tmp/out.png -define histogram:unique-colors=true " +
               "        -format \"%c\" histogram:info:- > #{histFilename}")

    f = File.open(histFilename)
    lines = f.readlines[0..-2] # the last line is always blank
    hist = lines.map { |line| { :count => /([0-9]*):/.match(line)[1].to_i, :color => /,([0-9]*),/.match(line)[1].to_i } }
    f.close

    tot = 0
    cumhist = hist.map do |h|
      tot += h[:count]
      {:count=>tot, :color=>h[:color]}
    end
    tot = tot.to_f
    cumhist.each { |h| h[:count] = h[:count] / tot }

    safesystem("rm /tmp/out.png #{histFilename}")

    return cumhist
  end
end

我随后创建了这个类,使用直方图来找出如何校正一张图片:

def safesystem(str)
  out = `#{str}`
  if $? != 0
    puts "shell command failed:"
    puts "\tcmd: #{str}"
    puts "\treturn code: #{$?}"
    puts "\toutput: #{out}"
    raise
  end
end

def generateHist(thumb, hist)
  safesystem("convert #{thumb} histogram:hist.jpg && mv hist.jpg #{hist}")
end

class ImgCorrector
  def initialize(filename)
    @filename = filename
    @grayHist = GrayHistogram.new(filename)
  end

  def flawClass
    if !@flawClass
      gapLeft  = (@grayHist.percentile(0.10) > 0.13) || (@grayHist.percentile(0.25) > 0.30)
      gapRight = (@grayHist.percentile(0.75) < 0.60) || (@grayHist.percentile(0.90) < 0.80)

      return (@flawClass="low"   ) if (!gapLeft &&  gapRight)
      return (@flawClass="high"  ) if ( gapLeft && !gapRight)
      return (@flawClass="narrow") if ( gapLeft &&  gapRight)
      return (@flawClass="fine"  )
    end
    return @flawClass
  end

  def percentileSummary
    [ @grayHist.percentile(0.10),
      @grayHist.percentile(0.25),
      @grayHist.percentile(0.75),
      @grayHist.percentile(0.90) ].map{ |x| (((x*100.0*10.0).round)/10.0).to_s }.join(', ') +
    "<br />" +
    "spread: " + @grayHist.spread.to_s
  end

  def writeCorrected(filenameOut)
    if flawClass=="fine"
      safesystem("cp #{@filename} #{filenameOut}")
      return
    end

    # spread out the histogram, centered at the midpoint
    midpt = 100.0*@grayHist.midpoint

    # map the histogram's spread to a sigmoidal concept (linearly)
    minSpread = 0.10
    maxSpread = 0.60
    minS = 1.0
    maxS = case flawClass
      when "low"    then 5.0
      when "high"   then 5.0
      when "narrow" then 6.0
    end
    s = ((1.0 - [[(@grayHist.spread - minSpread)/(maxSpread-minSpread), 0.0].max, 1.0].min) * (maxS - minS)) + minS

    #puts "s: #{s}"
    safesystem("convert #{@filename} -sigmoidal-contrast #{s},#{midpt}% #{filenameOut}")
  end
end

我这样运行它:
origThumbs = `find thumbs | grep jpg`.split("\n")
origThumbs.each do |origThumb|
  newThumb = origThumb.gsub(/thumb/, "newthumb")
  imgCorrector = ImgCorrector.new(origThumb)
  imgCorrector.writeCorrected(newThumb)
end

1
为了避免在拉伸对比度时改变图像的颜色,先将其转换为HSV / HSL颜色空间。然后,在L或V通道中应用常规对比度拉伸,但不要改变H或S通道。

网页内容由stack overflow 提供, 点击上面的
可以查看英文原文,
原文链接