经过许多错误,我终于做到了,这是我的MapView Fragment类:
import android.content.Context;
import android.location.Location;
import android.location.LocationListener;
import android.location.LocationManager;
import android.os.Bundle;
import android.support.v4.app.Fragment;
import android.util.Log;
import android.view.LayoutInflater;
import android.view.View;
import android.view.ViewGroup;
import android.widget.Toast;
import com.google.android.gms.maps.CameraUpdateFactory;
import com.google.android.gms.maps.GoogleMap;
import com.google.android.gms.maps.GoogleMap.OnMapClickListener;
import com.google.android.gms.maps.MapFragment;
import com.google.android.gms.maps.model.BitmapDescriptorFactory;
import com.google.android.gms.maps.model.CameraPosition;
import com.google.android.gms.maps.model.LatLng;
import com.google.android.gms.maps.model.MarkerOptions;
import com.serveroverload.yago.R;
public class HomeFragment extends Fragment implements LocationListener {
GoogleMap googleMap;
private LocationManager locationManager;
public static Fragment newInstance() {
return new HomeFragment();
}
@Override
public View onCreateView(LayoutInflater inflater, ViewGroup container,
Bundle savedInstanceState) {
View v = inflater.inflate(R.layout.home_fragment, container, false);
Bundle bdl = getArguments();
locationManager = (LocationManager) getActivity().getSystemService(
Context.LOCATION_SERVICE);
locationManager.requestLocationUpdates(
LocationManager.NETWORK_PROVIDER, 1, 1, this);
googleMap = ((MapFragment) getActivity().getFragmentManager()
.findFragmentById(R.id.map)).getMap();
googleMap.setOnMapClickListener(new OnMapClickListener() {
@Override
public void onMapClick(LatLng latLng) {
Toast.makeText(getActivity(), latLng.toString(),
Toast.LENGTH_LONG).show();
}
});
changeMapMode(3);
googleMap.setTrafficEnabled(true);
googleMap.setBuildingsEnabled(true);
googleMap.setMyLocationEnabled(true);
return v;
}
private void doZoom() {
if (googleMap != null) {
googleMap.animateCamera(CameraUpdateFactory.newLatLngZoom(
new LatLng(18.520430, 73.856744), 17));
}
}
private void changeMapMode(int mapMode) {
if (googleMap != null) {
switch (mapMode) {
case 0:
googleMap.setMapType(GoogleMap.MAP_TYPE_NONE);
break;
case 1:
googleMap.setMapType(GoogleMap.MAP_TYPE_NORMAL);
break;
case 2:
googleMap.setMapType(GoogleMap.MAP_TYPE_SATELLITE);
break;
case 3:
googleMap.setMapType(GoogleMap.MAP_TYPE_TERRAIN);
break;
case 4:
googleMap.setMapType(GoogleMap.MAP_TYPE_HYBRID);
break;
default:
break;
}
}
}
private void createMarker(double latitude, double longitude) {
for (int i = 0; i < 10; i++) {
double[] randomLocation = createRandLocation(latitude, longitude);
MarkerOptions marker = new MarkerOptions().position(
new LatLng(randomLocation[0], randomLocation[1])).title(
"Hello Maps " + i);
Log.e("Random", "> " + randomLocation[0] + ", " + randomLocation[1]);
if (i == 0)
marker.icon(BitmapDescriptorFactory
.defaultMarker(BitmapDescriptorFactory.HUE_AZURE));
if (i == 1)
marker.icon(BitmapDescriptorFactory
.defaultMarker(BitmapDescriptorFactory.HUE_BLUE));
if (i == 2)
marker.icon(BitmapDescriptorFactory
.defaultMarker(BitmapDescriptorFactory.HUE_CYAN));
if (i == 3)
marker.icon(BitmapDescriptorFactory
.defaultMarker(BitmapDescriptorFactory.HUE_GREEN));
if (i == 4)
marker.icon(BitmapDescriptorFactory
.defaultMarker(BitmapDescriptorFactory.HUE_MAGENTA));
if (i == 5)
marker.icon(BitmapDescriptorFactory
.defaultMarker(BitmapDescriptorFactory.HUE_ORANGE));
if (i == 6)
marker.icon(BitmapDescriptorFactory
.defaultMarker(BitmapDescriptorFactory.HUE_RED));
if (i == 7)
marker.icon(BitmapDescriptorFactory
.defaultMarker(BitmapDescriptorFactory.HUE_ROSE));
if (i == 8)
marker.icon(BitmapDescriptorFactory
.defaultMarker(BitmapDescriptorFactory.HUE_VIOLET));
if (i == 9)
marker.icon(BitmapDescriptorFactory
.defaultMarker(BitmapDescriptorFactory.HUE_YELLOW));
googleMap.addMarker(marker);
if (i == 9) {
CameraPosition cameraPosition = new CameraPosition.Builder()
.target(new LatLng(randomLocation[0], randomLocation[1]))
.zoom(15).build();
googleMap.animateCamera(CameraUpdateFactory
.newCameraPosition(cameraPosition));
}
}
}
private double[] createRandLocation(double latitude, double longitude) {
return new double[] { latitude + ((Math.random() - 0.5) / 500),
longitude + ((Math.random() - 0.5) / 500),
150 + ((Math.random() - 0.5) * 10) };
}
@Override
public void onLocationChanged(Location location) {
if (null != googleMap) {
double latti = location.getLatitude();
double longi = location.getLongitude();
LatLng position = new LatLng(latti, longi);
createMarker(latti, longi);
MarkerOptions markerOptions = new MarkerOptions();
markerOptions.position(position);
googleMap.animateCamera(CameraUpdateFactory.newLatLngZoom(position,
17f));
googleMap.addMarker(markerOptions);
}
}
@Override
public void onStatusChanged(String provider, int status, Bundle extras) {
}
@Override
public void onProviderEnabled(String provider) {
}
@Override
public void onProviderDisabled(String provider) {
}
@Override
public void onDestroyView() {
super.onDestroyView();
locationManager.removeUpdates(this);
android.app.Fragment fragment = getActivity().getFragmentManager()
.findFragmentById(R.id.map);
if (null != fragment) {
android.app.FragmentTransaction ft = getActivity()
.getFragmentManager().beginTransaction();
ft.remove(fragment);
ft.commit();
}
}
}
我的 Xml 文件长这样:
<?xml version="1.0" encoding="utf-8"?>
<fragment xmlns:android="http://schemas.android.com/apk/res/android"
    android:id="@+id/map"
    android:name="com.google.android.gms.maps.MapFragment"
    android:layout_width="match_parent"
    android:layout_height="match_parent" />
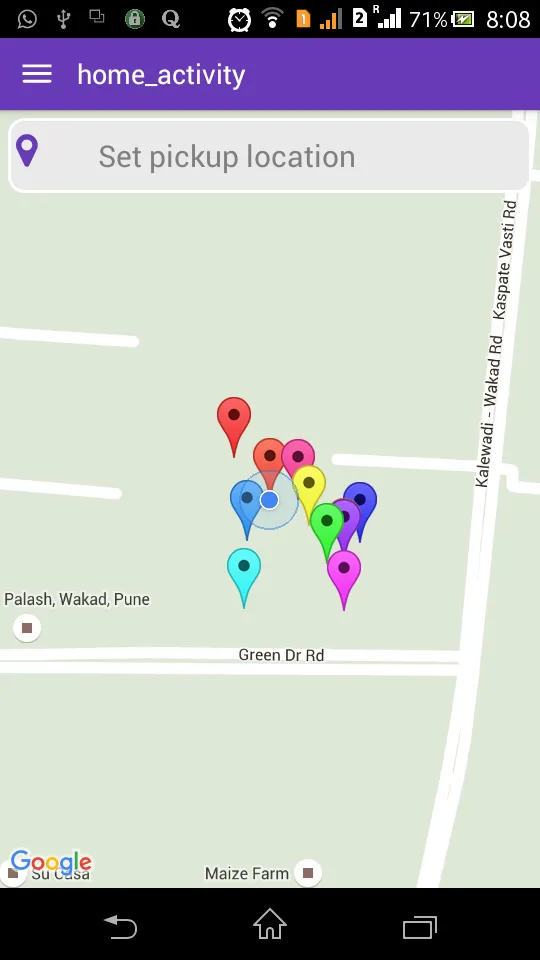
结果看起来像这样:
最重要的是不要混合使用app.Fragment和v4.Fragment,否则应用程序会崩溃。
正如您所看到的,我已经使用app.Fragment来附加和删除我的MapView Fragment。
希望能对某些人有所帮助。