Android中心标题与导航抽屉

12

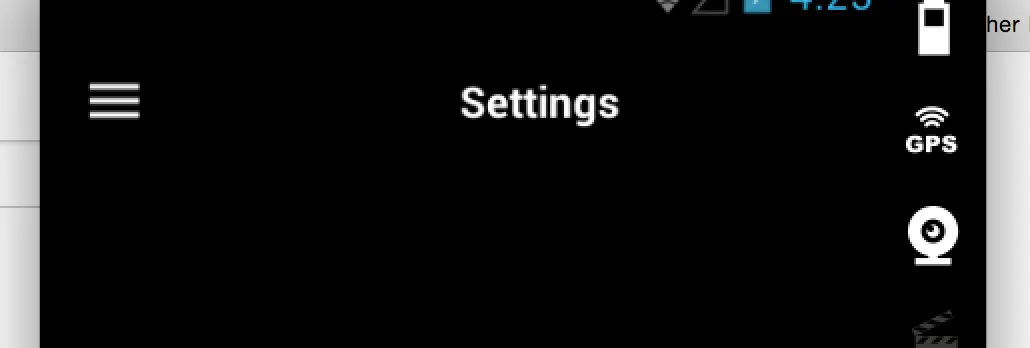
我目前有一个带工具栏和标题的导航抽屉,希望将此标题置于工具栏中心,但是工具栏似乎没有考虑到抽屉图标,如下图所示。

Off centre

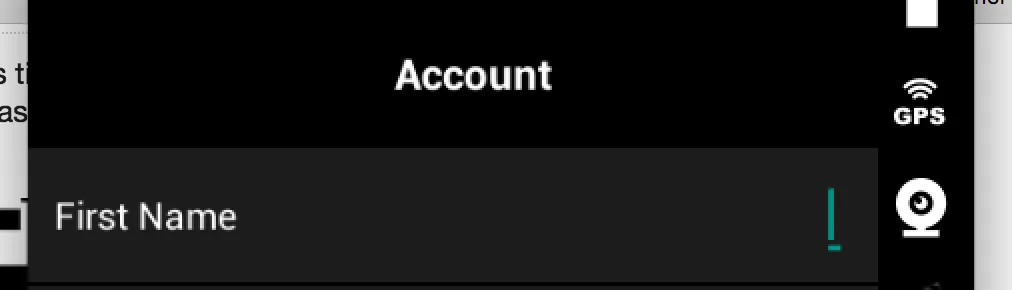
而当我将相同的工具栏布局用于其他不在导航抽屉内的活动时,标题完美地居中显示,如下图所示:

enter image description here

那么我该如何让它考虑到这个图标呢?

这是我的布局:

<android.support.design.widget.AppBarLayout
    xmlns:app="http://schemas.android.com/apk/res-auto"
    xmlns:android="http://schemas.android.com/apk/res/android"
    android:layout_height="wrap_content"
    android:layout_width="match_parent"
    android:theme="@style/Theme.App.AppBarOverlay">

    <android.support.v7.widget.Toolbar
        android:id="@+id/toolbar"
        android:layout_width="match_parent"
        android:layout_height="?attr/actionBarSize"
        android:background="@color/black"
        app:popupTheme="@style/Theme.App.PopupOverlay">

        <RelativeLayout
            android:layout_width="match_parent"
            android:layout_height="wrap_content">

            <TextView
                android:id="@+id/toolbar_title"
                android:layout_width="wrap_content"
                android:layout_height="wrap_content"
                android:layout_centerInParent="true"
                android:textColor="@color/white"
                android:textStyle="bold"
                android:text="Title"
                android:textSize="16sp" />

        </RelativeLayout>

    </android.support.v7.widget.Toolbar>

</android.support.design.widget.AppBarLayout>
5个回答

31

您需要了解的是,Toolbar小部件扩展了ViewGroup类,并且它有自己的LayoutParams

因此,在Toolbar内部不需要RelativeLayout,并且只需添加一个带有TextView的单行即可。

android:layout_gravity="center_horizontal"

最终的xml应该长成这个样子:

<android.support.design.widget.AppBarLayout xmlns:app="http://schemas.android.com/apk/res-auto"
xmlns:android="http://schemas.android.com/apk/res/android"
android:layout_width="match_parent"
android:layout_height="wrap_content"
android:theme="@style/Theme.App.AppBarOverlay" >

<android.support.v7.widget.Toolbar
    android:id="@+id/toolbar"
    android:layout_width="match_parent"
    android:layout_height="?attr/actionBarSize"
    android:background="@color/black"
    app:popupTheme="@style/Theme.App.PopupOverlay" >

    <TextView
        android:id="@+id/toolbar_title"
        android:layout_width="wrap_content"
        android:layout_height="wrap_content"
        android:layout_gravity="center_horizontal"
        android:text="Title"
        android:textColor="@color/white"
        android:textSize="16sp"
        android:textStyle="bold" />
</android.support.v7.widget.Toolbar>

1
谢谢@Chitrang,你让我的一天变得更美好了。 - Sandeep dhiman
我需要在工具栏内显示ImageView和TextView,我该如何实现? - Shoeb Siddique
如果我必须强制使用RelativeLayout,该怎么办。因为我的工具栏中有两个或更多的图像? - kunal.c

8

移除RelativeLayout,然后将您的TextView更改为以下内容:

<android.support.design.widget.AppBarLayout
    xmlns:app="http://schemas.android.com/apk/res-auto"
    xmlns:android="http://schemas.android.com/apk/res/android"
    android:layout_height="wrap_content"
    android:layout_width="match_parent"
    android:theme="@style/Theme.App.AppBarOverlay">

    <android.support.v7.widget.Toolbar
        android:id="@+id/toolbar"
        android:layout_width="match_parent"
        android:layout_height="?attr/actionBarSize"
        android:background="@color/black"
        app:popupTheme="@style/Theme.App.PopupOverlay">

        <TextView
            android:id="@+id/toolbar_title"
            android:layout_width="wrap_content"
            android:layout_height="wrap_content"
            android:layout_gravity="center"
            android:text="Title"
            android:textColor="@color/white"
            android:textSize="16sp"
            android:textStyle="bold"/>

    </android.support.v7.widget.Toolbar>

</android.support.design.widget.AppBarLayout>

在您的活动的onCreate方法中调用setDisplayShowTitleEnabled,以删除原始标题:

public class MainActivity extends AppCompatActivity {

    @Override
    protected void onCreate(Bundle savedInstanceState) {
        super.onCreate(savedInstanceState);
        setContentView(R.layout.activity_main);

        Toolbar toolbar = (Toolbar) findViewById(R.id.toolbar);
        setSupportActionBar(toolbar);
        getSupportActionBar().setDisplayShowTitleEnabled(false);

        ...
    }
}

这是所获得的结果:

在此输入图片描述


2

在TextView中,您需要将android:layout_width="wrap_content"更改为android:layout_width="match_parent"


所有这个程序做的就是将文本视图拉伸到工具栏的宽度,正如我所强调的那样,它没有考虑图标,因此仍然偏离中心。 - Joe Maher
将match_parent设置为居中对齐(不是layout_gravity)。 - Nguyễn Hoài Nam
@NguyễnHoàiNam,这并没有解决偏移的问题,因为整个布局都没有考虑到抽屉按钮的宽度。 - Joe Maher
啊,我认为导航按钮的位置是无法超越的。你应该阅读工具栏的源代码以获取更多信息和想法。 - Nguyễn Hoài Nam

0
希望这能有所帮助。尝试将此代码用于您的XML中,稍作修改即可:

enter image description here

<TextView
        android:id="@+id/toolbar_title"
        android:layout_width="match_parent"
        android:layout_height="wrap_content"
        android:layout_gravity="center_horizontal"
        android:text="title"
        android:gravity="center"
        android:textColor="#ffffff"
        android:textSize="21dp"
        android:textStyle="bold"
        android:paddingRight="30dp"
        android:paddingLeft="10dp"
        android:paddingTop="15dp" />

使用此代码片段适用于每个活动。这将确保您的文本覆盖图标旁边的整个空间,并将文本居中在其中。
<android.support.v7.widget.Toolbar android:id="@+id/toolbar"
    android:layout_width="match_parent" android:layout_height="?attr/actionBarSize"
    android:background="?attr/colorPrimary" app:popupTheme="@style/AppTheme.PopupOverlay" />
<RelativeLayout
    android:layout_width="match_parent"
    android:layout_height="wrap_content">

    <ImageView
        android:layout_width="wrap_content"
        android:layout_height="wrap_content"
        android:id="@+id/imageView"
        android:paddingTop="15dp"
        android:src="@drawable/ic_keyboard_arrow_left_black_24dp"
        android:layout_alignParentTop="true"
        android:layout_alignParentLeft="true"
        android:layout_alignParentStart="true" />

    <TextView
        android:id="@+id/toolbar_title"
        android:layout_width="match_parent"
        android:layout_height="wrap_content"
        android:layout_gravity="center_horizontal"
        android:text="title"
        android:gravity="center"
        android:textColor="#ffffff"
        android:textSize="21dp"
        android:textStyle="bold"
        android:paddingRight="30dp"
        android:paddingLeft="10dp"
        android:paddingTop="15dp" />

</RelativeLayout>

--------Nav_Drawer layout 

    <?xml version="1.0" encoding="utf-8"?>
    <LinearLayout xmlns:android="http://schemas.android.com/apk/res/android"
        android:layout_width="match_parent" android:layout_height="@dimen/nav_header_height"
        android:background="@drawable/side_nav_bar"
        android:paddingBottom="@dimen/activity_vertical_margin"
        android:paddingLeft="@dimen/activity_horizontal_margin"
        android:paddingRight="@dimen/activity_horizontal_margin"
        android:paddingTop="@dimen/activity_vertical_margin"
        android:theme="@style/ThemeOverlay.AppCompat.Dark" android:orientation="vertical"
        android:gravity="bottom">

        <ImageView android:layout_width="wrap_content" android:layout_height="wrap_content"
            android:paddingTop="@dimen/nav_header_vertical_spacing"
            android:src="@android:drawable/sym_def_app_icon" android:id="@+id/imageView" />

        <TextView android:layout_width="match_parent" android:layout_height="wrap_content"
            android:paddingTop="@dimen/nav_header_vertical_spacing" android:text="Android Studio"
            android:textAppearance="@style/TextAppearance.AppCompat.Body1" />

        <TextView android:layout_width="wrap_content" android:layout_height="wrap_content"
            android:text="android.studio@android.com" android:id="@+id/textView" />

    </LinearLayout>

0
对我来说,这两个答案都没用。相反,我只是给TextView设置了一个-40dp的开始边距,这是抽屉图标的宽度。效果很好。 也许对某些人有用。

网页内容由stack overflow 提供, 点击上面的
可以查看英文原文,
原文链接