解决方案
使用warp-packer将jlink创建的镜像和应用程序启动器制作成一个exe文件。
步骤如下:
- 从download link下载warp-packer。
- 使用jlink生成应用程序镜像。
然后,创建一个单文件应用程序可执行文件。这可以通过一条命令完成(在一行上运行它并使用您的值替换%%变量):
 %WARP_DIR%\warp-packer
   --arch windows-x64
   --input_dir %APP_JLINK_IMAGE_DIR%
   --exec %APP_JLINK_LAUNCHER_BAT_FILE%
   --output %APP_SINGLE_EXECUTABLE_FILE_NAME%
该命令可手动从命令行运行,也可以通过适当的构建工具插件自动运行。
jlink可以使用适合您构建环境的任何一种方式来调用; 例如: maven插件、gradle插件、命令行实用程序、jpackage 实用程序或jpackage构建工具插件等。
相关答案
这个想法不是我提出的,它是在这里提出的:
教程
如果需要更多信息,可以参考以下完整的教程示例。
解决方案描述
这个答案很长,因为它试图提供一个完整的例子和额外的上下文建议。它可能更简洁。它的风格更接近于教程或博客文章风格的帖子,而不是StackOverflow答案。希望长度不会让人望而却步,并且易于复制结果。
我对此很感兴趣,所以我想尝试一下。令我惊讶的是,我能够让它正常工作。因此,我在这里记录了如何复制它。
关键是由“OH GOD SPIDERS”在评论中提出的建议,使用"warp"工具进行打包,以及其他评论建议与jlink进行接口交互。
我尽可能使用Maven构建工具完成了大部分内容,因此这个解决方案是针对那个的。如果您喜欢,可以将解决方案适应于另一个工具链。
该解决方案示例使用FXML构建了一个JavaFX应用程序。如果不包括FXML,则示例可能更简单、更小,但我认为展示资源如何与此解决方案配合使用很重要,这就是为什么包括FXML的原因。
限制
这是一个仅限Windows的构建解决方案,必须在Windows机器上运行,无论是在构建时还是在部署和运行时。
它只适用于依赖于具有
module-info.java定义的Java模块的应用程序。例如,它不适用于Spring或SpringBoot应用程序,除非它完全是模块化的。直到Spring 6或SpringBoot 3发布,这种情况才会发生,具有完整的Java平台模块支持。
高级步骤
将应用程序构建为Java平台模块化应用程序。
- 应用程序必须没有自动依赖项(应用程序本身和所有传递依赖项必须定义为具有正确定义的module-info.java文件的Java模块)。
链接应用程序以创建带有启动脚本的运行时映像。
- 我使用了openjfx JavaFX Maven插件进行链接。
将带有启动脚本的运行时映像转换为exe。
- 此步骤使用
warp-packer工具,可通过maven exec插件执行。
- 此步骤使用
步骤
- 安装JDK 17(不需要包括JavaFX的版本)。
- 安装Maven。
- 创建如下所示的项目文件。
- 安装warp到
tools\warp-packer.exe。 - 构建和打包项目(
mvn package)。 - 运行应用程序exe(
target/hellowarp.exe)进行测试。 - 将应用程序exe发送给使用Windows机器的朋友。
- 朋友们可以从命令行或通过双击exe运行该exe。
不需要安装您的应用程序,不需要解压任何档案,不需要Java运行时安装和其他额外的安装。所需的只是将exe文件复制到Windows机器上(例如,在Web上单击下载链接或从邮件附件中复制exe),然后双击exe即可立即运行应用程序。
文件树
C:\dev\hellowarp>tree /a /f .
卷序列号为 00000086 C034:A84E 的卷
C:\DEV\HELLOWARP
|   pom.xml
|
+---src
|   \---main
|       +---java
|       |   |   module-info.java
|       |   |
|       |   \---com
|       |       \---example
|       |           \---hellowarp
|       |                   HelloController.java
|       |                   HelloWarp.java
|       |
|       \---resources
|           \---com
|               \---example
|                   \---hellowarp
|                           hello-view.fxml
|
\---tools
        warp-packer.exe
获取和安装warp
在项目根目录下创建一个新的目录\tools。
从以下网址下载Warp:
将warp可执行文件复制(重命名)到以下位置:
\tools\warp-packer.exe
文件
pom.xml
Maven项目。
<?xml version="1.0" encoding="UTF-8"?>
<project xmlns="http://maven.apache.org/POM/4.0.0"
         xmlns:xsi="http://www.w3.org/2001/XMLSchema-instance"
         xsi:schemaLocation="http://maven.apache.org/POM/4.0.0 https://maven.apache.org/xsd/maven-4.0.0.xsd">
    <modelVersion>4.0.0</modelVersion>

    <groupId>com.example</groupId>
    <artifactId>hellowarp</artifactId>
    <version>1.0-SNAPSHOT</version>

    <properties>
        <project.build.sourceEncoding>UTF-8</project.build.sourceEncoding>
        <java.version>17</java.version>
        <javafx.version>17.0.1</javafx.version>
    </properties>

    <dependencies>
        <dependency>
            <groupId>org.openjfx</groupId>
            <artifactId>javafx-controls</artifactId>
            <version>${javafx.version}</version>
        </dependency>
        <dependency>
            <groupId>org.openjfx</groupId>
            <artifactId>javafx-fxml</artifactId>
            <version>${javafx.version}</version>
        </dependency>
    </dependencies>

    <build>
        <plugins>
            <!--compile-->
            <plugin>
                <groupId>org.apache.maven.plugins</groupId>
                <artifactId>maven-compiler-plugin</artifactId>
                <version>3.8.1</version>
                <configuration>
                    <source>${java.version}</source>
                    <target>${java.version}</target>
                </configuration>
            </plugin>
             <!--create linked image-->
            <plugin>
                <groupId>org.openjfx</groupId>
                <artifactId>javafx-maven-plugin</artifactId>
                <version>0.0.8</version>
                <executions>
                    <execution>
                        <phase>package</phase>
                        <goals>
                            <goal>jlink</goal>
                        </goals>
                    </execution>
                </executions>
                <configuration>
                    <mainClass>com.example.hellowarp/com.example.hellowarp.HelloWarp</mainClass>
                    <compress>2</compress>
                    <noManPages>true</noManPages>
                    <noHeaderFiles>true</noHeaderFiles>
                    <stripDebug>true</stripDebug>
                    <launcher>${project.artifactId}</launcher>
                </configuration>
            </plugin>
            <!--package image as an exe-->
            <plugin>
                <groupId>org.codehaus.mojo</groupId>
                <artifactId>exec-maven-plugin</artifactId>
                <version>3.0.0</version>
                <executions>
                    <execution>
                        <phase>package</phase>
                        <goals>
                            <goal>exec</goal>
                        </goals>
                    </execution>
                </executions>
                <configuration>
                    <!-- obtain warp-packer.exe from: "https://github.com/dgiagio/warp/releases/download/v0.3.0/windows-x64.warp-packer.exe" -->
                    <executable>${project.basedir}\tools\warp-packer.exe</executable>
                    <arguments>
                        <argument>--arch</argument>
                        <argument>windows-x64</argument>

                        <argument>--input_dir</argument>
                        <argument>${project.build.directory}\image</argument>

                        <argument>--exec</argument>
                        <argument>bin\${project.artifactId}.bat</argument>

                        <argument>--output</argument>
                        <argument>${project.build.directory}\${project.artifactId}.exe</argument>
                    </arguments>
                </configuration>
            </plugin>
        </plugins>
    </build>
</project>
module-info.java
应用程序的Java平台模块定义。
module com.example.hellowarp {
    requires javafx.controls;
    requires javafx.fxml;

    opens com.example.hellowarp to javafx.fxml;
    exports com.example.hellowarp;
}
HelloWarp.java
JavaFX 应用程序。
package com.example.hellowarp;

import javafx.application.Application;
import javafx.fxml.FXMLLoader;
import javafx.scene.Scene;
import javafx.stage.Stage;

import java.io.IOException;

public class HelloWarp extends Application {
    @Override
    public void start(Stage stage) throws IOException {
        FXMLLoader fxmlLoader = new FXMLLoader(
                HelloWarp.class.getResource(
                        "hello-view.fxml"
                )
        );

        Scene scene = new Scene(fxmlLoader.load());

        stage.setTitle("Hello!");
        stage.setScene(scene);
        stage.show();
    }

    public static void main(String[] args) {
        launch();
    }
}
HelloController.java
JavaFX FXML控制器类。
package com.example.hellowarp;
import javafx.fxml.FXML;
import javafx.scene.control.Label;
public class HelloController {
@FXML
private Label welcomeText;
@FXML
protected void onHelloButtonClick() {
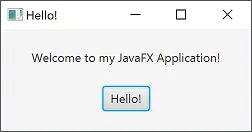
welcomeText.setText("Welcome to my JavaFX Application!");
}
}
hello-view.fxml
UI视图定义文件。
<?xml version="1.0" encoding="UTF-8"?>

<?import javafx.geometry.Insets?>
<?import javafx.scene.control.Label?>
<?import javafx.scene.layout.VBox?>

<?import javafx.scene.control.Button?>
<VBox alignment="CENTER" spacing="20.0" prefWidth="250" xmlns:fx="http://javafx.com/fxml"
      fx:controller="com.example.hellowarp.HelloController">
    <padding>
        <Insets bottom="20.0" left="20.0" right="20.0" top="20.0"/>
    </padding>

    <Label fx:id="welcomeText"/>
    <Button text="Hello!" onAction="#onHelloButtonClick"/>
</VBox>
运行中的hellowarp.exe应用程序截图
常见问题解答
本节提供上下文信息,如您已知晓或不需要此信息,请忽略本节。
这是“fat jar”的替代分发方式吗?
是的,我认为是。
适用于哪些场景?
适用于在您知道用户正在运行 Windows 的环境中分发的小型应用程序。
我也可以将我的应用程序打包成 MSI 安装程序吗?
可以。我使用 akman jpackage-maven-plugin 进行了打包,并且效果很好。为了限制大小和范围,我不会在此答案中详细说明。
使用“git repo”、“fat jar”、exe、打包安装程序还是“zipped”映像更好呢?
这取决于您的具体情况。
如果您的目标是其他开发人员,请在 github 上建立一个帐户,将项目放在那里,并为开发人员提供 maven 或 gradle 构建文件,以便他们可以在自己的环境中构建应用程序。只需将应用程序打包为标准 jar 文件(不要使用 fat jar)即可。您创建的任何 jar 文件都可以部署到 maven 中央仓库。使用 module-info.java 为 jar 文件提供链接,以便可以通过 jlink 链接到打包的应用程序中。
如果这是一个学校项目,则取决于学校的接受偏好。也许他们只想要 git 中的代码源,那么您所需要的就只有这些。或者您可以创建一个(瘦)jar 文件(或者带有 jar 文件和其依赖项的 zip 文件),并提供给他们,因为标准的学校系统已经安装了所有相关的 Java/JavaFX 软件。
或者,如果是已知的操作系统环境,例如 Windows、Mac 或 Linux,则可以使用 jpackage 为其中一个(或两个)环境构建可安装的软件包。
或者,如果仅限于 Windows,则将应用程序打包为“exe”进行分发可能效果很好。
不支持 JavaFX 开发的 "fat jar" configuration。我不建议使用它。虽然目前可以使其正常工作,但您需要决定是否值得做出这样的权衡。
如果您正在构建商业或流行的开源桌面产品,请使用类似jpackage(或其中一个商业或开源替代品)的工具创建打包安装程序,以适合目标平台的适当格式(例如Windows的msi或exe,Linux的rpm和deb,Mac的dmg)。您可以选择将这些打包格式部署到Windows或Mac应用商店或Linux yum / apt存储库中。如果是移动部署,请使用gluon mobile。 OpenJFX JavaFX Maven插件或akman jpackage-maven-plugin目前会生成正确的映像。 Apache jlink Maven插件目前会失败(使用JavaFX 17.0.1和Apache jlink插件3.1.0)。
当我尝试使用Apache jlink Maven插件时,它被JavaFX平台模块定义搞糊涂了。 Apache jlink插件开始使用奇怪的幻影模块名称,例如
javafx.graphicsEmpty,将其视为自动模块并传递给jlink,因此jlink拒绝链接它们。 我找不到解决该问题的方法。是的,双击exe时会出现空白窗口,标题栏中显示exe的名称以及我的应用程序窗口。
这只是此解决方案在此处的工作方式。
可能有一种方法可以避免这种情况,但我没有进行过大量调查。 您可以查看此处提供的信息(其中讨论了各种隐藏或最小化MS Windows应用程序启动器窗口的方法),看看它是否有所帮助:
- https://www.robvanderwoude.com/battech_hideconsole.php
- https://dev59.com/8WYr5IYBdhLWcg3wDF_P#55662615
如果您是通过在命令控制台中输入exe名称来运行应用程序而不是双击应用程序,则没有其他屏幕,因为已经存在一个现有的控制台,您正在其中键入。
我能否使用这种技术创建其他操作系统的单个文件可执行文件?
可以,我相信如此。
目前,我尚未尝试将此解决方案用于除Windows可执行文件以外的任何内容。
warp-packer 能够为各种操作系统生成可执行文件。
要打包非 Windows 机器,您需要将适用于目标操作系统的适当 jlink 映像输出输入到 warp-packer 中,然后运行适当的 warp-packer 实用程序(我相信是在目标操作系统上)以生成用于在该目标操作系统上执行的单个可执行文件。
如果感兴趣,请参阅 warp-packer 和 jlink 文档。
生成的可执行文件大小是多少?
对于示例应用程序,我的生成的应用程序可执行文件大小为34兆字节。
启动时间是多久?
我没有测量过,但启动时间(双击exe后显示应用程序GUI窗口所需的时间)似乎约为一秒钟。
我能为非模块化 Java 项目创建exe吗?
可以,但这超出了我准备在此讨论的范围,并且该方法与此处描述的方法不同。
1
2
如果您的Java应用程序有依赖项,则必须生成一个fat jar,如果它没有依赖项,则将其保持原样,然后使用launch4j。要创建fat jar,请执行以下操作:
Add this bunch of code in your build.xml file:
<property name="store.jar.name" value="Master Data App"/>

<property name="store.dir" value="store"/>
<property name="store.jar" value="${store.dir}/${store.jar.name}.jar"/>

<echo message="Packaging ${application.title} into a single JAR at ${store.jar}"/>

<delete dir="${store.dir}"/>
<mkdir dir="${store.dir}"/>

<jar destfile="${store.dir}/temp_final.jar" filesetmanifest="skip">
    <zipgroupfileset dir="dist" includes="*.jar"/>
    <zipgroupfileset dir="dist/lib" includes="*.jar"/>

    <manifest>
        <attribute name="Main-Class" value="sheetupdown.SheetUpDown"/>
    </manifest>
</jar>

<zip destfile="${store.jar}">
    <zipfileset src="${store.dir}/temp_final.jar"
    excludes="META-INF/*.SF, META-INF/*.DSA, META-INF/*.RSA"/>
</zip>

<delete file="${store.dir}/temp_final.jar"/>
In your java IDE, right click on build.xml -> Run Target -> Other Targets -> package for store
You will find your fat jar inside your project in store folder.
Open launch4j
Specify output file (ending with .exe)
Specify where you fat jar is
(Add other options as needed, like: icon, jre version .... ) -Optional-
Click Build Wrapper
1
原文链接
jre。为了实现你想要的功能,你需要将jre与应用程序本身一起分发(jlink可以帮助你)。然后,你可以制作一个本地启动器(exe)来使用你所分发的jre来启动你的应用程序。 - mr mcwolf