安卓
将以下内容添加至您的build.gradle文件中
[
        new Tuple2('Debug', 'debug'),
        new Tuple2('Profile', 'release'),
        new Tuple2('Release', 'release')
].each {
    def taskPostfix = it.first
    def profileMode = it.second
    tasks.whenTaskAdded { task ->
        if (task.name == "javaPreCompile$taskPostfix") {
            println "hello let ${task.name} dependsOn cargoBuild$taskPostfix"
            task.dependsOn "cargoBuild$taskPostfix"
        }
    }
    tasks.register("cargoBuild$taskPostfix", Exec) {
        println "hello executing doLast for task cargoBuild$taskPostfix"
        commandLine 'sh', '-c', "build-your-rust-code"
    }
}
其中build-your-rust-code是构建Rust代码的命令。 (例如,我使用fastlane将其包装起来(当然您也可以使用其他工具),并将其放在一个名为rust的文件夹中,因此我只需调用cd $projectDir/../rust/fastlane && bundle exec fastlane build_android profile:$profileMode。)
iOS
方法1
最手动的方法如下。 进入Build Phases,点击+按钮并选择New Run Script Phase。 然后输入您要运行以构建Rust代码的脚本。(例如,对于我自己,我使用Shell /bin/sh 并调用一些fastlane命令执行实际命令。)
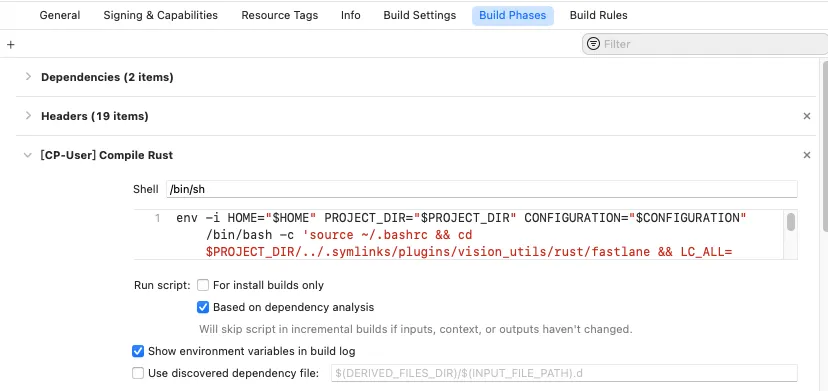
方法2
更自动化的方法是使用CocoaPod文件,这将自动帮助您设置一切。 例如,我添加:
  s.script_phase = {
      :name => 'Compile Rust',
      :script => your-script-to-compile-it,
      :execution_position => :before_compile,
      :shell_path => '/bin/sh'
   }
(例如,我的脚本是
%q{env -i HOME="$HOME" PROJECT_DIR="$PROJECT_DIR" CONFIGURATION="$CONFIGURATION" /bin/bash -c 'source ~/.bashrc && cd $PROJECT_DIR/../.symlinks/plugins/vision_utils/rust/fastlane && LC_ALL= LANG=en_US.UTF-8 bundle exec fastlane build_ios profile:$CONFIGURATION'}。请注意,在我的情况下,我必须创建一个全新的shell。否则,我的Rust中的opencv会出现问题并无法编译。但如果你的Rust代码不包含c++内容,则可能不会遇到这个问题。)
(问答式回答,以帮助那些面临与我相同情况的人,特别是对Android和iOS不熟悉的人。)