我正在寻找一个使用GetX处理表单和验证的最佳实践示例。是否有这样一个好的示例,或者可以有人向我展示如何最好地完成这项任务?
Flutter GetX表单验证
17
- allmighty
1
1你可以在 Visual Studio Code 中找到 GetX 扩展。它包含了一些 GetX 的代码片段和表单代码片段。链接如下:https://marketplace.visualstudio.com/items?itemName=get-snippets.get-snippets - Süleyman Bilgin
2个回答
22
GetX并不是万能解决方案,但它有一些实用的方法可以帮助您实现想要的功能。例如,您可以与SnackBar一起使用validator进行最终检查。下面是一个代码片段,可能会帮助您了解基础知识。
TextFormField(
  controller: emailController,
  autovalidateMode: AutovalidateMode.onUserInteraction,
  validator: (value) {
    if (!GetUtils.isEmail(value))
      return "Email is not valid";
    else
      return null;
  },
),
GetUtils有一些方便的方法可以快速进行验证,您需要探索每种方法以查看它是否适合您的需求。
- Sumit Sahoo
1
1太棒了的评论,使用GetUtils和autovalidatemode让它更简单!! - marlonjd
22
这是一个使用GetX的observable动态更新表单字段和提交按钮的示例。
我不保证这是最佳实践。我相信有更好的方法来完成同样的功能。但是,使用GetX执行验证的方式很有趣。
表格+Obx
两个感兴趣的小部件,根据Observable值的变化进行重建:
1. TextFormField - InputDecoration 的errorText 更改并将重建此widget。 - onChanged: fx.usernameChanged 不会导致重建。当表单字段输入更改时,它调用控制器中的函数usernameChanged(String val)。 - 它只是使用新值更新username observable。 - 可以写成: - onChanged: (val) => fx.username.value = val
2. ElevatedButton(“提交”按钮) - onPressed函数可以在null和function之间更改。 - null禁用按钮(Flutter中唯一的方法)。 - 这里的function将启用按钮。
class FormObxPage extends StatelessWidget {
  const FormObxPage({Key? key}) : super(key: key);

  @override
  Widget build(BuildContext context) {
    FormX fx = Get.put(FormX()); // controller

    return Scaffold(
      appBar: AppBar(
        title: const Text('Form Validation'),
      ),
      body: SafeArea(
        child: Container(
          alignment: Alignment.center,
          margin: const EdgeInsets.symmetric(horizontal: 5),
          child: Column(
            mainAxisAlignment: MainAxisAlignment.spaceEvenly,
            children: [
              Obx(
                    () {
                  print('rebuild TextFormField ${fx.errorText.value}');
                  return TextFormField(
                      onChanged: fx.usernameChanged, // controller func
                      decoration: InputDecoration(
                          labelText: 'Username',
                          errorText: fx.errorText.value // obs
                      )
                  );
                },
              ),
              Obx(
                    () => ElevatedButton(
                  child: const Text('Submit'),
                  onPressed: fx.submitFunc.value, // obs
                ),
              )
            ],
          ),
        ),
      ),
    );
  }
}
GetX控制器
下面是解释/分解
class FormX extends GetxController {
RxString username = RxString('');
RxnString errorText = RxnString(null);
Rxn<Function()> submitFunc = Rxn<Function()>(null);
@override
void onInit() {
super.onInit();
debounce<String>(username, validations, time: const Duration(milliseconds: 500));
}
void validations(String val) async {
errorText.value = null; // reset validation errors to nothing
submitFunc.value = null; // disable submit while validating
if (val.isNotEmpty) {
if (lengthOK(val) && await available(val)) {
print('All validations passed, enable submit btn...');
submitFunc.value = submitFunction();
errorText.value = null;
}
}
}
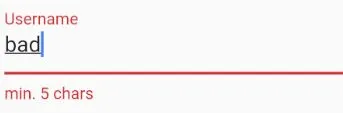
bool lengthOK(String val, {int minLen = 5}) {
if (val.length < minLen) {
errorText.value = 'min. 5 chars';
return false;
}
return true;
}
Future<bool> available(String val) async {
print('Query availability of: $val');
await Future.delayed(
const Duration(seconds: 1),
() => print('Available query returned')
);
if (val == "Sylvester") {
errorText.value = 'Name Taken';
return false;
}
return true;
}
void usernameChanged(String val) {
username.value = val;
}
Future<bool> Function() submitFunction() {
return () async {
print('Make database call to create ${username.value} account');
await Future.delayed(const Duration(seconds: 1), () => print('User account created'));
return true;
};
}
}
可观察对象
从这三个可观察对象开始...
  RxString username = RxString('');
  RxnString errorText = RxnString(null);
  Rxn<Function()> submitFunc = Rxn<Function()>(null);
username将保存最后一次输入到TextFormField中的内容。
errorText被实例化为null的初始值,因此用户名字段一开始不是“无效”的。如果不是 null(即使是空字符串),TextFormField将以红色呈现,表示输入无效。当字段中有非有效输入时,我们将显示错误消息。(例如:最少5个字符)
submitFunc是一个可观察对象,用于保存提交按钮函数或null值,因为在Dart中函数实际上是对象,所以这样做没问题。初始赋值为null将禁用该按钮。
onInit
debounce工作者会在username可观察对象更改500毫秒后调用validations函数。
validations将接收username.value作为其参数。
验证
在validations函数内,我们可以放置任何类型的验证:最小长度、不良字符、已使用名称、由于童年霸凌而不喜欢的名称等。
为了增加真实感,available()函数是async的。通常这将查询数据库以检查用户名是否可用,因此在此示例中,在返回此验证检查之前会有1秒的虚拟延迟。
submitFunction()返回一个函数,该函数将替换submitFunc可观察对象中的null值,当我们满意表单具有有效输入并允许用户继续时。
更现实一点,我们可能希望从提交按钮函数中返回一些返回值,因此我们可以使该按钮函数返回一个future bool:
  Future<bool> Function() submitFunction() {
    return () async {
      print('Make database call to create ${username.value} account');
      await Future.delayed(Duration(seconds: 1), () => print('User account created'));
      return true;
    };
  }
- Baker
网页内容由stack overflow 提供, 点击上面的可以查看英文原文,
原文链接
原文链接