SwiftUI中一个复杂视图的字体缩放

12

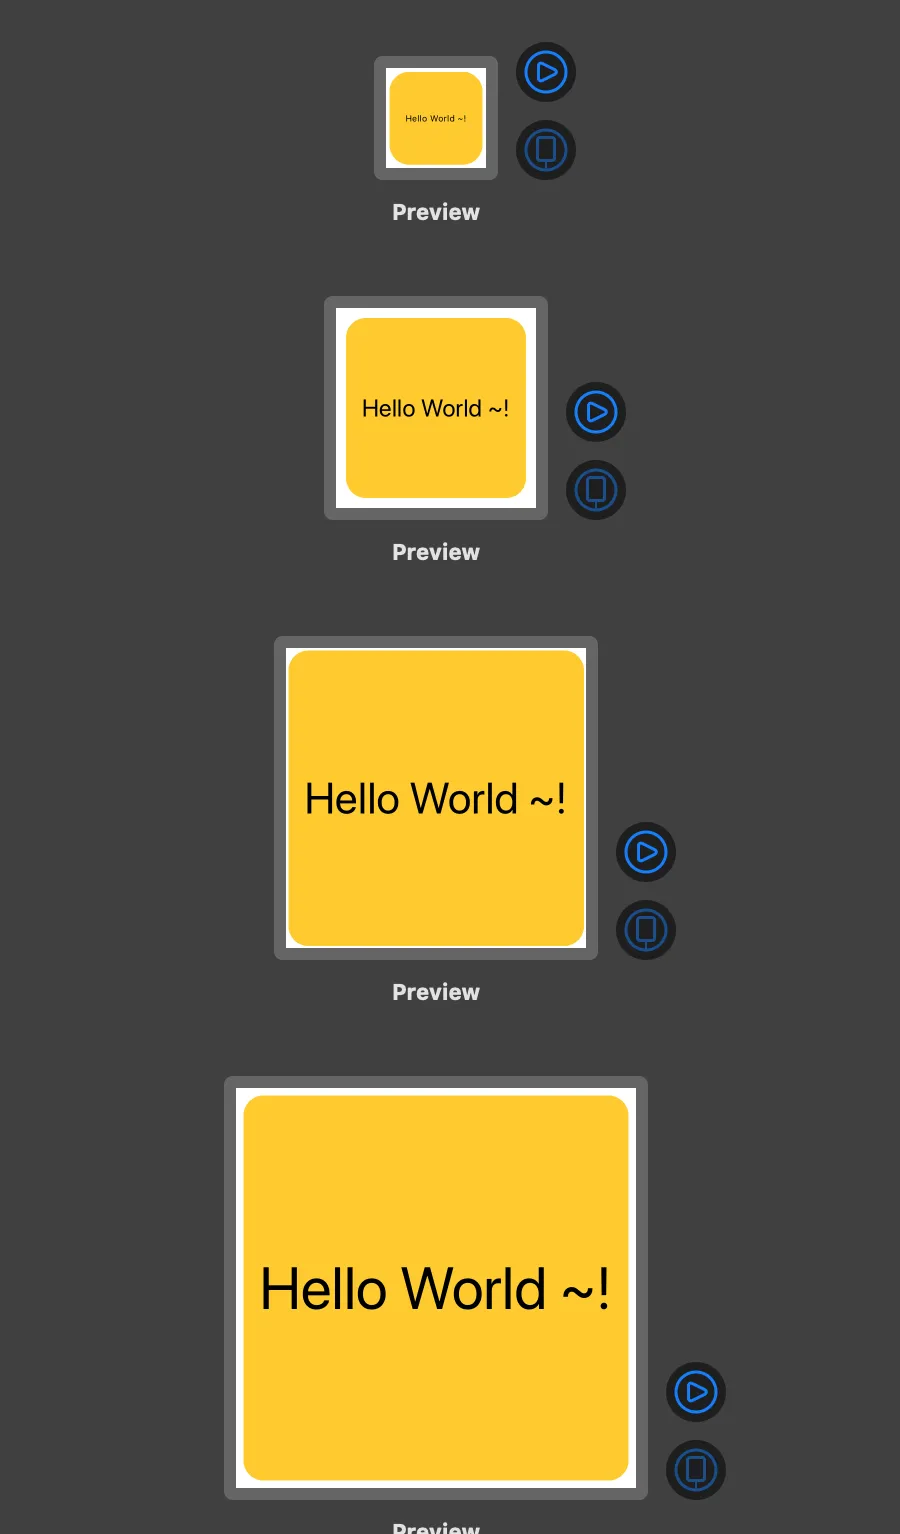
我的目标是确保容器中的文本根据其父级进行缩放。 当容器仅包含一个文本视图时,它能够很好地工作,如下所示:

import SwiftUI

struct FontScalingExperiment: View {
    var body: some View {
        Text("Hello World ~!")
            .font(.system(size: 500))
            .minimumScaleFactor(0.01)
            .lineLimit(1)
            .padding()
            .background(
                RoundedRectangle(cornerRadius: 20)
                    .fill(Color.yellow)
                    .scaledToFill()  
        )
    }
}

struct FontScalingExperiment_Previews: PreviewProvider {
    static var previews: some View {
        Group {
            FontScalingExperiment()
                .previewLayout(.fixed(width: 100, height: 100))
            FontScalingExperiment()
                .previewLayout(.fixed(width: 200, height: 200))
            FontScalingExperiment()
                .previewLayout(.fixed(width: 300, height: 300))
            FontScalingExperiment()
                .previewLayout(.fixed(width: 400, height: 400))
        }

    }
}

结果:

Result

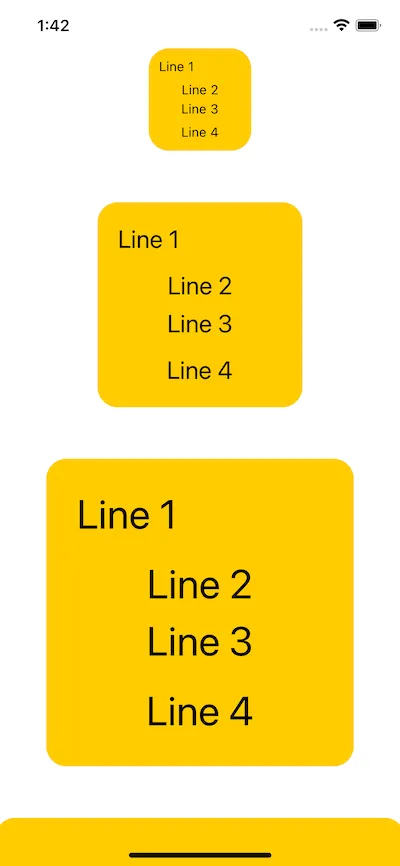
然而,当我们有更复杂的视图时,我们不能使用同样的方法根据其父级大小自动缩放文本,例如:

import SwiftUI

struct IndicatorExperiment: View {
    var body: some View {
        VStack {
            HStack {
                Text("Line 1")
                Spacer()
            }
            Spacer()
            VStack {
                Text("Line 2")
                Text("Line 3")
            }
            Spacer()
            Text("Line 4")
        }
        .padding()
        .background(
            RoundedRectangle(cornerRadius: 20)
                .fill(Color.yellow)
        )
            .aspectRatio(1, contentMode: .fit)
    }
}

struct IndicatorExperiment_Previews: PreviewProvider {
    static var previews: some View {
        Group {
            IndicatorExperiment()
                .previewLayout(.fixed(width: 100, height: 100))
            IndicatorExperiment()
                .previewLayout(.fixed(width: 200, height: 200))
            IndicatorExperiment()
                .previewLayout(.fixed(width: 300, height: 300))
            IndicatorExperiment()
                .previewLayout(.fixed(width: 400, height: 400))
        }
    }
}

只需添加这3个修饰符:

.font(.system(size: 500)) .minimumScaleFactor(0.01) .lineLimit(1)

不会像第一个示例那样产生结果; 文字超出框架放大。 我成功地使用GeometryReader,然后根据 geometry.size.width 调整字体大小,得到了我想要的结果。这是在SwiftUI中实现所需结果的唯一方法吗?


我有和你一样的问题,但是我无法在任何地方找到答案。 除非将视图放入 HStack 中,否则所有内容都按预期工作。 你介意通过 GeometryReader 与我分享解决方案吗? - Jeff
GeometryReader 会为我们提供框架的高度和宽度,通过这个大小,我们可以相应地设置字体大小。例如:在 GeometryReader 中使用以下代码:GeometryReader { g in HStack { ... } .font(.system(size: g.size.width / ratio)) }其中 ratio 是任何数字,用于调整大小。需要手动进行视觉验证,以确保它在最小的框架中正确渲染。 - wk.experimental
你的解决方案很好。视觉检查是关键。谢谢分享。 - Jeff
2个回答

3
您可以尝试使所有的Text高度相同。为此,您需要显式设置填充和间距,这样它将会按比例缩放而不是使用固定的默认值。
另外,这里的Spacer()没有太多意义 - 如果要求是所有Text保持相同的大小,那么Spacer只会使所有文本变小。对于基于空间缩放文本的Text,以及Spacer试图尽可能利用空间的情况,这是矛盾的。因此,我决定在初始化器中设置VStackspacing
工作代码:
struct IndicatorExperiment: View {
    private let size: CGFloat
    private let padding: CGFloat
    private let primarySpacing: CGFloat
    private let secondarySpacing: CGFloat
    private let textHeight: CGFloat

    init(size: CGFloat) {
        self.size = size
        padding = size / 10
        primarySpacing = size / 15
        secondarySpacing = size / 40

        let totalHeights = size - padding * 2 - primarySpacing * 2 - secondarySpacing
        textHeight = totalHeights / 4
    }

    var body: some View {
        VStack(spacing: primarySpacing) {
            HStack {
                scaledText("Line 1")

                Spacer()
            }
            .frame(height: textHeight)

            VStack(spacing: secondarySpacing) {
                scaledText("Line 2")

                scaledText("Line 3")
            }
            .frame(height: textHeight * 2 + secondarySpacing)

            scaledText("Line 4")
        }
        .padding(padding)
        .background(
            RoundedRectangle(cornerRadius: 20)
                .fill(Color.yellow)
        )
        .aspectRatio(1, contentMode: .fit)
        .frame(width: size, height: size)
    }

    private func scaledText(_ content: String) -> some View {
        Text(content)
            .font(.system(size: 500))
            .minimumScaleFactor(0.01)
            .lineLimit(1)
            .frame(height: textHeight)
    }
}

用于测试的代码:

struct ContentView: View {
    var body: some View {
        ScrollView {
            VStack(spacing: 50) {
                IndicatorExperiment(size: 100)

                IndicatorExperiment(size: 200)

                IndicatorExperiment(size: 300)

                IndicatorExperiment(size: 400)
            }
        }
    }
}

Result:

Result


2
使用GeometryReader.minimumScaleFactor修饰符可能是在视图中缩放文本的唯一方法。为了更好地控制大小,一种可能的方法是从父视图提供.frame大小。
可缩放文本视图
    GeometryReader { geo in
        Text("Foo")
            .font(
                .system(size: min(geo.size.height, geo.size.width) * 0.95))
            .minimumScaleFactor(0.05)
            .lineLimit(1)
    }

使用可扩展文本视图的父视图。
    GeometryReader { geo in
        ScaleableText()
            .frame(width: geo.size.width, height: geo.size.height)
    }

网页内容由stack overflow 提供, 点击上面的
可以查看英文原文,
原文链接