你需要在onPreResponse扩展函数中捕获错误响应,并在此处设置一个新的HTML响应。
相同的原则适用于任何Boom错误,无论是由处理程序中设置的错误还是由Hapi内部设置的错误(例如404未找到或401身份验证失败)。
下面是一个你可以尝试的示例:
index.js
const Hapi = require('hapi');
const Path = require('path');

const server = new Hapi.Server();
server.connection({ port: 4000 });

server.route({
    method: 'GET',
    path: '/',
    handler: function (request, reply) {

        reply(new Error('I\'ll be a 500'));
    }
});

server.ext('onPreResponse', (request, reply) => {

    if (request.response.isBoom) {
        const err = request.response;
        const errName = err.output.payload.error;
        const statusCode = err.output.payload.statusCode;

        return reply.view('error', {
            statusCode: statusCode,
            errName: errName
        })
        .code(statusCode);
    }

    reply.continue();
});


server.register(require('vision'), (err) => {

    if (err) {
        throw err;
    }

    server.views({
        engines: {
            hbs: require('handlebars')
        },
        path: Path.join(__dirname, 'templates')
    });

    server.start((err) => {

        if (err) {
            throw err;
        }

        console.log('Server running at:', server.info.uri);
    });
});
模板错误.hbs
<!DOCTYPE html>
<html lang="en">
<head>
<meta charset="UTF-8">
<title>{{title}}</title>
<style>
body {
text-align: center;
background: #B0B0B0;
color: #222;
}
.error h1 {
font-size: 80px;
margin-bottom: 0;
}
</style>
</head>
<body>
<div class="error">
<h1>⚠<br/>{{statusCode}}</h1>
<h2>{{errName}}</h2>
</div>
</body>
</html>
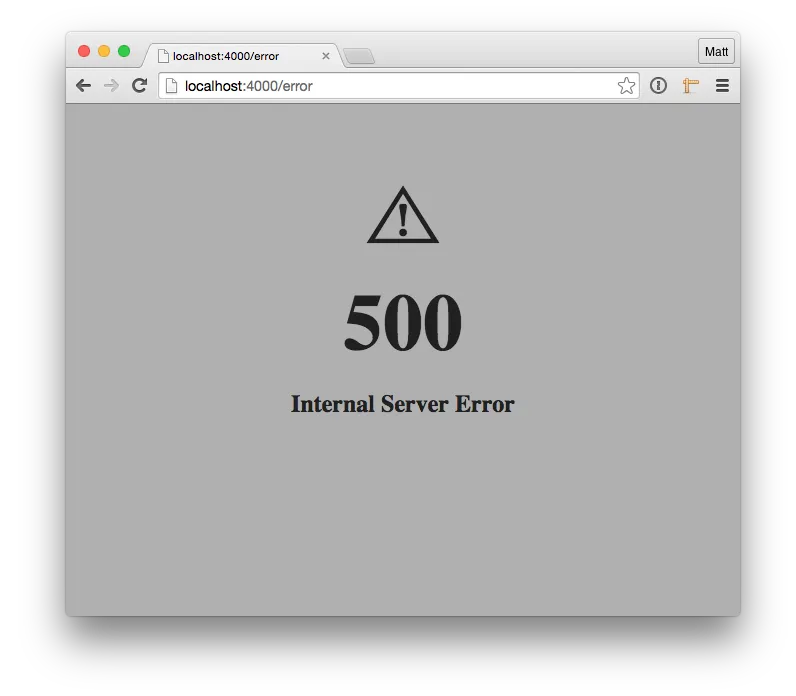
通过访问http://localhost:4000/来测试它,查看自定义错误页面:
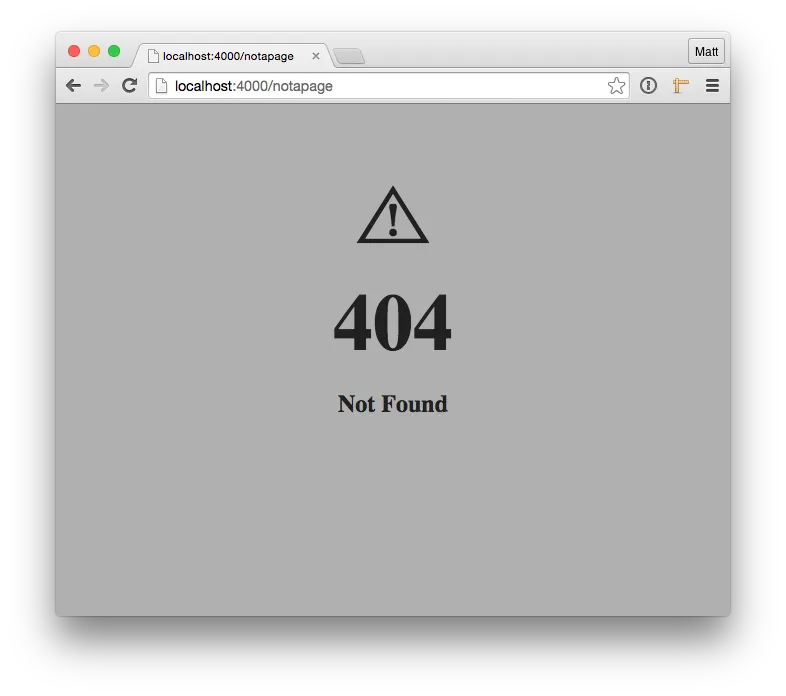
此方法捕获任何Boom响应,包括由hapi内部生成的响应,而不仅仅是我们生成的响应。因此,它也适用于4xx错误。尝试导航到http://localhost:4000/notapage,您将会得到相同漂亮的页面但是对于404:
hapi一起工作?它无法识别.continue();。 - shorif2000