在SwiftUI中,是否可以使用按钮将新视图添加到屏幕上?

3
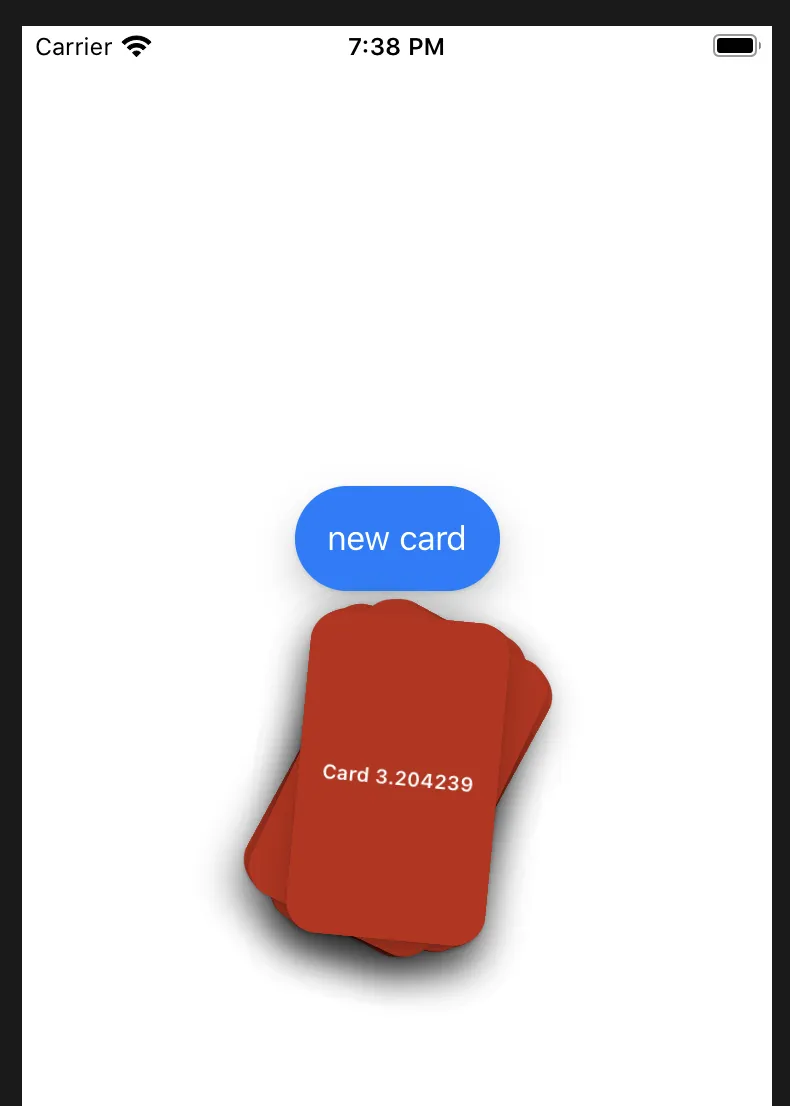
每次我点击按钮时,我希望出现一个新的cardView。 我想知道在SwiftUI中是否有这种可能性,如果有,我需要执行什么操作。 如果我能够将一些参数传递给cardView结构体会更好,但任何帮助都可以。

struct ContentView: View {
    var body: some View {
        ZStack {
            VStack {
                TextButton(action: {print("Button tapped")}, text: "new card")
                CardView()
            }
        }
    }
}

struct CardView: View {
    var body: some View {
        ZStack {
            Rectangle()
                .fill(Color(#colorLiteral(red: 0.7450980544, green: 0.1568627506, blue: 0.07450980693, alpha: 1)))
                .frame(width: 100, height: 100 * 1.618)
                .cornerRadius(16)
                .shadow(color: Color(#colorLiteral(red: 0, green: 0, blue: 0, alpha: 1)).opacity(0.1), radius: 1, x: 0, y: 1)
                .shadow(color: Color(#colorLiteral(red: 0, green: 0, blue: 0, alpha: 1)).opacity(0.2), radius: 10, x: 0, y: 10)

            VStack {
                Text("Card")
                    .font(.system(size: 10) )
                    .foregroundColor(.white)
                    .bold()
            }
        }
    }
}


struct TextButton: View {
    let action: () -> Void
    let text: String

    var body: some View {
        Button(action: action, label: {
            Text(text)
                .padding(.horizontal, 16)
                .padding(.vertical, 16)
                .foregroundColor(.white)
                .background(Color.blue)
                .cornerRadius(.infinity)
                .shadow(color: Color(#colorLiteral(red: 0, green: 0, blue: 0, alpha: 1)).opacity(0.1), radius: 1, x: 0, y: 1)
                .shadow(color: Color(#colorLiteral(red: 0, green: 0, blue: 0, alpha: 1)).opacity(0.2), radius: 10, x: 0, y: 10)
        })
    }
}
struct ContentView_Previews: PreviewProvider {
    static var previews: some View {
        ContentView()
    }
} ```
2个回答

2
在SwiftUI中,视图反映状态数据,因此您不直接修改视图,而是修改状态数据,并基于状态构建视图。这是SwiftUI背后的核心原则,它允许您将视图关注点与驱动其的数据(在某些术语中为ViewModel)分离。
因此,假设我们有一个数据模型用于Card(使其符合Identifiable - 这将在稍后需要):
struct Card: Identifiable {
  let id = UUID()
  let name: String
}

接下来,在你的视图中定义一个卡片数组作为状态变量:

@State private var cards: [Card] = [Card(name: "foo")]

然后,页面可以使用ForEachList视图来显示这些卡片:

var body = some View {
  VStack() {
    Button("Add Card") {
       self.cards.append(Card(name: "I'm an added card"))
    }
    ForEach(cards) { card in
       CardView(for: card) // if your CardView had parameters
    }
  }
}

发生的事情是,按钮的闭包将一个新的Card实例添加到cards状态变量中。就这样。它不直接改变视图中的任何内容。视图看到了变化(这就是SwiftUI在幕后所做的),并重新呈现自己。
你需要让Card符合Identifiable协议的原因是让ForEach知道如何唯一地标识每张卡片。如果不符合可识别性,你可以使用关键路径,如下所示:
ForEach(cards) { card in
  // ...
}

1
非常感谢!您提供了非常清晰和连贯的解释。太棒了。问题已解决。 - Henry Hudson

0

看看这个:

import SwiftUI

struct ContentView: View {

    @State var cards: [CardView] = [CardView()]


    var body: some View {
        VStack {
            TextButton(action: {
                print("Button tapped")
                self.cards.append(CardView())

            }, text: "new card")
            ZStack {
                ForEach(cards, id: \.self) { card in
                    card
                        .rotationEffect(card.angle)

                }

            }
        }
    }
}

struct CardView: View, Hashable, Identifiable {

    var id = UUID()

    var angle : Angle {
        let angle = Angle(degrees: Double.random(in: 0...30))
        print(angle.degrees)
        return angle
    }
    var body: some View {
        ZStack {
            Rectangle()
                .fill(Color(#colorLiteral(red: 0.7450980544, green: 0.1568627506, blue: 0.07450980693, alpha: 1)))
                .frame(width: 100, height: 100 * 1.618)
                .cornerRadius(16)
                .shadow(color: Color(#colorLiteral(red: 0, green: 0, blue: 0, alpha: 1)).opacity(0.1), radius: 1, x: 0, y: 1)
                .shadow(color: Color(#colorLiteral(red: 0, green: 0, blue: 0, alpha: 1)).opacity(0.2), radius: 10, x: 0, y: 10)

            VStack {
                Text("Card \(angle.degrees)")
                    .font(.system(size: 10) )
                    .foregroundColor(.white)
                    .bold()
            }
        }
    }
}


struct TextButton: View {
    let action: () -> Void
    let text: String

    var body: some View {
        Button(action: action, label: {
            Text(text)
                .padding(.horizontal, 16)
                .padding(.vertical, 16)
                .foregroundColor(.white)
                .background(Color.blue)
                .cornerRadius(.infinity)
                .shadow(color: Color(#colorLiteral(red: 0, green: 0, blue: 0, alpha: 1)).opacity(0.1), radius: 1, x: 0, y: 1)
                .shadow(color: Color(#colorLiteral(red: 0, green: 0, blue: 0, alpha: 1)).opacity(0.2), radius: 10, x: 0, y: 10)
        })
    }
}
struct ContentView_Previews: PreviewProvider {
    static var previews: some View {
        ContentView()
    }
}

enter image description here


网页内容由stack overflow 提供, 点击上面的
可以查看英文原文,
原文链接