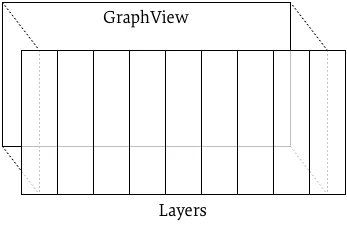
让我们实现一个图形视图,使用一堆高而瘦的层来减少需要重新绘制的量。我们将在添加样本时将层向左滑动,因此在任何时候,我们可能会有一个层悬挂在视图的左边缘,另一个层悬挂在视图的右边缘:
您可以在我的GitHub账户上找到完整的代码示例。
常量
让我们将每个图层的宽度设为32个点:
假设我们要将样本沿X轴以每个点一个样本的方式分布在空间中:
因此,我们可以推断每层的样本数量。让我们称一层的样本为一个 瓷砖:
当我们绘制图层时,不能仅在图层内严格绘制样本。我们必须在每个边缘上多绘制一个或两个样本,因为到这些样本的线会跨越图层的边缘。我们将这些称为填充样本:
iPhone 屏幕的最大尺寸为 320 点,因此我们可以计算出需要保留的最大样本数量:
(如果想在iPad上运行,请更改320。)
我们需要能够计算包含给定样本的瓷砖。正如您将看到的那样,即使样本编号为负数,我们也希望这样做,因为它将使后续计算更加容易:
static inline NSInteger tileForSampleIndex(NSInteger sampleIndex) {
return (NSInteger)floorf((float)sampleIndex / kSamplesPerTile);
}
实例变量
现在,为了实现GraphView,我们需要一些实例变量。我们需要存储用于绘制图形的层。我们希望能够根据每个瓷砖所绘制的图形查找每个层:
@implementation GraphView {
// Each key in _tileLayers is an NSNumber whose value is a tile number.
// The corresponding value is the CALayer that displays the tile's samples.
// There will be tiles that don't have a corresponding layer.
NSMutableDictionary *_tileLayers
在真实项目中,您需要将样本存储在模型对象中,并将引用传递给视图。但是对于此示例,我们将仅将样本存储在视图中:
// Samples are stored in _samples as instances of NSNumber.
NSMutableArray *_samples
由于我们不希望存储任意数量的样本,当_samples变得很大时,我们将放弃旧样本。但是,如果我们可以大多数情况下假装我们从未放弃过样本,那么它将简化实现。为此,我们跟踪曾经接收到的总样本数。
// I discard old samples from _samples when I have more than
// kMaxTiles' worth of samples. This is the total number of samples
// ever collected, including discarded samples.
NSInteger _totalSampleCount
我们应该避免阻塞主线程,因此我们将在单独的GCD队列上进行绘制。我们需要跟踪哪些瓦片需要在该队列上绘制。为了避免重复绘制挂起的瓦片,我们使用一个集合(可以消除重复项)而不是数组:
    // Each member of _tilesToRedraw is an NSNumber whose value
    // is a tile number to be redrawn.
    NSMutableSet *_tilesToRedraw;
这里是我们将进行绘制的GCD队列。
dispatch_queue_t _redrawQueue;
}
初始化 / 销毁
为了使这个视图在代码或nib中创建时都能正常工作,我们需要两种初始化方法:
- (id)initWithFrame:(CGRect)frame {
    if ((self = [super initWithFrame:frame])) {
        [self commonInit];
    }
    return self;
}

- (void)awakeFromNib {
    [self commonInit];
}
这两种方法都调用commonInit进行真正的初始化:
- (void)commonInit {
    _tileLayers = [[NSMutableDictionary alloc] init];
    _samples = [[NSMutableArray alloc] init];
    _tilesToRedraw = [[NSMutableSet alloc] init];
    _redrawQueue = dispatch_queue_create("MyView tile redraw", 0);
}
ARC不会为我们清理GCD队列:
- (void)dealloc {
    if (_redrawQueue != NULL) {
        dispatch_release(_redrawQueue);
    }
}
添加一个样本
要添加一个新的样本,我们选择一个随机数并将其附加到_samples。 我们还会递增_totalSampleCount。 如果_samples变得很大,我们会丢弃最旧的样本。
- (void)addRandomSample {
    [_samples addObject:[NSNumber numberWithFloat:120.f * ((double)arc4random() / UINT32_MAX)]];
    ++_totalSampleCount;
    [self discardSamplesIfNeeded];
然后,我们检查是否已经开始了新的瓷砖。如果是这样,我们找到正在绘制最旧的瓷砖的图层,并重复使用它来绘制新创建的瓷砖。
if (_totalSampleCount % kSamplesPerTile == 1) {
[self reuseOldestTileLayerForNewestTile]
}
现在我们重新计算所有层的布局,这将使它们向左移动一点,以便新样本在图表中可见。
[self layoutTileLayers]
最后,我们将瓷砖添加到重新绘制队列中。
[self queueTilesForRedrawIfAffectedByLastSample]
}
我们不想一个一个地丢弃样本。这样效率很低。相反,我们让垃圾堆积一段时间,然后一次性扔掉:
- (void)discardSamplesIfNeeded {
    if (_samples.count >= 2 * kMaxVisibleSamples) {
        [_samples removeObjectsInRange:NSMakeRange(0, _samples.count - kMaxVisibleSamples)];
    }
}
为了将图块重复使用在新的层中,我们需要找到最旧的图块所在的层:
- (void)reuseOldestTileLayerForNewestTile {
    // The oldest tile's layer should no longer be visible, so I can reuse it as the new tile's layer.
    NSInteger newestTile = tileForSampleIndex(_totalSampleCount - 1);
    NSInteger reusableTile = newestTile - _tileLayers.count;
    NSNumber *reusableTileObject = [NSNumber numberWithInteger:reusableTile];
    CALayer *layer = [_tileLayers objectForKey:reusableTileObject];
现在我们可以将其从旧键下的
_tileLayers字典中移除,并存储在新键下:
[_tileLayers removeObjectForKey:reusableTileObject]
[_tileLayers setObject:layer forKey:[NSNumber numberWithInteger:newestTile]]
默认情况下,当我们将重复使用的图层移动到新位置时,核心动画会使其滑动。我们不希望这样,因为它会成为一个空的橙色矩形在我们的图形上滑动。我们希望立即移动它:
[CATransaction begin]; {
[CATransaction setDisableActions:YES];
layer.frame = [self frameForTile:newestTile];
} [CATransaction commit];
}
当我们添加一个样本时,我们总是希望重绘包含该样本的瓷砖。如果新样本在先前瓷砖的填充范围内,则还需要重绘先前的瓷砖。
- (void)queueTilesForRedrawIfAffectedByLastSample {
[self queueTileForRedraw:tileForSampleIndex(_totalSampleCount - 1)];
[self queueTileForRedraw:tileForSampleIndex(_totalSampleCount - 1 - kPaddingSamples)];
}
将瓦片添加到重绘集合并分派一个块来在“_redrawQueue”上重绘它只是一个简单的操作。
- (void)queueTileForRedraw:(NSInteger)tile {
    [_tilesToRedraw addObject:[NSNumber numberWithInteger:tile]];
    dispatch_async(_redrawQueue, ^{
        [self rq_redrawOneTile];
    });
}
布局
系统会在 GraphView 首次出现时发送 layoutSubviews,以及任何时候其大小发生变化时(例如设备旋转重新调整大小)。而且只有当我们真正要出现在屏幕上时,才会收到 layoutSubviews 消息,并设置最终边界。因此,layoutSubviews 是设置平铺图层的好地方。
首先,我们需要根据需要创建或删除图层,以便拥有适合我们大小的正确图层。然后,我们需要通过适当设置它们的框架来布置这些图层。最后,对于每个图层,我们需要排队重绘其平铺。
- (void)layoutSubviews {
[self adjustTileDictionary];
[CATransaction begin]; {
[CATransaction setDisableActions:YES];
[self layoutTileLayers];
} [CATransaction commit];
for (NSNumber *key in _tileLayers) {
[self queueTileForRedraw:key.integerValue];
}
}
调整瓷砖字典意味着为每个可见的瓷砖设置一层,并删除非可见瓷砖的层。我们将每次从头开始重置字典,但我们会尝试重复使用已经创建的图层。需要图层的瓷砖是最新的瓷砖和前面的瓷砖,以便我们有足够的图层来覆盖视图。
- (void)adjustTileDictionary {
NSInteger newestTile = tileForSampleIndex(_totalSampleCount - 1);
NSInteger tileLayersNeeded = 1 + ceilf(self.bounds.size.width / kLayerWidth);
NSInteger oldestTile = newestTile - tileLayersNeeded + 1;
NSMutableArray *spareLayers = [[_tileLayers allValues] mutableCopy];
[_tileLayers removeAllObjects];
for (NSInteger tile = oldestTile; tile <= newestTile; ++tile) {
CALayer *layer = [spareLayers lastObject];
if (layer) {
[spareLayers removeLastObject];
} else {
layer = [self newTileLayer];
}
[_tileLayers setObject:layer forKey:[NSNumber numberWithInteger:tile]];
}
for (CALayer *layer in spareLayers) {
[layer removeFromSuperlayer];
}
}
第一次和每当视图变得足够宽时,我们需要创建新的层。在创建视图时,我们会告诉它避免动画其内容或位置。否则,默认情况下它会进行动画。
- (CALayer *)newTileLayer {
    CALayer *layer = [CALayer layer];
    layer.backgroundColor = [UIColor greenColor].CGColor;
    layer.actions = [NSDictionary dictionaryWithObjectsAndKeys:
        [NSNull null], @"contents",
        [NSNull null], @"position",
        nil];
    [self.layer addSublayer:layer];
    return layer;
}
事实上,铺设瓷砖层只需设置每个图层的框架即可。
- (void)layoutTileLayers {
    [_tileLayers enumerateKeysAndObjectsUsingBlock:^(id key, id obj, BOOL *stop) {
        CALayer *layer = obj;
        layer.frame = [self frameForTile:[key integerValue]];
    }];
}
当然,关键在于计算每个图层的框架。y、宽度和高度部分很容易:
- (CGRect)frameForTile:(NSInteger)tile {
    CGRect myBounds = self.bounds;
    CGFloat x = [self xForTile:tile myBounds:myBounds];
    return CGRectMake(x, myBounds.origin.y, kLayerWidth, myBounds.size.height);
}
计算瓦片框架的x坐标,我们需要计算瓦片中第一个样本的x坐标。
- (CGFloat)xForTile:(NSInteger)tile myBounds:(CGRect)myBounds {
    return [self xForSampleAtIndex:tile * kSamplesPerTile myBounds:myBounds];
}
计算样本的x坐标需要一些思考。我们希望最新的样本位于视图的右侧边缘,第二新的样本位于其左侧
kPointsPerSample个点处,以此类推:
- (CGFloat)xForSampleAtIndex:(NSInteger)index myBounds:(CGRect)myBounds {
    return myBounds.origin.x + myBounds.size.width - kPointsPerSample * (_totalSampleCount - index);
}
重绘
现在我们可以讨论如何实际绘制瓦片。我们将在一个单独的GCD队列上进行绘制。由于我们不能同时从两个线程安全地访问大多数Cocoa Touch对象,因此我们需要小心处理。我们将在所有在_redrawQueue上运行的方法前缀使用rq_,以提醒自己我们不在主线程上。
要重新绘制一个瓦片,我们需要获取瓦片编号、瓦片的图形边界和要绘制的点。所有这些东西都来自我们可能在主线程上修改的数据结构,因此我们只能在主线程上访问它们。因此,我们会调度回到主队列:
- (void)rq_redrawOneTile {
__block NSInteger tile;
__block CGRect bounds;
CGPoint pointStorage[kSamplesPerTile + kPaddingSamples * 2];
CGPoint *points = pointStorage;
__block NSUInteger pointCount;
dispatch_sync(dispatch_get_main_queue(), ^{
tile = [self dequeueTileToRedrawReturningBounds:&bounds points:points pointCount:&pointCount];
});
恰巧可能没有需要重绘的瓷砖。如果您回顾一下queueTilesForRedrawIfAffectedByLastSample,您会发现它通常尝试两次排队相同的瓷砖。由于_tilesToRedraw是一个集合(而不是数组),因此重复项被丢弃,但rq_redrawOneTile仍然被触发了两次。因此,我们需要检查是否确实有需要重绘的瓷砖:
    if (tile == NSNotFound)
        return;
现在我们需要实际绘制瓷砖的样本:
UIImage *image = [self rq_imageWithBounds:bounds points:points pointCount:pointCount];
最后,我们需要更新瓦片的图层以显示新图像。我们只能在主线程上触摸一个图层:
    dispatch_async(dispatch_get_main_queue(), ^{
        [self setImage:image forTile:tile];
    });
}
这是我们实际绘制图层图像的方式。我假设您已经了解足够的Core Graphics以便理解以下内容:
- (UIImage *)rq_imageWithBounds:(CGRect)bounds points:(CGPoint *)points pointCount:(NSUInteger)pointCount {
    UIGraphicsBeginImageContextWithOptions(bounds.size, YES, 0); {
        CGContextRef gc = UIGraphicsGetCurrentContext();
        CGContextTranslateCTM(gc, -bounds.origin.x, -bounds.origin.y);

        [[UIColor orangeColor] setFill];
        CGContextFillRect(gc, bounds);

        [[UIColor whiteColor] setStroke];
        CGContextSetLineWidth(gc, 1.0);
        CGContextSetLineJoin(gc, kCGLineCapRound);
        CGContextBeginPath(gc);
        CGContextAddLines(gc, points, pointCount);
        CGContextStrokePath(gc);
    }
    UIImage *image = UIGraphicsGetImageFromCurrentImageContext();
    UIGraphicsEndImageContext();
    return image;
}
但是我们仍然需要获取瓦片、图形边界和绘制点。我们派发回主线程来完成它:
- (NSInteger)dequeueTileToRedrawReturningBounds:(CGRect *)boundsOut points:(CGPoint *)pointsOut pointCount:(NSUInteger *)pointCountOut {
NSInteger tile = [self dequeueTileToRedraw];
if (tile == NSNotFound)
return NSNotFound;
图形边界就是瓦片的边界,就像我们之前计算用于设置图层框架的边界一样。
*boundsOut = [self frameForTile:tile]
我需要从瓷砖的第一个样本之前的填充样本开始绘图。但是,在具有足够的样本填充视图之前,我的瓷砖编号可能实际上为负数!因此,我需要确保不尝试访问负索引处的样本:
NSInteger sampleIndex = MAX(0, tile * kSamplesPerTile - kPaddingSamples)
我们还需要确保在计算停止绘制图形的样本时,不要尝试超出样本的末尾:
NSInteger endSampleIndex = MIN(_totalSampleCount, tile * kSamplesPerTile + kSamplesPerTile + kPaddingSamples)
当我实际访问样本值时,需要考虑我已经丢弃的样本:
NSInteger discardedSampleCount = _totalSampleCount - _samples.count;
现在我们可以计算要绘制的实际点:
    CGFloat x = [self xForSampleAtIndex:sampleIndex myBounds:self.bounds];
    NSUInteger count = 0;
    for ( ; sampleIndex < endSampleIndex; ++sampleIndex, ++count, x += kPointsPerSample) {
        pointsOut[count] = CGPointMake(x, [[_samples objectAtIndex:sampleIndex - discardedSampleCount] floatValue]);
    }
我可以返回点数和方块编号:
    *pointCountOut = count;
    return tile;
}
这里是我们实际上如何从重新绘制队列中取出一个瓷砖。请记住,队列可能为空:
- (NSInteger)dequeueTileToRedraw {
    NSNumber *number = [_tilesToRedraw anyObject];
    if (number) {
        [_tilesToRedraw removeObject:number];
        return number.integerValue;
    } else {
        return NSNotFound;
    }
}
最后,这是我们如何将瓷砖层的内容设置为新图像。请记住,我们回到主队列执行此操作:
- (void)setImage:(UIImage *)image forTile:(NSInteger)tile {
    CALayer *layer = [_tileLayers objectForKey:[NSNumber numberWithInteger:tile]];
    if (layer) {
        layer.contents = (__bridge id)image.CGImage;
    }
}
让它更加动感十足
如果你按照上述步骤进行操作,它会正常工作。但是,当新样本进来时,你可以通过对图层重新定位进行动画处理,使其看起来更加美观。这非常简单。我们只需修改newTileLayer,使其为position属性添加动画效果:
- (CALayer *)newTileLayer {
    CALayer *layer = [CALayer layer];
    layer.backgroundColor = [UIColor greenColor].CGColor;
    layer.actions = [NSDictionary dictionaryWithObjectsAndKeys:
        [NSNull null], @"contents",
        [self newTileLayerPositionAnimation], @"position",
        nil];
    [self.layer addSublayer:layer];
    return layer;
}
我们可以这样创建动画:
- (CAAnimation *)newTileLayerPositionAnimation {
    CABasicAnimation *animation = [CABasicAnimation animationWithKeyPath:@"position"];
    animation.duration = 0.1;
    animation.timingFunction = [CAMediaTimingFunction functionWithName:kCAMediaTimingFunctionLinear];
    return animation;
}
你需要将持续时间设置为与新样本到达的速度相匹配。