如何在我的应用程序设置包中显示应用程序版本修订号?

94

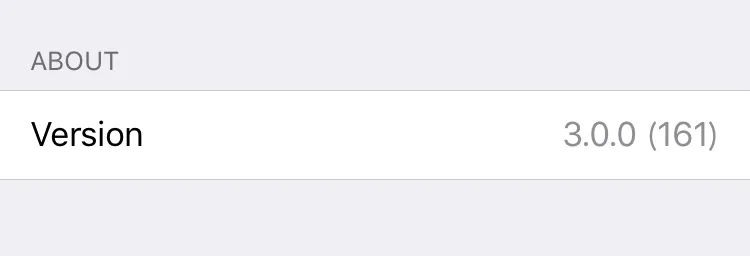
我想在我的应用程序设置束中包含应用程序版本和内部修订版本,类似于1.0.1(r1243)。

Root.plist文件包含以下片段...

     <dict>
        <key>Type</key>
        <string>PSTitleValueSpecifier</string>
        <key>Title</key>
        <string>Version</string>
        <key>Key</key>
        <string>version_preference</string>
        <key>DefaultValue</key>
        <string>VersionValue</string>
        <key>Values</key>
        <array>
            <string>VersionValue</string>
        </array>
        <key>Titles</key>
        <array>
            <string>VersionValue</string>
        </array>
    </dict>

我希望在构建时替换 "VersionValue" 字符串。

我有一个脚本可以从我的存储库中提取版本号,现在我需要一种方法在构建时处理(预处理)Root.plist文件,并替换修订号,而不影响源文件。

13个回答

71

还有一种比前面两个答案都简单得多的解决方案。苹果在大多数安装程序中捆绑了一个名为PlistBuddy的命令行工具,并在Leopard中将其包含在/usr/libexec/PlistBuddy中。

假设您已经将版本值提取到$newVersion中,由于您想要替换VersionValue,因此可以使用以下命令:

/usr/libexec/PlistBuddy -c "Set :VersionValue $newVersion" /path/to/Root.plist

不需要纠结于sed或正则表达式,这种方法相当简单。详细指令请参考man page。您可以使用PlistBuddy添加、删除或修改属性列表中的任何条目。例如,我的一个朋友在博客《使用PlistBuddy增加Xcode构建号》中介绍了如何使用PlistBuddy递增构建号。

注意: 如果只提供属性列表的路径,PlistBuddy将进入交互模式,因此您可以在决定保存更改之前发布多个命令。我强烈建议在放入构建脚本之前这样做。


21
我花了一些时间才找到正确的方法来引用我的plist文件中的版本号;在我的情况下,这个方法是/usr/libexec/PlistBuddy Settings.bundle/Root.plist -c“set PreferenceSpecifiers:0:DefaultValue $newversion” - 希望对其他人有用。 - JosephH
Quinn Taylor,JosephH,感谢你们的回答,我成功地在Settings.bundle中自动实现了我的应用程序版本号。给你们点赞;-) - Niko
7
在自定义的“运行脚本”构建阶段中,我需要包含更多到Root.plist的路径:/usr/libexec/PlistBuddy ${TARGET_BUILD_DIR}/${FULL_PRODUCT_NAME}/Settings.bundle/Root.plist -c "set PreferenceSpecifiers:0:DefaultValue $newVersion"。 - Chris Vasselli
2
仅为完整起见,这是另一种使用PListBuddy的方法,适用于我:http://xcodehelp.blogspot.com/2012/05/add-version-number-to-settings-screen.html - koen
最正确的方式是 /usr/libexec/PlistBuddy -c "Set :PreferenceSpecifiers:0:DefaultValue ${newVersion}" "${TARGET_BUILD_DIR}/${CONTENTS_FOLDER_PATH}/Settings.bundle/Root.plist" - kambala

66

我的懒人解决方案是从我的应用程序代码中更新版本号。您可以在Root.plist中设置默认值(或空白值),然后在启动代码的某个地方:

NSString *version = [[[NSBundle mainBundle] infoDictionary] objectForKey:@"CFBundleVersion"];
[[NSUserDefaults standardUserDefaults] setObject:version forKey:@"version_preference"];

唯一的限制是您的应用程序必须至少运行一次,才能在设置面板中显示更新版本。
您可以进一步实现这个想法,并更新应用程序已启动的次数计数器,或其他有趣的信息。

9
除非用户在启动您的应用程序之前进入设置,否则此方法可行。 - Moshe
9
@Moshe 确实,但为了更优雅地处理这个问题,你可以在.plist文件中指定一个默认值,例如'尚未启动'。 - Carlos P
1
尽管大多数开发人员可能会将CFBundleShortVersionStringCFBundleVersion设置为相同的值,但实际上CFBundleShortVersionString苹果希望您考虑的发布版本,这是您向用户展示的版本。 CFBundleVersion可能是一个内部版本号,如果不同,您可能不应该向用户显示它。 - Nate
3
我是否遗漏了什么?这正是我所做的,但值没有被改变。你们是否没有使用标题属性,我认为它是只读的? - samson
2
更新应用程序时还存在另一个问题。设置包仍将显示旧的构建版本,直到更新后的应用程序至少启动一次为止。 - Legoless

65

参考@Quinn的答案,这里是我用来实现此功能的完整过程和工作代码。

  • 向您的应用程序添加设置包。 不要重命名它。
  • 在文本编辑器中打开Settings.bundle / Root.plist

将其内容替换为:

<?xml version="1.0" encoding="UTF-8"?>
<!DOCTYPE plist PUBLIC "-//Apple//DTD PLIST 1.0//EN"     "http://www.apple.com/DTDs/PropertyList-1.0.dtd">
<plist version="1.0">
<dict>
    <key>PreferenceSpecifiers</key>
    <array>
        <dict>
            <key>Title</key>
            <string>About</string>
            <key>Type</key>
            <string>PSGroupSpecifier</string>
        </dict>
        <dict>
            <key>DefaultValue</key>
            <string>DummyVersion</string>
            <key>Key</key>
            <string>version_preference</string>
            <key>Title</key>
            <string>Version</string>
            <key>Type</key>
            <string>PSTitleValueSpecifier</string>
        </dict>
    </array>
    <key>StringsTable</key>
    <string>Root</string>
</dict>
</plist>
  • 创建一个运行脚本构建阶段,将其移动到复制资源包阶段之后。添加以下代码:

cd "${BUILT_PRODUCTS_DIR}"
buildVersion=$(/usr/libexec/PlistBuddy -c "Print CFBundleVersion" "${INFOPLIST_PATH}" )
/usr/libexec/PlistBuddy -c "Set PreferenceSpecifiers:1:DefaultValue $buildVersion" "${WRAPPER_NAME}/Settings.bundle/Root.plist"
  • 将MyAppName替换为您实际应用程序的名称,并将PreferenceSpecifiers后面的1替换为设置中版本条目的索引。上面的Root.plist示例将其放在索引1处。


  • 我尝试了这个方法,我看到我的设置包中的标题值发生了变化。标题出现在InAppSettingsKit中,但是该值从初始版本开始就没有改变过。该标题从未出现在设置应用程序中。我放弃了,当用户在菜单中选择“关于”时,我只会弹出一个对话框。 - bugloaf
    当使用此方法时,设置不是只读的。即,我可以在settings.app中访问版本号设置并进行编辑。 - motionpotion
    8
    @ben-clayton的bash脚本对我无效,所以我根据他的回答重新制作了一个,以下是它的内容:buildVersion=$(/usr/libexec/PlistBuddy -c "Print CFBundleShortVersionString" "${PROJECT_DIR}/${INFOPLIST_FILE}")/usr/libexec/PlistBuddy -c "Set PreferenceSpecifiers:3:DefaultValue $buildVersion" "${SRCROOT}/Settings.bundle/Root.plist" - Luis Ascorbe
    这种方法非常有效。我发现在第一行中不需要转义反单引号字符。此外,现代Xcode项目不再使用Classes文件夹;无论如何,人们应该根据需要调整文件路径,每个开发者都应该知道如何做到这一点。 - bio
    1
    你可以使用${INFOPLIST_PATH}来表示info plist路径。 - Tomer Even
    显示剩余4条评论

    30

    使用Ben Clayton的plist https://dev59.com/GHNA5IYBdhLWcg3wpvtg#12842530

    Copy Bundle Resources之后添加以下代码片段的Run script

    version=$(/usr/libexec/PlistBuddy -c "Print CFBundleShortVersionString" "$PROJECT_DIR/$INFOPLIST_FILE")
    build=$(/usr/libexec/PlistBuddy -c "Print CFBundleVersion" "$PROJECT_DIR/$INFOPLIST_FILE")
    /usr/libexec/PlistBuddy -c "Set PreferenceSpecifiers:1:DefaultValue $version ($build)" "$CODESIGNING_FOLDER_PATH/Settings.bundle/Root.plist"
    

    CFBundleShortVersionString之外添加CFBundleVersion

    这将生成如下版本:

    将其写入$CODESIGNING_FOLDER_PATH/Settings.bundle/Root.plist而不是$SRCROOT中的文件,会有一些好处:

    1. 它不会修改仓库的工作副本中的文件。
    2. 您不需要把路径转换为$SRCROOT中的Settings.bundle。路径可能会发生变化。

    在Xcode 7.3.1上测试。


    1
    如果您将脚本添加到项目方案的“构建”、“前置操作”部分中,我认为这是最佳答案。请参考安迪的回答。 - Vahid Amiri
    2
    这对我有效。只需记得将“DefaultValue”更改为特定于您的内容。例如,我想更改页脚,因此我使用了“FooterText”。您还需要更改“PreferenceSpecifiers”后面的数字,以便它与plist中的项目相对应。 - Richard Witherspoon

    19

    使用Xcode 11.4,您可以按照以下步骤在应用程序的设置捆绑中显示应用程序版本。


    设置 $(MARKETING_VERSION)$(CURRENT_PROJECT_VERSION) 变量

    注意:如果 Info.plist 中的 Bundle version string (short)Bundle version 键出现了 $(MARKETING_VERSION)$(CURRENT_PROJECT_VERSION) 变量,则可以跳过以下步骤并转到下一部分。

    1. 打开 Xcode 项目。
    2. 打开 项目导航器cmd1),选择您的项目以显示项目设置,然后选择应用目标。
    3. 选择 常规 选项卡。
    4. 身份 部分中,将 版本 字段内容更改为某个新值(例如 0.1.0),并将 构建 字段内容更改为某个新值(例如 12)。这两个更改将在 Info.plist 文件中创建 $(MARKETING_VERSION)$(CURRENT_PROJECT_VERSION) 变量。

    创建和配置设置捆绑

    1. 项目导航器 中,选择您的项目。
    2. 选择 文件 > 新建 > 文件…cmdN)。
    3. 选择 iOS 选项卡。
    4. 资源 部分中选择 设置捆绑,然后单击 下一步创建
    5. 选择 Root.plist 并以源代码形式打开它。将其内容替换为以下代码:
    <?xml version="1.0" encoding="UTF-8"?>
    <!DOCTYPE plist PUBLIC "-//Apple//DTD PLIST 1.0//EN" "http://www.apple.com/DTDs/PropertyList-1.0.dtd">
    <plist version="1.0">
    <dict>
        <key>PreferenceSpecifiers</key>
        <array>
            <dict>
                <key>DefaultValue</key>
                <string></string>
                <key>Key</key>
                <string>version_preference</string>
                <key>Title</key>
                <string>Version</string>
                <key>Type</key>
                <string>PSTitleValueSpecifier</string>
            </dict>
        </array>
        <key>StringsTable</key>
        <string>Root</string>
    </dict>
    </plist>
    

    添加运行脚本

    1. 项目导航器(Project Navigator)中,选择你的项目。
    2. 选择应用程序目标(app target)。
    3. 选择构建阶段(Build Phases)选项卡。
    4. 点击+ > 新建"Run Script"阶段
    5. 将新阶段拖放到"Copy Bundle Resources" 部分之前的任意位置。这样,脚本将在编译应用程序之前执行。
    6. 打开新添加的"Run Script"阶段,添加以下脚本:
    version="$MARKETING_VERSION"
    build="$CURRENT_PROJECT_VERSION"
    /usr/libexec/PlistBuddy -c "Set PreferenceSpecifiers:0:DefaultValue $version ($build)" "${SRCROOT}/Settings.bundle/Root.plist"
    

    启动应用

    1. 在设备或模拟器上运行产品 (cmdR)。
    2. 一旦应用程序启动,在设备或模拟器上打开设置应用程序并在第三方应用程序列表中选择您的应用程序。应用程序版本应如下所示:


    来源


    这对我来说会抛出一个错误:Set: Entry, "PreferenceSpecifiers:0:DefaultValue", Does Not Exist - Jordan H
    4
    这对我起作用了:/usr/libexec/PlistBuddy "$SRCROOT/AppName/Settings.bundle/Root.plist" -c "set PreferenceSpecifiers:0:DefaultValue $version"。该命令会设置一个默认值 $version/usr/libexec/PlistBuddy "$SRCROOT/AppName/Settings.bundle/Root.plist" 文件中的 PreferenceSpecifiers:0 中。 - Jordan H
    谢谢。这对我来说意义重大。但我的文件名是Settings-Watch.bundle,并且已删除($build) - Kurt L.
    1
    太棒了!对我来说,关键的帮助是使用@Ben Clayton的答案,但修改运行脚本以使用$MARKETING_VERSION和$CURRENT_PROJECT_VERSION,正如你所指出的那样。这对我来说是必要的,因为这些版本号现在实际上并没有直接存储在Info.plist中,因此在运行脚本中读取Info.plist在这种情况下并没有帮助(这是Xcode的默认设置)。 - Mete
    哦,还有一个小细节,但是你的运行脚本不必要地重新定义了 $MARKETING_VERSION -> $version - 你可以直接将 $MARKETING_VERSION 放入 PlistBuddy 命令中,使其成为一行代码。 - Mete
    2
    这对我来说很直接有效,谢谢!最好的逐步解答!! - FrugalResolution

    13

    基于这里的示例,这是我正在使用的脚本,用于自动更新设置捆绑版本号:

    #! /usr/bin/env python
    import os
    from AppKit import NSMutableDictionary
    
    settings_file_path = 'Settings.bundle/Root.plist' # the relative path from the project folder to your settings bundle
    settings_key = 'version_preference' # the key of your settings version
    
    # these are used for testing only
    info_path = '/Users/mrwalker/developer/My_App/Info.plist'
    settings_path = '/Users/mrwalker/developer/My_App/Settings.bundle/Root.plist'
    
    # these environment variables are set in the XCode build phase
    if 'PRODUCT_SETTINGS_PATH' in os.environ.keys():
        info_path = os.environ.get('PRODUCT_SETTINGS_PATH')
    
    if 'PROJECT_DIR' in os.environ.keys():
        settings_path = os.path.join(os.environ.get('PROJECT_DIR'), settings_file_path)
    
    # reading info.plist file
    project_plist = NSMutableDictionary.dictionaryWithContentsOfFile_(info_path)
    project_bundle_version = project_plist['CFBundleVersion']
    
    # print 'project_bundle_version: '+project_bundle_version
    
    # reading settings plist
    settings_plist = NSMutableDictionary.dictionaryWithContentsOfFile_(settings_path)
      for dictionary in settings_plist['PreferenceSpecifiers']:
        if 'Key' in dictionary and dictionary['Key'] == settings_key:
            dictionary['DefaultValue'] = project_bundle_version
    
    # print repr(settings_plist)
    settings_plist.writeToFile_atomically_(settings_path, True)
    

    这是我在Settings.bundle中拥有的Root.plist:

    <?xml version="1.0" encoding="UTF-8"?>
    <!DOCTYPE plist PUBLIC "-//Apple//DTD PLIST 1.0//EN" "http://www.apple.com/DTDs/PropertyList-1.0.dtd">
    <plist version="1.0">
    <dict>
        <key>PreferenceSpecifiers</key>
        <array>
            <dict>
                <key>Title</key>
                <string>About</string>
                <key>Type</key>
                <string>PSGroupSpecifier</string>
            </dict>
            <dict>
                <key>DefaultValue</key>
                <string>1.0.0.0</string>
                <key>Key</key>
                <string>version_preference</string>
                <key>Title</key>
                <string>Version</string>
                <key>Type</key>
                <string>PSTitleValueSpecifier</string>
            </dict>
        </array>
        <key>StringsTable</key>
        <string>Root</string>
    </dict>
    </plist>
    

    非常有用 - 我在使用Python执行PlistBuddy时遇到了问题,我从来没有想过使用 NSDictionary(也没有意识到它可以让你如此轻松地访问plist文件) - Dov
    谢谢您的回复。有一个修改建议——按照您现在的方式,它会对源代码进行更改,而不是构建目录——这意味着您在设备或模拟器上看到的版本始终比实际构建版本落后一个版本。为了解决这个问题,我修改了您的脚本,先迭代源代码,然后再迭代构建目录,即:settings_path_build = os.path.join(os.environ.get('TARGET_BUILD_DIR'), settings_file_path_build)。 - xaphod
    另外,我还附加了githash:gitHash = subprocess.check_output(["git", "rev-parse", "--short", "HEAD"]).rstrip() - xaphod

    9
    其他答案存在一个问题,即运行脚本的构建阶段直到设置包装完毕后才会执行。因此,如果您的Info.plist版本为2.0.11并将其更新为2.0.12,然后构建/归档项目,则设置包仍将显示2.0.11。如果您打开设置包Root.plist,则可以看到版本号直到构建过程结束才会更新。您可以重新构建项目以正确更新设置包,或者将脚本添加到预构建阶段中...
    在XCode中,编辑项目目标的Scheme 单击BUILD方案上的披露箭头 然后,单击“Pre-actions”项 单击加号并选择“New Run Script Action” 将shell值设置为/bin/sh 将“Provide build settings from”设置为您的项目目标 将您的脚本添加到文本区域。以下脚本适用于我。您可能需要修改路径以匹配您的项目设置:
    versionString=$(/usr/libexec/PlistBuddy -c "Print CFBundleVersion" "${PROJECT_DIR}/${INFOPLIST_FILE}") /usr/libexec/PlistBuddy "$SRCROOT/Settings.bundle/Root.plist" -c "set PreferenceSpecifiers:0:DefaultValue $versionString"
    这将在构建/归档过程中正确运行脚本,使其在设置包装期间运行。如果您打开设置包Root.plist并构建/归档项目,则现在将看到版本号在构建过程开始时更新,您的设置包将显示正确的版本。

    这对我来说仍需要第二次构建,使用Xcode 10.0。 - Patrick
    1
    顺便说一句,我找到了一个更简单的方法来添加这个脚本:进入项目目标的“Build Phases”选项卡,然后点击“+”图标。选择“New Run Script Phase”,并在其中添加脚本代码。这是关键:将新的运行脚本点击并拖动到“Target Dependencies”下面的“Build Phases”列表的顶部,但在“Compile Sources”之前。这将与预构建脚本相同,并且更容易找到。 - Andy
    谢谢@Andy,你添加到“Build Phases”选项卡的解决方案完美地解决了问题。 - Patrick
    在@hirosh的上篇文章中,他们建议使用$ CODESIGNING_FOLDER_PATH,因为它在本地工作时不会影响工作副本。这是否适用于您的方式? - Patrick
    刚试了一下,没成功,想知道是否有其他方法可以防止它修改工作副本。 - Patrick
    显示剩余2条评论

    3
    我使用开源项目pListcompiler (http://sourceforge.net/projects/plistcompiler) 成功实现了我想要的功能。
    1. Using this compiler you can write the property file in a .plc file using the following format:

      plist {
          dictionary {
              key "StringsTable" value string "Root"
              key "PreferenceSpecifiers" value array [
                  dictionary {
                      key "Type" value string "PSGroupSpecifier"
                      key "Title" value string "AboutSection"
                  }
                  dictionary {
                      key "Type" value string "PSTitleValueSpecifier"
                      key "Title" value string "Version"
                      key "Key" value string "version"
                      key "DefaultValue" value string "VersionValue"
                      key "Values" value array [
                          string "VersionValue"
                      ]
                      key "Titles" value array [
                          string "r" kRevisionNumber
                      ]
                  }
              ]
          }
      }
      
    2. I had a custom run script build phase that was extracting my repository revision to .h file as described by brad-larson here.

    3. The plc file can contain preprocessor directives, like #define, #message, #if, #elif, #include, #warning, #ifdef, #else, #pragma, #error, #ifndef, #endif, xcode environment variables. So I was able to reference the variable kRevisionNumber by adding the following directive

      #include "Revision.h"
      
    4. I also added a custom script build phase to my xcode target to run the plcompiler every time the project is beeing build

      /usr/local/plistcompiler0.6/plcompile -dest Settings.bundle -o Root.plist Settings.plc
      

    就是这样了!


    这听起来好像需要花费很多功夫才能替换 plist 文件中的单个值... 在构建 plist 时能够访问变量的概念很酷,但使用专门为 plist 文件构建的工具会更容易。我在我的答案中描述了 PlistBuddy - 试试吧! - Quinn Taylor

    3

    由于上面的回答对我不起作用,因此我创建了自定义脚本。

    这将从Root.plist动态更新条目。

    使用下面的运行脚本。在xcode 10.3中经过验证,一定会有效。

    "var buildVersion" 是要显示在标题中的版本。

    标识符名称是以下的 "var version",用于设置.bundle Root.plist 中的标题。

    cd "${BUILT_PRODUCTS_DIR}"
    
    #set version name to your title identifier's string from settings.bundle
    var version = "Version"
    
    #this will be the text displayed in title
    longVersion=$(/usr/libexec/PlistBuddy -c "Print CFBundleVersion" "${INFOPLIST_PATH}")
    shortVersion=$(/usr/libexec/PlistBuddy -c "Print :CFBundleShortVersionString" ${TARGET_BUILD_DIR}/${INFOPLIST_PATH})
    buildVersion="$shortVersion.$longVersion"
    
    path="${WRAPPER_NAME}/Settings.bundle/Root.plist"
    
    settingsCnt=`/usr/libexec/PlistBuddy -c "Print PreferenceSpecifiers:" ${path} | grep "Dict"|wc -l`
    
    for (( idx=0; idx<$settingsCnt; idx++ ))
    do
    #echo "Welcome $idx times"
    val=`/usr/libexec/PlistBuddy -c "Print PreferenceSpecifiers:${idx}:Key" ${path}`
    #echo $val
    
    #if ( "$val" == "Version" )
    if [ $val == "Version" ]
    then
    #echo "the index of the entry whose 'Key' is 'version' is $idx."
    
    # now set it
    /usr/libexec/PlistBuddy -c "Set PreferenceSpecifiers:${idx}:DefaultValue $buildVersion" $path
    
    # just to be sure that it worked
    ver=`/usr/libexec/PlistBuddy -c "Print PreferenceSpecifiers:${idx}:DefaultValue" $path`
    #echo 'PreferenceSpecifiers:$idx:DefaultValue set to: ' $ver
    
    fi
    
    done
    

    Root.plist中的示例条目

        <dict>
            <key>Type</key>
            <string>PSTitleValueSpecifier</string>
            <key>Title</key>
            <string>Version</string>
            <key>DefaultValue</key>
            <string>We Rock</string>
            <key>Key</key>
            <string>Version</string>
        </dict>
    

    Working sample Root.plist entry


    3

    我根据 @Ben Clayton 的回答和 @Luis Ascorbe 和 @Vahid Amiri 的评论编写了一个工作示例:

    注意:这种方法修改了代码库的工作副本中的 Settings.bundle/Root.plist 文件。

    1. Add a settings bundle to your project root. Don't rename it

    2. Open Settings.bundle/Root.plist as SourceCode

      Replace the contents with:

      <?xml version="1.0" encoding="UTF-8"?>
      <!DOCTYPE plist PUBLIC "-//Apple//DTD PLIST 1.0//EN" "http://www.apple.com/DTDs/PropertyList-1.0.dtd">
      <plist version="1.0">
      <dict>
          <key>PreferenceSpecifiers</key>
          <array>
              <dict>
                  <key>DefaultValue</key>
                  <string></string>
                  <key>Key</key>
                  <string>version_preference</string>
                  <key>Title</key>
                  <string>Version</string>
                  <key>Type</key>
                  <string>PSTitleValueSpecifier</string>
              </dict>
          </array>
          <key>StringsTable</key>
          <string>Root</string>
      </dict>
      </plist>
      
    3. Add the following script to the Build, Pre-actions section of the project (target) scheme

      version=$(/usr/libexec/PlistBuddy -c "Print CFBundleShortVersionString" "$PROJECT_DIR/$INFOPLIST_FILE")
      build=$(/usr/libexec/PlistBuddy -c "Print CFBundleVersion" "$PROJECT_DIR/$INFOPLIST_FILE")
      
      /usr/libexec/PlistBuddy -c "Set PreferenceSpecifiers:0:DefaultValue $version ($build)" "${SRCROOT}/Settings.bundle/Root.plist"
      
    4. Build and Run the current scheme


    网页内容由stack overflow 提供, 点击上面的
    可以查看英文原文,
    原文链接