我使用UIBezierPath和CAShapeLayer在iOS中编写了以下半圆代码:
clockWiseLayer = [[CAShapeLayer alloc] init];
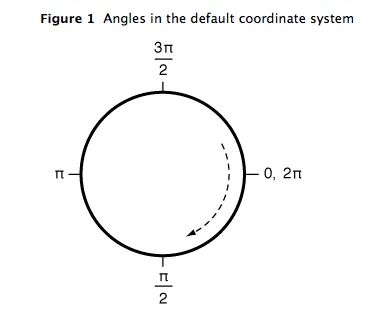
CGFloat startAngle = -M_PI_2;
CGFloat endAngle = M_PI + M_PI_2;
CGFloat width = CGRectGetWidth(imageView.frame)/2.0f + 30;
CGFloat height = CGRectGetHeight(imageView.frame)/2.0f +50;
CGPoint centerPoint = CGPointMake(width, height);
float radius = CGRectGetWidth(imageView.frame)/2+10;
clockWiseLayer.path = [UIBezierPath bezierPathWithArcCenter:centerPoint
radius:radius
startAngle:startAngle
endAngle:endAngle
clockwise:YES].CGPath;
clockWiseLayer.fillColor = [UIColor clearColor].CGColor;
clockWiseLayer.strokeColor = [UIColor blueColor].CGColor;
clockWiseLayer.borderColor = [UIColor greenColor].CGColor;
clockWiseLayer.backgroundColor = [UIColor redColor].CGColor;
clockWiseLayer.strokeStart = 0.0f;
clockWiseLayer.strokeEnd = 0.5f;
clockWiseLayer.lineWidth = 2.0f;
clockWiseLayer.borderWidth = 5.0f;
clockWiseLayer.shouldRasterize = NO;
[self.layer addSublayer:clockWiseLayer];
以下是结果。
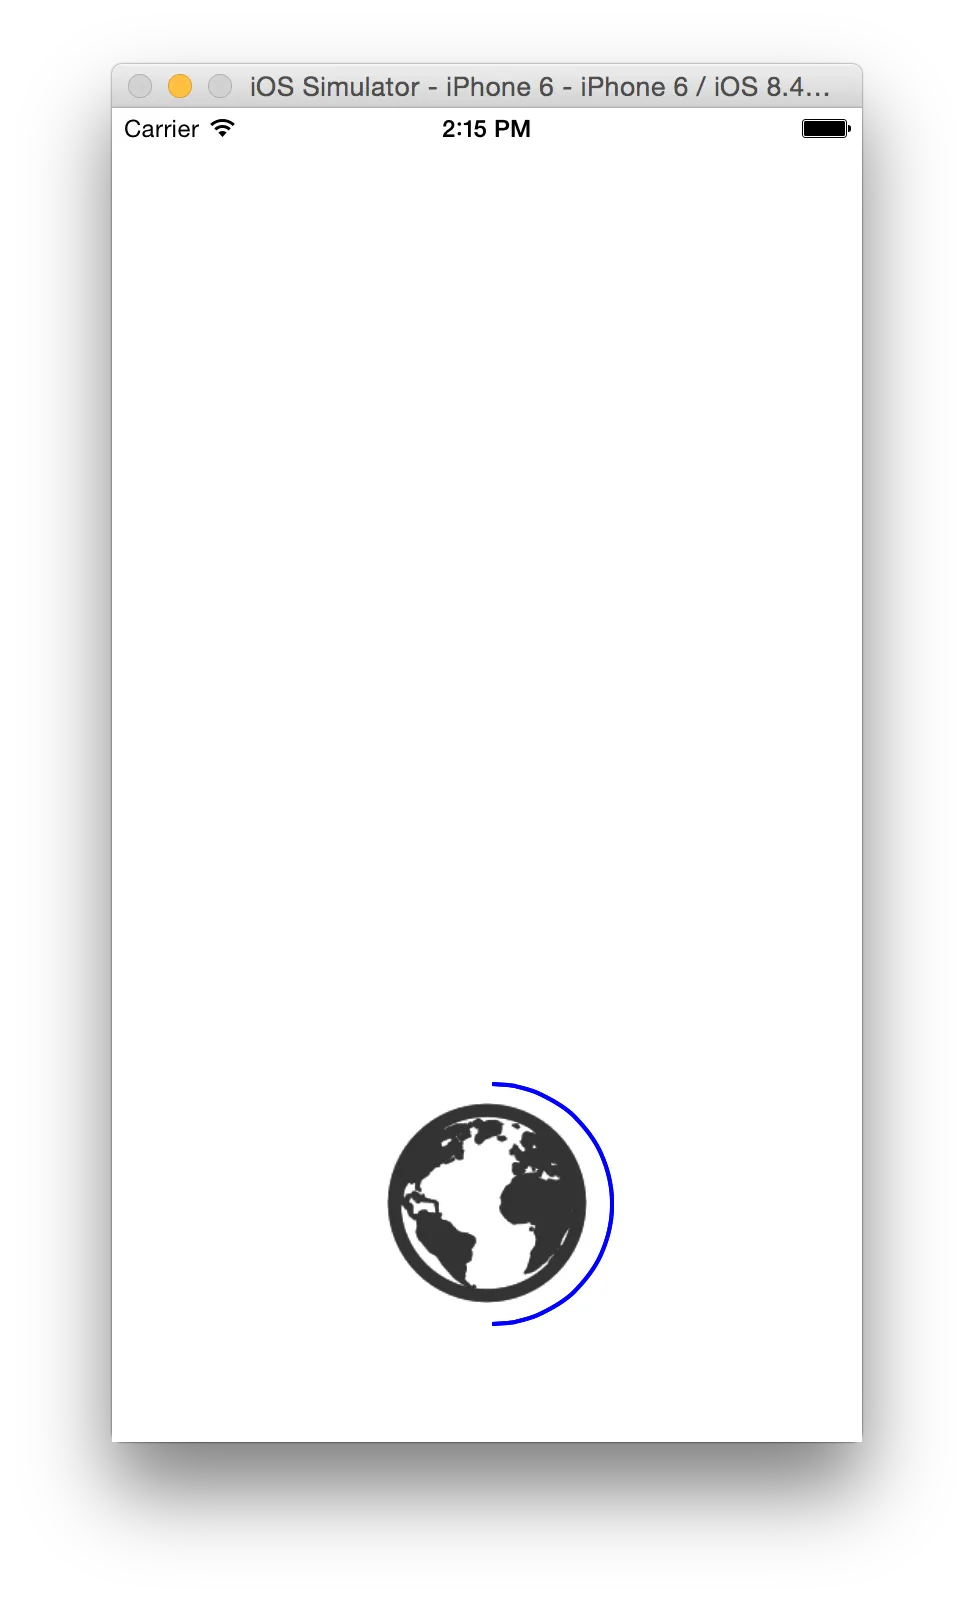
我希望这个蓝色的半圆在地球仪的相反面。
它是半圆,但我想要它在另一面,而且是逆时针方向。
当clockwise:NO时,我无法为其设置起始角度和终止角度。
谢谢。