在AppDelegate中设置初始视图控制器 - Swift

174

我想从appdelegate设置初始的视图控制器。我找到了一个非常好的答案,但是它是用Objective C编写的,我在Swift中尝试实现同样的内容时遇到了困难。

使用故事板编程设置初始视图控制器

- (BOOL)application:(UIApplication *)application didFinishLaunchingWithOptions:(NSDictionary*)launchOptions
{
    self.window = [[UIWindow alloc] initWithFrame:UIScreen.mainScreen.bounds];

    UIStoryboard *storyboard = [UIStoryboard storyboardWithName:@"MainStoryboard" bundle:nil];

    UIViewController *viewController = // determine the initial view controller here and instantiate   it with [storyboard instantiateViewControllerWithIdentifier:<storyboard id>];

    self.window.rootViewController = viewController;
    [self.window makeKeyAndVisible];

    return YES;
}

有人能帮忙吗?

我想让初始视图控制器依赖于某些条件,使用条件语句来实现。


这可能是一个重复的问题:https://dev59.com/8Wkv5IYBdhLWcg3wsCpO#14926009 - mfaani
25个回答

6

Swift 4:

在AppDelegate.swift文件中,在didFinishLaunchingWithOptions()函数内添加以下行...

    func application(_ application: UIApplication, didFinishLaunchingWithOptions launchOptions: [UIApplicationLaunchOptionsKey: Any]?) -> Bool {

    // Setting the Appropriate initialViewController

    // Set the window to the dimensions of the device
    self.window = UIWindow(frame: UIScreen.main.bounds)

    // Grab a reference to whichever storyboard you have the ViewController within
    let storyboard = UIStoryboard(name: "Name of Storyboard", bundle: nil)

    // Grab a reference to the ViewController you want to show 1st.
    let initialViewController = storyboard.instantiateViewController(withIdentifier: "Name of ViewController")

    // Set that ViewController as the rootViewController
    self.window?.rootViewController = initialViewController

    // Sets our window up in front
    self.window?.makeKeyAndVisible()

    return true
}

现在举个例子,当我们想要将用户跳转到登录界面、初始设置界面或应用程序主屏幕等时,我们通常会做类似于以下的操作。如果您也想执行此类操作,则可以使用此过程作为决策点。
想一想,例如您可以在NSUserDefaults中存储一个userLoggedIn Boolean值,if userLoggedIn == false { use this storyboard & initialViewController... } else { use this storyboard & initialViewController... }

它在一个新项目中添加了一个视图控制器后无法工作。始终从初始视图控制器开始。Xcode 11.2。可能出了什么问题? - Oleh H

6

我已经在Xcode 8和Swift 3.0上完成了,希望它能对您有所帮助,并且它的工作完美无缺。请使用以下代码:

var window: UIWindow?

func application(_ application: UIApplication, didFinishLaunchingWithOptions launchOptions: [UIApplicationLaunchOptionsKey: Any]?) -> Bool {       
    self.window = UIWindow(frame: UIScreen.main.bounds)
    let storyboard = UIStoryboard(name: "Main", bundle: nil)
    let initialViewController = storyboard.instantiateViewController(withIdentifier: "ViewController")
    self.window?.rootViewController = initialViewController
    self.window?.makeKeyAndVisible()
    return true
}

如果您正在使用导航控制器,则可以使用以下代码:

var window: UIWindow?

func application(_ application: UIApplication, didFinishLaunchingWithOptions launchOptions: [UIApplicationLaunchOptionsKey: Any]?) -> Bool {
    self.window = UIWindow(frame: UIScreen.main.bounds)
    let storyboard = UIStoryboard(name: "Main", bundle: nil)
    let navigationController:UINavigationController = storyboard.instantiateInitialViewController() as! UINavigationController
    let initialViewController = storyboard.instantiateViewControllerWithIdentifier("ViewController")
    navigationController.viewControllers = [initialViewController]
    self.window?.rootViewController = navigationController
    self.window?.makeKeyAndVisible()      
    return true
}

嗨... Mayank,我在Xcode 8和Swift 3.0中完成了。使用这个解决方案后会出现哪些错误?因为它正在工作。 - Kunal

5

以上/以下所有答案都会提示“storyboard中没有入口点”的警告。

如果您想要有2个(或更多)入口视图控制器,这些视图控制器取决于某些条件(如conditionVariable),那么您应该执行以下操作:

  • In your Main.storyboard create UINavigationController without rootViewController, set it as entry point
  • Create 2 (or more) "Show" segues into view controllers, assign them some id, say id1 and id2
  • Use next code:

    class AppDelegate: UIResponder, UIApplicationDelegate {
    
       var window: UIWindow?
    
       func application(application: UIApplication, didFinishLaunchingWithOptions launchOptions: [NSObject: AnyObject]?) -> Bool {
           let navigationController = window!.rootViewController! as! UINavigationController
           navigationController.performSegueWithIdentifier(conditionVariable ? "id1" : "id2")
    
           return true
       }
    
希望这可以帮到你。

1
“no entry point in storyboard” 错误通常是由项目配置引起的,可以通过删除进行修复。前往项目 > 信息 > 自定义iOS目标属性,然后删除“Main storyboard file base name”属性。警告将不再出现。 - orangemako

4

这是适用于Swift 4的完整解决方案,请在didFinishLaunchingWithOptions中实现

 func application(_ application: UIApplication, didFinishLaunchingWithOptions launchOptions: [UIApplicationLaunchOptionsKey: Any]?) -> Bool {

 let isLogin = UserDefaults.standard.bool(forKey: "Islogin")
    if isLogin{
        self.NextViewController(storybordid: "OtherViewController")


    }else{
        self.NextViewController(storybordid: "LoginViewController")

    }
}

将此函数编写在Appdelegate.swift的任何位置

  func NextViewController(storybordid:String)
{

    let storyBoard:UIStoryboard = UIStoryboard(name: "Main", bundle: nil)
    let exampleVC = storyBoard.instantiateViewController(withIdentifier:storybordid )
   // self.present(exampleVC, animated: true)
    self.window = UIWindow(frame: UIScreen.main.bounds)
    self.window?.rootViewController = exampleVC
    self.window?.makeKeyAndVisible()
}

3

对于 swift 4.0

在您的 AppDelegate.swift 文件中的 didfinishedlaunchingWithOptions 方法中,放入以下代码。

var window: UIWindow?


func application(_ application: UIApplication, didFinishLaunchingWithOptions launchOptions: [UIApplicationLaunchOptionsKey: Any]?) -> Bool {
    window = UIWindow(frame: UIScreen.main.bounds)
    window?.makeKeyAndVisible()

    let rootVC = MainViewController() // your custom viewController. You can instantiate using nib too. UIViewController(nib name, bundle)
    //let rootVC = UIViewController(nibName: "MainViewController", bundle: nil) //or MainViewController()
    let navController = UINavigationController(rootViewController: rootVC) // Integrate navigation controller programmatically if you want

    window?.rootViewController = navController

    return true
}

希望它能够完美运行。


3
如果您在故事板中没有设置初始视图控制器,则需要添加 window = UIWindow(frame: UIScreen.main.bounds)。 - Punit

3

如果你想在视图控制器中执行而不是在应用程序委托中执行:只需在视图控制器中获取对AppDelegate的引用,并使用正确的视图控制器作为其rootViewController重置其window对象。

let appDelegate = UIApplication.sharedApplication().delegate as! AppDelegate
appDelegate.window = UIWindow(frame: UIScreen.mainScreen().bounds)
let mainStoryboard: UIStoryboard = UIStoryboard(name: "Main", bundle: nil)
let yourVC = mainStoryboard.instantiateViewControllerWithIdentifier("YOUR_VC_IDENTIFIER") as! YourViewController
appDelegate.window?.rootViewController = yourVC
appDelegate.window?.makeKeyAndVisible()

3

Swift 5.3 +和iOS 13.0 +

将初始ViewController设置在"SceneDelegate.swift"中 //仅限

class SceneDelegate: UIResponder, UIWindowSceneDelegate {
    
    var window: UIWindow?
    func scene(_ scene: UIScene, willConnectTo session: UISceneSession, options connectionOptions: UIScene.ConnectionOptions) {
        guard let windowScene = (scene as? UIWindowScene) else { return }
        window = UIWindow(windowScene: windowScene)
        setInitialViewController()
        window?.makeKeyAndVisible()
    }
    
    func setInitialViewController()  {
        
        // Set Story board Controller
        /*
         let storyboard = UIStoryboard(name: "Main", bundle: nil)
         let vc = storyboard.instantiateViewController(withIdentifier: "ViewController")
         */
        
        // Set Custom Xib
        let vc = FrontVC(nibName: "FrontViewController", bundle: nil)
        
        // Navigation Controller
        let nav = UINavigationController(rootViewController: vc)
        nav.isNavigationBarHidden = true
        window?.rootViewController = nav
    }

3

Swift 5 & Xcode 11

在xCode 11中,appDelegate中的窗口解决方案已不再有效。他们将其移动到了SceneDelgate中。您可以在SceneDelgate.swift文件中找到它。

您会注意到现在有一个var window:UIWindow?

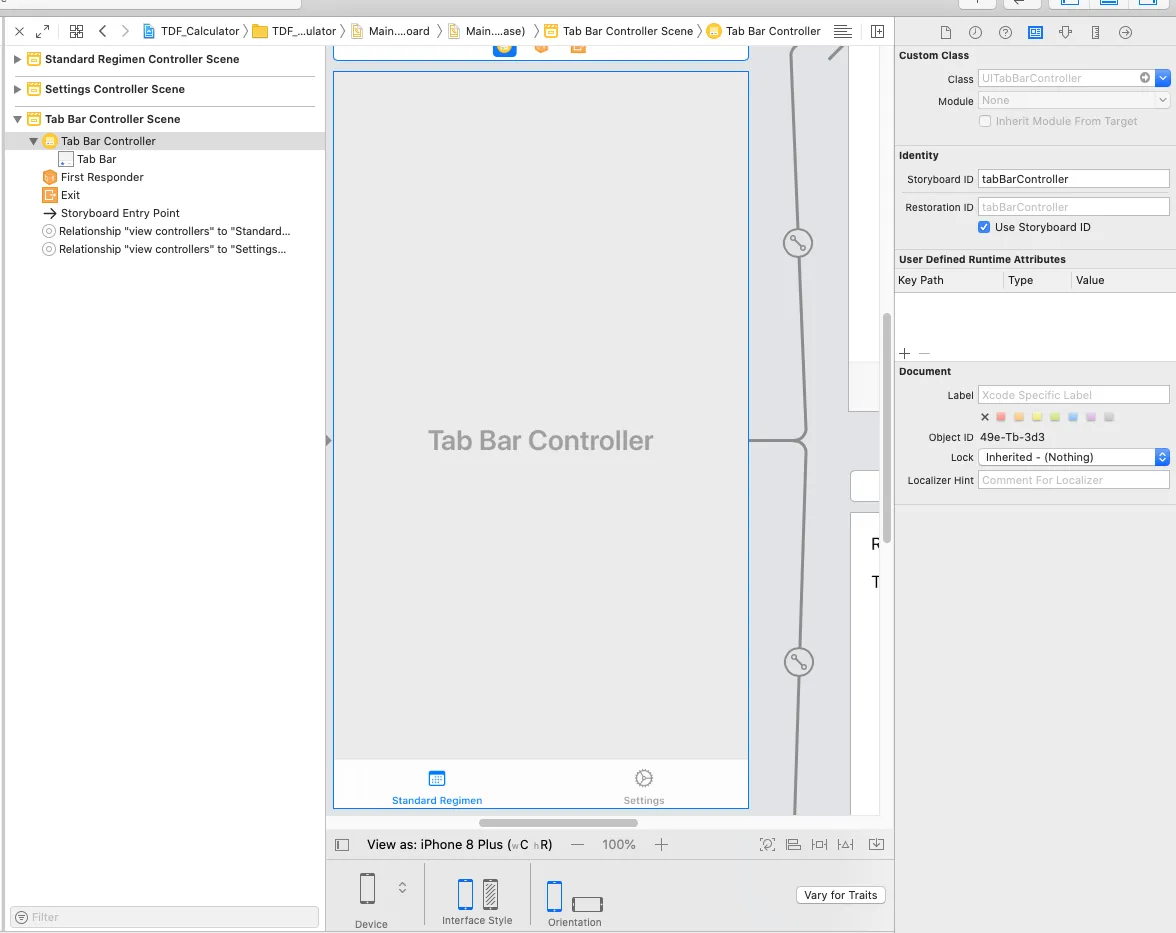
在我的情况下,我正在使用来自storyboard的TabBarController,并希望将其设置为rootViewController。

这是我的代码:

sceneDelegate.swift

func scene(_ scene: UIScene, willConnectTo session: UISceneSession, options connectionOptions: UIScene.ConnectionOptions) {
        // Use this method to optionally configure and attach the UIWindow `window` to the provided UIWindowScene `scene`.
        // If using a storyboard, the `window` property will automatically be initialized and attached to the scene.
        // This delegate does not imply the connecting scene or session are new (see `application:configurationForConnectingSceneSession` instead).

        self.window = self.window ?? UIWindow()//@JA- If this scene's self.window is nil then set a new UIWindow object to it.

        //@Grab the storyboard and ensure that the tab bar controller is reinstantiated with the details below.
        let storyboard = UIStoryboard(name: "Main", bundle: nil)
        let tabBarController = storyboard.instantiateViewController(withIdentifier: "tabBarController") as! UITabBarController

        for child in tabBarController.viewControllers ?? [] {
            if let top = child as? StateControllerProtocol {
                print("State Controller Passed To:")
                print(child.title!)
                top.setState(state: stateController)
            }
        }

        self.window!.rootViewController = tabBarController //Set the rootViewController to our modified version with the StateController instances
        self.window!.makeKeyAndVisible()

        print("Finished scene setting code")
        guard let _ = (scene as? UIWindowScene) else { return }
    }

请确保像我这样将其添加到正确的场景方法中。注意,在storyboard中使用的tabBarController或viewController需要设置“标识符名称”。 如何设置故事板ID 在我的情况下,我是为了设置stateController以跟踪选项卡视图之间共享变量而执行此操作。如果您想要执行相同的操作,请添加以下代码... StateController.swift
import Foundation

struct tdfvars{
    var rbe:Double = 1.4
    var t1half:Double = 1.5
    var alphaBetaLate:Double = 3.0
    var alphaBetaAcute:Double = 10.0
    var totalDose:Double = 6000.00
    var dosePerFraction:Double = 200.0
    var numOfFractions:Double = 30
    var totalTime:Double = 168
    var ldrDose:Double = 8500.0
}

//@JA - Protocol that view controllers should have that defines that it should have a function to setState
protocol StateControllerProtocol {
  func setState(state: StateController)
}

class StateController {
    var tdfvariables:tdfvars = tdfvars()
}

注意:只需使用您自己的变量或想要跟踪的任何内容,我只是在tdfvariables结构中列出了我的示例。
在TabController的每个视图中添加以下成员变量。
    class SettingsViewController: UIViewController {
    var stateController: StateController?
.... }

然后在同样的文件中添加以下内容:

extension SettingsViewController: StateControllerProtocol {
  func setState(state: StateController) {
    self.stateController = state
  }
}

这样做的作用是允许您避免在视图之间传递变量时采用单例模式的方式。这有利于采用依赖注入模型,长期来看比单例模式更好。

2

iOS 13+

SceneDelegate中:

var window: UIWindow?

func scene(_ scene: UIScene, willConnectTo session: UISceneSession, options 
connectionOptions: UIScene.ConnectionOptions) {
    guard let windowScene = (scene as? UIWindowScene) else { return }
    window = UIWindow(windowScene: windowScene)
    let vc = UIViewController() //Instead of UIViewController() we initilise our initial viewController
    window?.rootViewController = vc
    window?.makeKeyAndVisible()
}

1
func application(application: UIApplication, didFinishLaunchingWithOptions launchOptions: [NSObject: AnyObject]?) -> Bool {

    self.window = UIWindow(frame: UIScreen.mainScreen().bounds)
    let mainStoryboard: UIStoryboard = UIStoryboard(name: "Main", bundle: nil)
    var exampleViewController: ExampleViewController = mainStoryboard.instantiateViewControllerWithIdentifier("ExampleController") as! ExampleViewController

    self.window?.rootViewController = exampleViewController

    self.window?.makeKeyAndVisible()

    return true
}

网页内容由stack overflow 提供, 点击上面的
可以查看英文原文,
原文链接