如何在Visual Studio中为自定义配置文件添加配置转换?

30

我正在进行的项目涉及从配置文件中读取许多服务端点(url)。由于列表可能相当大,我决定将它们保存在自定义配置文件中,以保持我的 web.config 文件整洁小巧。我按如下所示将自定义部分包含到我的 Web 中:

<mySection configSource="myConfig.config" />

我的程序完美运行。

但是,在将项目部署到不同环境时出现了转换问题。我有三个 web.config 文件:

Web.config

Web.Uat.config

Web.Release.config

尽管 web.config 的转换有效,但自定义配置文件的转换在部署时失败。

是否有一种方法可以在部署期间转换自定义配置文件?


1
我对此进行了一些调查。找到了这个链接;离线是吗?这是你在寻找的东西吗?http://www.diaryofaninja.com/blog/2011/09/14/using-custom-webconfig-transformations-in-msbuild - Irshad
6个回答

27

默认情况下,Visual Studio仅转换web.config文件。

如果您需要具有DEV、UAT、PROD等环境的自定义配置文件和转换,则可以尝试以下方法:

  1. 使用Visual Studio的自定义扩展,例如SlowCheetah - XML Transforms,以获取配置转换预览功能。
  2. 从Nuget添加SlowCheetah到项目中,以提供内置转换。

一些详细信息:

从“扩展和更新”中添加VS扩展SlowCheetah Extensions and Updates屏幕截图

在您的myconfig.config上右键单击,然后选择添加转换: 扩展和更新屏幕

在每个定义的配置中插入自己的转换规则,如下所示:

<services xmlns:xdt="http://schemas.microsoft.com/XML-Document-Transform">
  <service name="WebApplication1.Services.Service2" xdt:Transform="Replace" xdt:Locator="Match(name)" >
    <endpoint address="http://localhost:57939/Services/DebugService" behaviorConfiguration="WebApplication1.Services.Service2AspNetAjaxBehavior"
      binding="webHttpBinding" contract="WebApplication1.Services.Service2" />
  </service>
</services>

这并没有提供问题的答案。如果要批评或请求作者澄清,请在他们的帖子下留言。-【来自审查】 - Ghasem
1
我认为这是对问题“...如何转换自定义配置文件...?”的答案。好的,我会详细说明它的工作原理。 - Michael
当我重新安装Visual Studio时,答案被downvote了。希望现在没问题了。 - Michael
4
它解决了问题,但我不得不将其添加为一个NuGet包。Visual Studio扩展能够显示“预览转换”,但在发布时它并没有进行转换。 - TejSoft
1
还有一个名为Fast Koala的Visual Studio Gallery扩展,它有一些细微的差别,但最终实现了相同的功能 - 此外,您还可以进行构建时间(而不是发布时间)转换:https://visualstudiogallery.msdn.microsoft.com/7bc82ddf-e51b-4bb4-942f-d76526a922a0 - BenAlabaster
我知道这个是老的了,但如果有人正在寻找并且不想安装东西,我添加了另一种方法的答案,它不需要安装扩展或nuget包。 - Alisson Reinaldo Silva

15

我想在Andoni Ripoll Jarauta的回答上做一些扩展。

我们面临着类似的问题。我想从web.config文件中提取连接字符串以限制合并冲突。我还想创建一个“发布”配置,其中包含静态信息。

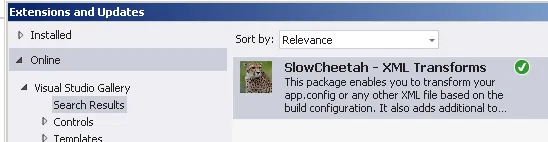
...很简单。创建一个自定义配置文件webdb.config,并更新web.config文件。

Ex. web.config

<connectionStrings configSource="WebDB.config"/>

wedbdb.config(需要 XML 版本="1.0" 才能进行转换)

<?xml version="1.0" encoding="utf-8"?>
<connectionStrings>
</connectionStrings>

接下来添加用于webdb.config的转换文件

enter image description here

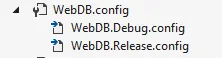
WebDB.Debug.config 示例:

<?xml version="1.0" encoding="utf-8"?>

<connectionStrings xdt:Transform="Replace" xmlns:xdt="http://schemas.microsoft.com/XML-Document-Transform">
    <add name="PRRADDataContainer" connectionString="metadata=~/PRRADData.csdl|~/PRRADData.ssdl|~/PRRADData.msl;provider=System.Data.SqlClient;provider connection string=';Data Source=localhost;Initial Catalog=;User ID=;Password=;multipleactiveresultsets=True;App=EntityFramework';" providerName="System.Data.EntityClient" />
    <add name="MyConnectionString" connectionString="Data Source=localhost;Initial Catalog=;Persist Security Info=True;User ID=;Password=;" providerName="System.Data.SqlClient" />
</connectionStrings>

WebDB.Release.config 示例:

<?xml version="1.0" encoding="utf-8"?>

<connectionStrings xdt:Transform="Replace" xmlns:xdt="http://schemas.microsoft.com/XML-Document-Transform">
    <add name="PRRADDataContainer" connectionString="metadata=~/PRRADData.csdl|~/PRRADData.ssdl|~/PRRADData.msl;provider=System.Data.SqlClient;provider connection string=';Data Source=prod_server;Initial Catalog=;User ID=;Password=;multipleactiveresultsets=True;App=EntityFramework';" providerName="System.Data.EntityClient" />
    <add name="MyConnectionString" connectionString="Data Source=prod_server;Initial Catalog=;Persist Security Info=True;User ID=;Password=;" providerName="System.Data.SqlClient" />
</connectionStrings>

接下来我们需要添加一个构建后事件。这可以通过简单地编辑CSPROJ文件来创建。

<UsingTask TaskName="TransformXml" AssemblyFile="$(MSBuildExtensionsPath32)\Microsoft\VisualStudio\v$(VisualStudioVersion)\Web\Microsoft.Web.Publishing.Tasks.dll" />
<Target Name="AfterBuild">
    <TransformXml Source="WebDB.config" Transform="WebDB.$(Configuration).config" Destination="WebDB.config" />
</Target>

现在,当我本地运行时,我会得到WebDB.Debug.config文件,当我发布代码时,我只需要确保选择“Release”作为配置源。 在两种情况下,构建时都将使用相应的文件更新WebDB.config文件。

注意:确保将webdb.config、webdb.debug.config和webdb.release.config设置为“不复制”,以便进行“复制到输出目录”选项。


无法使SlowCheetah的构建事件正常工作,但这似乎可以正确运行转换。SlowCheetah仍然具有“预览变换”选项,因此您可能仍希望仅获取它。此外,如果您没有获取NuGet包,它将提示您每次下载。我也不必设置“不复制”。 - General Grievance

8
我一直在使用SlowCheetah,但我发现有一个更优雅的解决方案。只需告诉构建根据构建配置生成 .config 文件即可。
在您的项目中有一个 app.Release.config 文件(或者根据您的部署需求可能会有更多),您只需要编辑项目文件(如果您使用 C# 编程,则是 .csproj 文件)。找到它的末尾,在最后一个 </ItemGroup></Project> 之间添加:
  </ItemGroup>
  <Import Project="$(MSBuildToolsPath)\Microsoft.CSharp.targets" />
  <UsingTask TaskName="TransformXml" AssemblyFile="$(MSBuildExtensionsPath32)\Microsoft\VisualStudio\v$(VisualStudioVersion)\Web\Microsoft.Web.Publishing.Tasks.dll" />
  <Target Name="AfterBuild">
    <PropertyGroup>
      <OutputTypeName>$(OutputType)</OutputTypeName>
      <OutputTypeName Condition="'$(OutputTypeName)'=='Library'">dll</OutputTypeName>
      <OutputTypeName Condition="'$(OutputTypeName)'=='Module'">dll</OutputTypeName>
      <OutputTypeName Condition="'$(OutputTypeName)'=='Winexe'">exe</OutputTypeName>
    </PropertyGroup>
    <TransformXml Source="Config\app.config" Transform="Config\app.$(Configuration).config" Destination="$(OutputPath)\$(AssemblyName).$(OutputTypeName).config" />
  </Target>
</Project>

保存并重新加载VisualStudio。以Release模式编译并检查bin / Release文件夹下的<MyProject>.config文件,转换完成。

此示例适用于Exe和Dll文件以及任何VisualStudio版本,因为包括此帖子的帮助


这个解决方案也适用于 web,(配置).config 文件?我正在使用 Visual Studio 2015 Web 应用程序。 - Dharti Sutariya

6

有另一种方法,不需要安装扩展程序,也不需要使用构建事件。

假设您的自定义配置文件如下:

  • myConfig.config
  • myConfig.Uat.config
  • myConfig.Release.config

然后在您的主要Web.config中添加以下内容:

<mySection configSource="myConfig.config" />

最后,在你的Web.Uat.config文件中添加以下转换代码:
<mySection configSource="myConfig.Uat.config" xdt:Transform="SetAttributes" />

这并不是对myConfig.config文件进行变换,而是覆盖应该使用的自定义配置文件的名称。您可以对Release和其他任何环境执行相同的操作。
您的myConfig.Uat.config不应包含变换,它应该是基本自定义配置文件的副本,并具有适用于自定义环境的适当值。
缺点是每次向基本自定义配置文件添加内容时,都需要将其添加到其他环境的配置文件中(即使该值在环境之间应该相同)。因此,我建议仅将这些自定义配置文件用于应在环境之间更改的设置。

0

由于OP在部署过程中询问了有关Web.config转换的问题,因此假设WPP已经存在。所以我对WPP进行了修改。

我使用以下代码片段来转换Umbraco自己的配置文件(但确实适用于任何配置文件):

<?xml version="1.0" encoding="utf-8"?>
<Project ToolsVersion="4.0" xmlns="http://schemas.microsoft.com/developer/msbuild/2003">
  <ItemGroup>
    <UmbracoConfigsToTransform Include="Config\umbracoSettings.config">
      <DestinationRelativePath>Config\umbracoSettings.config</DestinationRelativePath>
    </UmbracoConfigsToTransform>
  </ItemGroup>

  <PropertyGroup>
    <CollectWebConfigsToTransformDependsOn>
      $(CollectWebConfigsToTransformDependsOn);
      CollectUmbracoConfigsToTransform
    </CollectWebConfigsToTransformDependsOn>
  </PropertyGroup>

  <Target Name="CollectUmbracoConfigsToTransform">
    <!-- The logic comes from the 'CollectWebConfigsToTransform' task -->
    <ItemGroup>
      <WebConfigsToTransform Include="@(UmbracoConfigsToTransform)">
        <Exclude>false</Exclude>
        <TransformFile>$([System.String]::new($(WebPublishPipelineProjectDirectory)\$([System.IO.Path]::GetDirectoryName($([System.String]::new(%(DestinationRelativePath)))))).TrimEnd('\'))\%(Filename).$(Configuration)%(Extension)</TransformFile>
        <TransformOriginalFolder>$(TransformWebConfigIntermediateLocation)\original</TransformOriginalFolder>
        <TransformFileFolder>$(TransformWebConfigIntermediateLocation)\assist</TransformFileFolder>
        <TransformOutputFile>$(TransformWebConfigIntermediateLocation)\transformed\%(DestinationRelativePath)</TransformOutputFile>
        <TransformScope>$([System.IO.Path]::GetFullPath($(WPPAllFilesInSingleFolder)\%(DestinationRelativePath)))</TransformScope>
      </WebConfigsToTransform>
    </ItemGroup>
  </Target>
</Project>

我将其命名为Umbraco.wpp.targets并将其放置在项目的根目录中。然后WPP会自动导入它。
然后,您需要添加一个转换文件(在此示例中为Config\umbracoSettings.Release.config)。

0

我有一个类似的需求,需要转换一个自定义配置文件,但是在一个类库中。Andoni Ripoll Jarauta的解决方案在我直接构建项目时有效,但是当我构建另一个引用它的项目时,转换后的文件不会被复制。我发现除此之外,我还需要将转换后的文件添加到AssignTargetPathsDependsOn中才能实现这一点。这就是解决方法:

<PropertyGroup>
  <AssignTargetPathsDependsOn>
    $(AssignTargetPathsDependsOn);
    BuildCustomConfig;
  </AssignTargetPathsDependsOn>
</PropertyGroup>
<Import Project="$(MSBuildToolsPath)\Microsoft.CSharp.targets" />
<UsingTask TaskName="TransformXml" AssemblyFile="$(MSBuildExtensionsPath32)\Microsoft\VisualStudio\v$(VisualStudioVersion)\Web\Microsoft.Web.Publishing.Tasks.dll" />
<Target Name="BuildCustomConfig">
  <TransformXml Source="MyCustom.config" Transform="MyCustom.$(Configuration).config" Destination="$(OutputPath)\MyCustom.config" />
  <ItemGroup>
    <Content Include="$(OutputPath)\MyCustom.config" Condition="Exists('$(OutputPath)\MyCustom.config')">
      <Link>MyCustom.config</Link>
      <CopyToOutputDirectory>PreserveNewest</CopyToOutputDirectory>
    </Content>
  </ItemGroup>
</Target>

网页内容由stack overflow 提供, 点击上面的
可以查看英文原文,
原文链接