另一个ViewGroup:
片段是可以在Activity中显示的ViewGroup,但它需要一个容器。容器可以是任何布局(如FragmeLayout、LinearLayout等),不重要。
步骤1:
定义Activity布局:
<RelativeLayout xmlns:android="http://schemas.android.com/apk/res/android"
   android:layout_width="match_parent"
   android:layout_height="match_parent">
   <FrameLayout
       android:id="@+id/fragmentHolder"
       android:layout_width="match_parent"
       android:layout_height="wrap_content"
    />
</RelativeLayout>
步骤2:
定义片段布局:
<LinearLayout xmlns:android="http://schemas.android.com/apk/res/android"
    android:layout_width="match_parent"
    android:layout_height="match_parent"
    android:gravity="center"
    android:orientation="vertical">
    <EditText
       android:id="@+id/user"
       android:layout_width="wrap_content"
       android:layout_height="wrap_content"/>
    <EditText
       android:id="@+id/password"
       android:layout_width="wrap_content"
       android:layout_height="wrap_content"
       android:inputType="textPassword"/>
    <Button
       android:id="@+id/login"
       android:layout_width="wrap_content"
       android:layout_height="wrap_content"
       android:text="Login"/>
</LinearLayout>
步骤三:
创建 Fragment 类
public class LoginFragment extends Fragment {


    private Button login;
    private EditText username, password;

    public static LoginFragment getInstance(String username){
       Bundle bundle = new Bundle();
       bundle.putInt("USERNAME", username);
       LoginFragment fragment = new LoginFragment();
       fragment.setArguments(bundle);
       return fragment;
    }

    @Override
    public View onCreateView(LayoutInflater inflater, ViewGroup parent, Bundle savedInstanceState){
       View view = inflater.inflate(R.layout.login_fragment, parent, false);
       login = view.findViewById(R.id.login);
       username = view.findViewById(R.id.user);
       password = view.findViewById(R.id.password);
       String name = getArguments().getInt("USERNAME");
       username.setText(username);
       return view;
    }

}
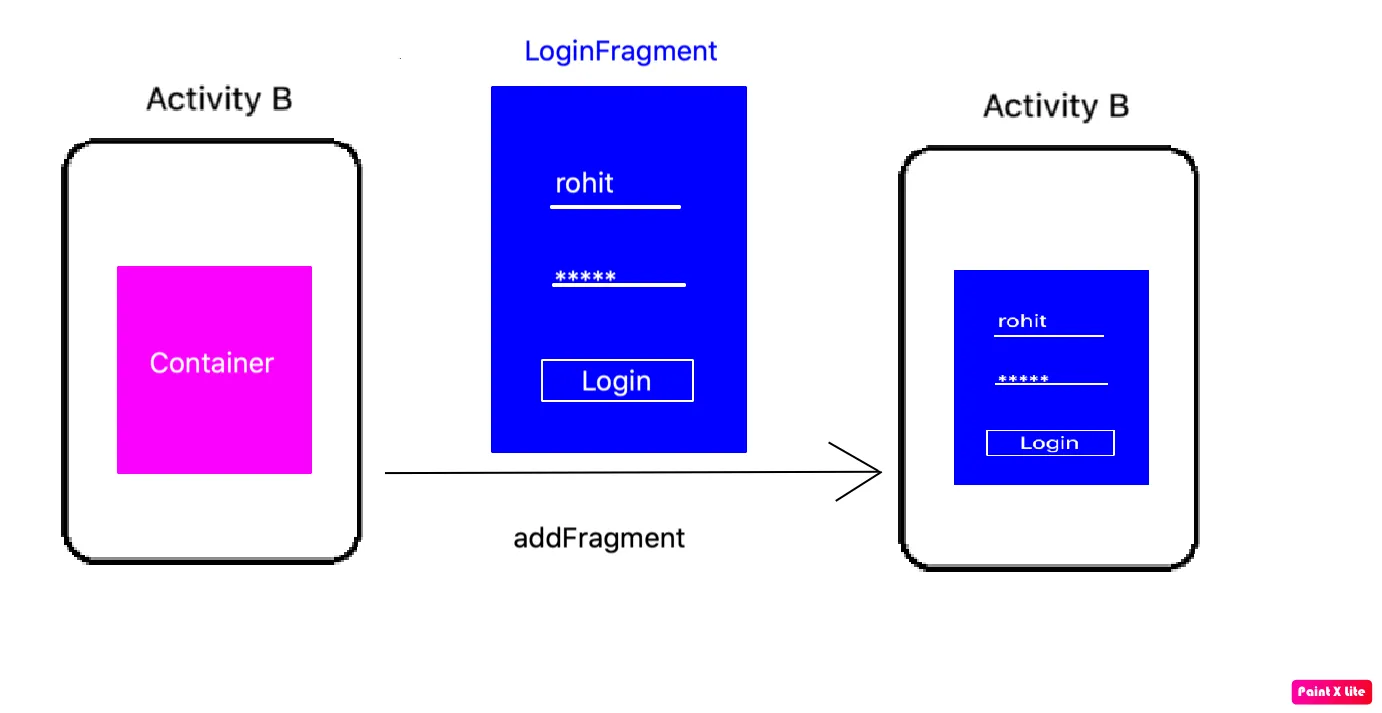
步骤四:
在Activity中添加碎片
public class ActivityB extends AppCompatActivity{

   private Fragment currentFragment;

   @Override
   protected void onCreate(Bundle savedInstanceState) {

       super.onCreate(savedInstanceState);
       setContentView(R.layout.activity_main);

       currentFragment = LoginFragment.getInstance("Rohit");
       getSupportFragmentManager()
                .beginTransaction()
                .add(R.id.fragmentHolder, currentFragment, "LOGIN_TAG")
                .commit();
   }

}
示例项目:
这段代码非常基础。如果您想学习更高级的Fragment主题,可以查看以下资源:
Woof - 学习正确使用Fragment
我的Android车库