我按照官方React Native文档(即https://facebook.github.io/react-native/docs/signed-apk-android)的步骤创建了一个签名的React Native apk文件,但应用程序在创建之后崩溃了。
于是我回到了最初,决定创建一个未编辑过的新应用程序并重新执行相同的步骤。但这个应用程序仍然崩溃了。我查看了StackOverflow上的所有讨论,并尝试了他们提出的解决方案,但都没有成功。请问有人能告诉我我哪里错了吗?以及如何解决它?
以下是我的build.gradle文件:
(在gradle中,Android Studio警告说无法解析符号“build”,但这并没有影响我在虚拟设备上运行的应用程序)
于是我回到了最初,决定创建一个未编辑过的新应用程序并重新执行相同的步骤。但这个应用程序仍然崩溃了。我查看了StackOverflow上的所有讨论,并尝试了他们提出的解决方案,但都没有成功。请问有人能告诉我我哪里错了吗?以及如何解决它?
以下是我的build.gradle文件:
(在gradle中,Android Studio警告说无法解析符号“build”,但这并没有影响我在虚拟设备上运行的应用程序)
apply plugin: "com.android.application"

import com.android.build.OutputFile

/**
 * The react.gradle file registers a task for each build variant (e.g. bundleDebugJsAndAssets
 * and bundleReleaseJsAndAssets).
 * These basically call `react-native bundle` with the correct arguments during the Android build
 * cycle. By default, bundleDebugJsAndAssets is skipped, as in debug/dev mode we prefer to load the
 * bundle directly from the development server. Below you can see all the possible configurations
 * and their defaults. If you decide to add a configuration block, make sure to add it before the
 * `apply from: "../../node_modules/react-native/react.gradle"` line.
 *
 * project.ext.react = [
 *   // the name of the generated asset file containing your JS bundle
 *   bundleAssetName: "index.android.bundle",
 *
 *   // the entry file for bundle generation
 *   entryFile: "index.android.js",
 *
 *   // whether to bundle JS and assets in debug mode
 *   bundleInDebug: false,
 *
 *   // whether to bundle JS and assets in release mode
 *   bundleInRelease: true,
 *
 *   // whether to bundle JS and assets in another build variant (if configured).
 *   // See http://tools.android.com/tech-docs/new-build-system/user-guide#TOC-Build-Variants
 *   // The configuration property can be in the following formats
 *   //         'bundleIn${productFlavor}${buildType}'
 *   //         'bundleIn${buildType}'
 *   // bundleInFreeDebug: true,
 *   // bundleInPaidRelease: true,
 *   // bundleInBeta: true,
 *
 *   // whether to disable dev mode in custom build variants (by default only disabled in release)
 *   // for example: to disable dev mode in the staging build type (if configured)
 *   devDisabledInStaging: true,
 *   // The configuration property can be in the following formats
 *   //         'devDisabledIn${productFlavor}${buildType}'
 *   //         'devDisabledIn${buildType}'
 *
 *   // the root of your project, i.e. where "package.json" lives
 *   root: "../../",
 *
 *   // where to put the JS bundle asset in debug mode
 *   jsBundleDirDebug: "$buildDir/intermediates/assets/debug",
 *
 *   // where to put the JS bundle asset in release mode
 *   jsBundleDirRelease: "$buildDir/intermediates/assets/release",
 *
 *   // where to put drawable resources / React Native assets, e.g. the ones you use via
 *   // require('./image.png')), in debug mode
 *   resourcesDirDebug: "$buildDir/intermediates/res/merged/debug",
 *
 *   // where to put drawable resources / React Native assets, e.g. the ones you use via
 *   // require('./image.png')), in release mode
 *   resourcesDirRelease: "$buildDir/intermediates/res/merged/release",
 *
 *   // by default the gradle tasks are skipped if none of the JS files or assets change; this means
 *   // that we don't look at files in android/ or ios/ to determine whether the tasks are up to
 *   // date; if you have any other folders that you want to ignore for performance reasons (gradle
 *   // indexes the entire tree), add them here. Alternatively, if you have JS files in android/
 *   // for example, you might want to remove it from here.
 *   inputExcludes: ["android/**", "ios/**"],
 *
 *   // override which node gets called and with what additional arguments
 *   nodeExecutableAndArgs: ["node"],
 *
 *   // supply additional arguments to the packager
 *   extraPackagerArgs: []
 * ]
 */

project.ext.react = [
    entryFile: "index.js"
]

apply from: "../../node_modules/react-native/react.gradle"

/**
 * Set this to true to create two separate APKs instead of one:
 *   - An APK that only works on ARM devices
 *   - An APK that only works on x86 devices
 * The advantage is the size of the APK is reduced by about 4MB.
 * Upload all the APKs to the Play Store and people will download
 * the correct one based on the CPU architecture of their device.
 */
def enableSeparateBuildPerCPUArchitecture = false

/**
 * Run Proguard to shrink the Java bytecode in release builds.
 */
def enableProguardInReleaseBuilds = false

android {
    compileSdkVersion rootProject.ext.compileSdkVersion

    defaultConfig {
        applicationId "com.newproject"
        minSdkVersion rootProject.ext.minSdkVersion
        targetSdkVersion rootProject.ext.targetSdkVersion
        versionCode 1
        versionName "1.0"
    }
    signingConfigs {
        release {
            if (project.hasProperty('MYAPP_RELEASE_STORE_FILE')) {
                storeFile file(MYAPP_RELEASE_STORE_FILE)
                storePassword MYAPP_RELEASE_STORE_PASSWORD
                keyAlias MYAPP_RELEASE_KEY_ALIAS
                keyPassword MYAPP_RELEASE_KEY_PASSWORD
            }
        }
    }
    splits {
        abi {
            reset()
            enable enableSeparateBuildPerCPUArchitecture
            universalApk false  // If true, also generate a universal APK
            include "armeabi-v7a", "x86", "arm64-v8a"
        }
    }
    buildTypes {
        release {
            signingConfig signingConfigs.release
            minifyEnabled enableProguardInReleaseBuilds
            proguardFiles getDefaultProguardFile("proguard-android.txt"), "proguard-rules.pro"
        }
    }
    // applicationVariants are e.g. debug, release
    applicationVariants.all { variant ->
        variant.outputs.each { output ->
            // For each separate APK per architecture, set a unique version code as described here:
            // http://tools.android.com/tech-docs/new-build-system/user-guide/apk-splits
            def versionCodes = ["armeabi-v7a":1, "x86":2, "arm64-v8a": 3]
            def abi = output.getFilter(OutputFile.ABI)
            if (abi != null) {  // null for the universal-debug, universal-release variants
                output.versionCodeOverride =
                        versionCodes.get(abi) * 1048576 + defaultConfig.versionCode
            }
        }
    }
}

dependencies {
    implementation fileTree(dir: "libs", include: ["*.jar"])
    implementation "com.android.support:appcompat-v7:${rootProject.ext.supportLibVersion}"
    implementation "com.facebook.react:react-native:0.58.4"  // From node_modules
}

// Run this once to be able to run the application with BUCK
// puts all compile dependencies into folder libs for BUCK to use
task copyDownloadableDepsToLibs(type: Copy) {
    from configurations.compile
    into 'libs'
}
这是我的 gradle.properties 文件:
(我已经用 ***** 替换了实际密码)# Project-wide Gradle settings.
# IDE (e.g. Android Studio) users:
# Gradle settings configured through the IDE *will override*
# any settings specified in this file.
# For more details on how to configure your build environment visit
# http://www.gradle.org/docs/current/userguide/build_environment.html
# Specifies the JVM arguments used for the daemon process.
# The setting is particularly useful for tweaking memory settings.
# Default value: -Xmx10248m -XX:MaxPermSize=256m
# org.gradle.jvmargs=-Xmx2048m -XX:MaxPermSize=512m -XX:+HeapDumpOnOutOfMemoryError -Dfile.encoding=UTF-8
# When configured, Gradle will run in incubating parallel mode.
# This option should only be used with decoupled projects. More details, visit
# http://www.gradle.org/docs/current/userguide/multi_project_builds.html#sec:decoupled_projects
# org.gradle.parallel=true
MYAPP_RELEASE_STORE_FILE=my-release-key.keystore
MYAPP_RELEASE_KEY_ALIAS=my-key-alias
MYAPP_RELEASE_STORE_PASSWORD=******
MYAPP_RELEASE_KEY_PASSWORD=******
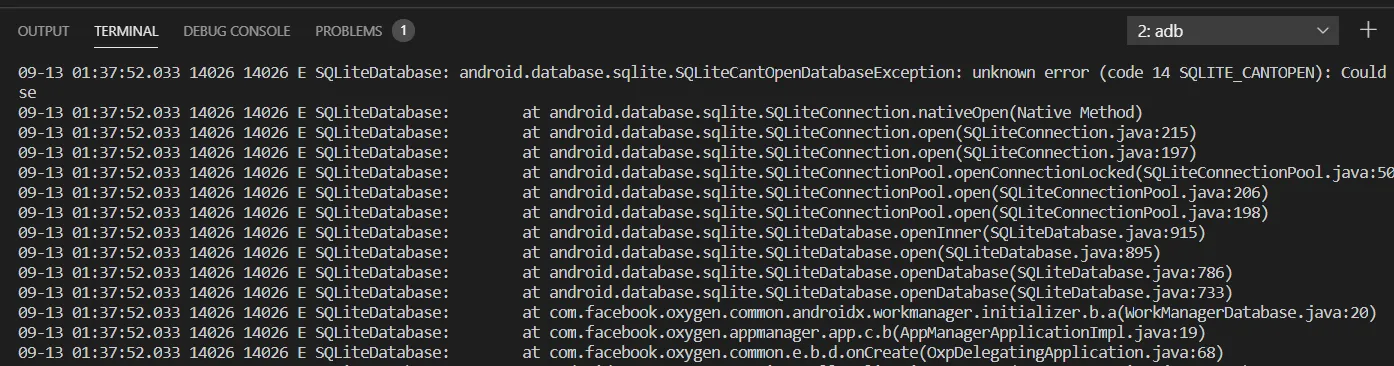
我还使用了Logcat,在我打开应用程序时在我的Android设备上发现了以下错误:
2019-02-13 12:39:48.479 16607-16607/? E/Zygote: isWhitelistProcess - Process is Whitelisted
2019-02-13 12:39:48.479 16607-16607/? E/libpersona: scanKnoxPersonas
2019-02-13 12:39:48.480 16607-16607/? E/libpersona: Couldn't open the File - /data/system/users/0/personalist.xml - No such file or directory
2019-02-13 12:39:48.770 2979-3049/? E/WindowManager: win=Window{17ca770 u0 com.sec.android.app.launcher/com.sec.android.app.launcher.activities.LauncherActivity EXITING} destroySurfaces: appStopped=false win.mWindowRemovalAllowed=false win.mRemoveOnExit=false win.mViewVisibility=8, caller=com.android.server.wm.AppWindowToken.destroySurfaces:748 com.android.server.wm.AppWindowToken.destroySurfaces:732 com.android.server.wm.WindowState.onExitAnimationDone:5646 com.android.server.wm.AppWindowAnimator.stepAnimationLocked:517 com.android.server.wm.AppWindowToken.stepAppWindowsAnimation:1745
2019-02-13 12:39:48.771 2979-3049/? E/WindowManager: win=Window{a96df36 u0 Splash Screen com.newproject EXITING} destroySurfaces: appStopped=false win.mWindowRemovalAllowed=true win.mRemoveOnExit=true win.mViewVisibility=0, caller=com.android.server.wm.AppWindowToken.destroySurfaces:748 com.android.server.wm.AppWindowToken.destroySurfaces:732 com.android.server.wm.WindowState.onExitAnimationDone:5646 com.android.server.wm.WindowStateAnimator.stepAnimationLocked:553 com.android.server.wm.DisplayContent.lambda$-com_android_server_wm_DisplayContent_21578:476
2019-02-13 12:39:48.807 16607-16623/? E/AndroidRuntime: FATAL EXCEPTION: create_react_context
    Process: com.newproject, PID: 16607
    java.lang.RuntimeException: Unable to load script from assets 'index.android.bundle'. Make sure your bundle is packaged correctly or you're running a packager server.
        at com.facebook.react.bridge.CatalystInstanceImpl.jniLoadScriptFromAssets(Native Method)
        at com.facebook.react.bridge.CatalystInstanceImpl.loadScriptFromAssets(CatalystInstanceImpl.java:226)
        at com.facebook.react.bridge.JSBundleLoader$1.loadScript(JSBundleLoader.java:32)
        at com.facebook.react.bridge.CatalystInstanceImpl.runJSBundle(CatalystInstanceImpl.java:253)
        at com.facebook.react.ReactInstanceManager.createReactContext(ReactInstanceManager.java:1152)
        at com.facebook.react.ReactInstanceManager.access$900(ReactInstanceManager.java:123)
        at com.facebook.react.ReactInstanceManager$5.run(ReactInstanceManager.java:943)
        at java.lang.Thread.run(Thread.java:764)
2019-02-13 12:39:48.919 4373-4787/? E/PBSessionCacheImpl: sessionId[19234207413972827] not persisted.
2019-02-13 12:39:49.205 2979-3049/? E/WindowManager: win=Window{4d42d2f u0 com.newproject/com.newproject.MainActivity EXITING} destroySurfaces: appStopped=false win.mWindowRemovalAllowed=false win.mRemoveOnExit=false win.mViewVisibility=8, caller=com.android.server.wm.AppWindowToken.destroySurfaces:748 com.android.server.wm.AppWindowToken.destroySurfaces:732 com.android.server.wm.WindowState.onExitAnimationDone:5646 com.android.server.wm.WindowStateAnimator.stepAnimationLocked:553 com.android.server.wm.DisplayContent.lambda$-com_android_server_wm_DisplayContent_21578:476
2019-02-13 12:39:50.498 2979-2999/? E/ViewRootImpl: sendUserActionEvent() returned.

adb logcat命令。确保USB调试已启用即可。 - Andrew