最终我解决了问题。感谢@Xcihnegn提供的想法。以下是解决方案:
actionBar.setSelectedNavigationItem(0);
actionBar.getTabAt(0).setCustomView(R.layout.fragmnt_red);
viewPager.setOnPageChangeListener(new ViewPager.OnPageChangeListener() {
@Override
public void onPageSelected(int position) {
actionBar.setSelectedNavigationItem(position);
if(position == 0)
{
actionBar.getSelectedTab().setCustomView(R.layout.fragmnt_red);
}else if(position == 1)
{
actionBar.getSelectedTab().setCustomView(R.layout.fragmnt_orange);
}else if(position == 2)
{
actionBar.getSelectedTab().setCustomView(R.layout.fragmnt_green);
}
}
}
@Override
public void onPageScrolled(int arg0, float arg1, int arg2) {
}
@Override
public void onPageScrollStateChanged(int arg0) {
}
});
}
@Override
public void onTabSelected(ActionBar.Tab tab, android.support.v4.app.FragmentTransaction fragmentTransaction) {
viewPager.setCurrentItem(tab.getPosition());
}
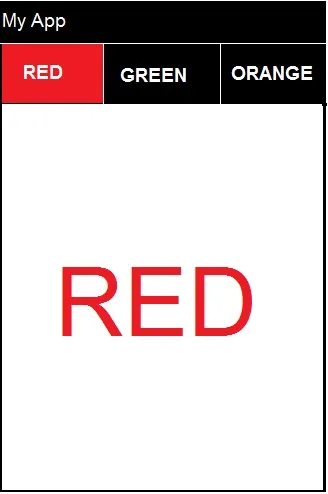
当一个标签未被选中时,setCustomView(null)会将其布局更改回原始的黑色。因此,只有选定的标签会改变颜色。取消选择标签将使其布局恢复到原始形式。
@Override
public void onTabUnselected(ActionBar.Tab tab,     android.support.v4.app.FragmentTransaction fragmentTransaction) {

        if(tab.getPosition() == 0)
        {
            actionBar.getTabAt(0).setCustomView(null);

        }else if(tab.getPosition() == 1)
        {
            actionBar.getTabAt(1).setCustomView(null);

        }else if(tab.getPosition() == 2)
        {
            actionBar.getTabAt(2).setCustomView(null);
        }
    }
}
为了在设置自定义视图时消除不必要的填充,我们应该在styles.xml中使用以下代码。
<style name="Custom.ActionBar.TabView.Empty" parent="@android:style/Widget.ActionBar.TabView">
    <item name="android:paddingLeft">0dp</item>
    <item name="android:paddingRight">0dp</item>
    <item name="android:background">#000000</item>
</style>

<style name="CustomActionbartab" parent="Theme.AppCompat.Light.DarkActionBar">
    <item name="actionBarTabStyle">@style/Custom.ActionBar.TabView.Empty</item>
    <item name="android:actionBarTabStyle">@style/Custom.ActionBar.TabView.Empty</item>
</style>
不要忘记在活动中的setcontentview之前添加此代码。
settheme(R.styles.CustomActionbartab)
自定义选项卡的布局。
<?xml version="1.0" encoding="utf-8"?>
<RelativeLayout xmlns:android="http://schemas.android.com/apk/res/android"
  android:layout_width="match_parent"
  android:layout_height="match_parent"
  android:background="@color/red">

<TextView
    android:layout_width="fill_parent"
    android:layout_height="fill_parent"
    android:text="RED"
    android:textStyle="bold"
    android:gravity="center"
    android:textColor="#ffffff"/>
</RelativeLayout>