SwiftUI 更新导航栏标题颜色

135

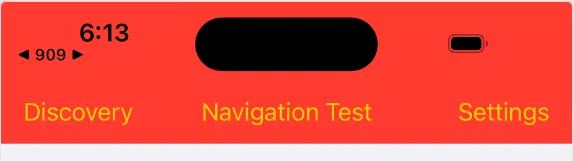
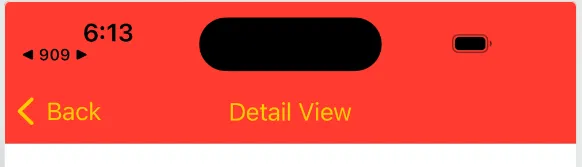
如何在SwiftUI中更改导航栏标题颜色

NavigationView {
    List {
        ForEach(0..<15) { item in
            HStack {
                Text("Apple")
                    .font(.headline)
                    .fontWeight(.medium)
                    .color(.orange)
                    .lineLimit(1)
                    .multilineTextAlignment(.center)
                    .padding(.leading)
                    .frame(width: 125, height: nil)
                
                Text("Apple Infinite Loop. Address: One Infinite Loop Cupertino, CA 95014 (408) 606-5775 ")
                    .font(.subheadline)
                    .fontWeight(.regular)
                    .multilineTextAlignment(.leading)
                    .lineLimit(nil)
            }
        }
    }
    .navigationBarTitle(Text("TEST")).navigationBarHidden(false).foregroundColor(.orange)
}

我尝试过.foregroundColor(.orange)但是没有效果

还尝试了.navigationBarTitle(Text("TEST").color(.orange))


3
嗯...看起来SwiftUI忽略了为导航栏标题设置的所有修饰符...而且很奇怪的是我们无法在导航栏中放置任何视图 :-( - Olexiy Pyvovarov
遇到了类似的问题,并通过使用 ZStack 并将其内部的 Rectangle 偏移至导航区域下方屏幕外找到了一种 hacky 的方法。请查看 - https://dev59.com/gdL7oIgBc1ULPQZFtM6a#75278773 - ansavchenco
28个回答

1

https://dev59.com/C1MI5IYBdhLWcg3wUp02#58427754 这个答案有效,但如果您在浅色或深色模式下遇到 navigationController 为空的问题,请添加以下内容...不知道为什么它有效。

struct ContentView: View {
   var body: some View {
      NavigationView {
        ScrollView {
            Text("Don't use .appearance()!")
        }
        .navigationBarTitle("Try it!", displayMode: .inline)
        .background(NavigationConfigurator { nc in
            nc.navigationBar.barTintColor = .blue
            nc.navigationBar.background = .blue
            nc.navigationBar.titleTextAttributes = [.foregroundColor : UIColor.white]
        })
    }
   .navigationViewStyle(StackNavigationViewStyle())
   .accentColor(.red)   <------- DOES THE JOB
  }
}

accentColor 也会改变按钮的默认颜色。 - José

1

使用NavigationView很烦人。 从iOS 16开始,您可以使用.toolbar来自定义标题,这样会更灵活,而不是使用NavigationTitle

enter image description here enter image description here

例如:
import SwiftUI

struct Company: Identifiable, Hashable {
    let id = UUID()
    let name: String
}

struct ContentView: View {
    private let companies: [Company] = [
        .init(name: "Google"),
        .init(name: "Apple"),
        .init(name: "Amazon"),
        .init(name: "Huawei"),
        .init(name: "Baidu")
    ]
    
    @State private var path: [Company] = []
    var body: some View {
        NavigationStack(path: $path) {
            List(companies) { company in
                NavigationLink(company.name, value: company)
            }
            .toolbar {
                    ToolbarItem(placement: .principal) {
                        Text("Navigation Test")
                            .foregroundColor(.yellow)
                    }
            }
            .toolbar {
                ToolbarItem(placement: .navigationBarTrailing) {
                    Text("Settings")
                        .foregroundColor(.yellow)
                }
            }
            .toolbar {
                ToolbarItem(placement: .navigationBarLeading) {
                    Text("Discovery")
                        .foregroundColor(.yellow)
                }
            }
            .navigationBarTitleDisplayMode(.inline)
            .toolbarBackground(Color.red, for: .navigationBar)
            .toolbarBackground(.visible, for: .navigationBar)
            .navigationDestination(for: Company.self) { company in
                DetailView(company: company)
            }
        }
        .accentColor(.yellow)
        .tint(.green)
    }
}

DetailView.swift


import SwiftUI

struct DetailView: View {
    var company: Company
    
    var body: some View {
        Text(company.name)
            .toolbarBackground(Color.red, for: .navigationBar)
            .toolbarBackground(.visible, for: .navigationBar)
            .toolbar {
                ToolbarItem(placement: .principal) {
                    Text("Detail View")
                        .foregroundColor(.yellow)
                }
            }
    }
}


0
Post iOS 14 easy way to do:

        protocol CustomNavigationTitle: View {
            associatedtype SomeView: View
            func customNavigationTitle(_ string: String) -> Self.SomeView
        }
        
        extension CustomNavigationTitle {
            func customNavigationTitle(_ string: String) -> some View {
                toolbar {
                    ToolbarItem(placement: .principal) {
                        Text(string).foregroundColor(.red).font(.system(size: 18))
                    }
                }
            }
        }
        
        extension ZStack: CustomNavigationTitle {}
    
    Suppose your root view of view is made with ZStack
    it can be utilised below way
    
    ZStack {
    }. customNavigationTitle("Some title")

0
我使用UINavigationBarAppearance()方法,并将.id()添加到NavigationView中,这个解决方案对我有效。当颜色改变时,这将自动重新绘制组件。
现在,您可以根据状态引擎实现响应式颜色更改。
var body: some Scene {
  let color = someValue ? UIColor.systemBlue : UIColor.systemGray3

  let custom = UINavigationBarAppearance()
  custom.configureWithOpaqueBackground()
  custom.backgroundColor = color
  UINavigationBar.appearance().standardAppearance = custom
  UINavigationBar.appearance().scrollEdgeAppearance = custom
  UINavigationBar.appearance().compactAppearance = custom
  UINavigationBar.appearance().compactScrollEdgeAppearance = custom

  return WindowGroup {
    NavigationView {
      content
    }
      .id(color.description)
  }
}

0
 .toolbar {
            ToolbarItem(placement: .principal) {
                Text("Your Score \(count)")
                .foregroundColor(.white)
                .font(.largeTitle)
                .bold()
                .shadow(radius: 5, x: 0, y: -10)
            }
            
        }

0
从 iOS 16+ 开始,您可以使用 toolbarBackgroundtoolbarColorScheme 修饰符的组合来实现对导航栏的自定义程度。
NavigationStack {
    ContentView()
        .toolbarBackground(Color.accentColor)
        .toolbarBackground(.visible)
        .toolbarColorScheme(.dark)
}

功劳归功于人,我是从Sarunw那里学到的。


-1
我找到的最简单的方法是:
init() {
    UINavigationBar.appearance().tintColor = UIColor.systemBlue
    }

你可以使用任何其他颜色,而不是systemBlue。 你必须在“var body: some View {}”之外实现此功能。 你也可以添加:

@Environment(/.colorScheme) var colorScheme

init()的基础上,您可以使用 .dark 或 .light 来更改暗模式和亮模式下颜色的方式。例如:

init() {
    UINavigationBar.appearance().tintColor = UIColor(colorScheme == .dark ? .white : Color(#colorLiteral(red: 0.2196078449, green: 0.007843137719, blue: 0.8549019694, alpha: 1)))
    }

这将全局应用此样式,不仅适用于此视图。这意味着您甚至不需要在视图中编写此代码。 - José

-2

我使用了ViewModifier来为导航栏应用自定义颜色。虽然我不能说下面的代码修改了实际的导航栏,但我发现这种解决方法比其他方法更好。

与UINavigationBar.appearance()不同,它不会应用于所有视图。

  • 创建一个ViewModifer - 我使用了ShapeStyle,所以您可以为导航栏应用任何样式(如-渐变、颜色)
struct NavigationBarStyle<S: ShapeStyle>: ViewModifier {
    private var bgStyle: S
    private var viewBackgroundColor: Color
    
    init(_ bgStyle: S, viewBackgroundColor: Color) {
        self. bgStyle = bgStyle
        self.viewBackgroundColor = viewBackgroundColor
    }
    
    func body(content: Content) -> some View {
        ZStack {
            Color(UIColor.systemBackground)
                .ignoresSafeArea(.all, edges: .bottom)
            
            content
        }
        .background(bgStyle)
    }
}

extension View {
    func navigationBarStyle<S: ShapeStyle>(_ bgStyle: S, viewBackgroundColor: Color = Color(UIColor.systemBackground)) -> some View {
        modifier(NavigationBarStyle(bgStyle, viewBackgroundColor: viewBackgroundColor))
    }
}


注意 - 您必须将此修饰符应用于最顶层的视图才能生效。例如 -
struct NewView: View {
    var body: some View {
        NavigationView {
            VStack {
                HStack {
                    Text("H Stack")
                }
                // .navigationBarStyle(Color.orange) not the right place
                Text("Hello World")
            }
            .navigationBarStyle(Color.orange) // right place to apply
        }
    }
}


答案与导航栏无关。 - Alexander Volkov

网页内容由stack overflow 提供, 点击上面的
可以查看英文原文,
原文链接