ImageMagick: 如何最小化裁剪图像以达到特定的长宽比?

33
使用 ImageMagick,我想以最小的方式裁剪图像,使其适合给定的纵横比。
例如:给定一个尺寸为3038 x 2014像素的图像,我想将其裁剪为3:2的纵横比。生成的图像将从原始图像的中心裁剪,大小为3021 x 2014像素。
因此,您需要使用类似以下命令:convert in.jpg -gravity center -crop 3021x2014+0+0 out.jpg

4
Fred's ImageMagick Scripts网站上可以找到相应的脚本,他在其中详细解释了如何实现这种效果。如果您正在使用另一种脚本语言来驱动IM,可能更容易在那里计算数学运算。 - T-Dor
太棒了!顺便说一下,那里有很多有用的东西 :) - Kelley van Evert
5个回答

39

Imagemagick 7.0.7.22 及以上版本

-crop 3:2 自2018年1月6日起可用,详情请参阅 更改日志

JPG

magick convert in.jpg -gravity center -crop 3:2 out.jpg

原始图片 修改后的图片

警告/提醒:如果您没有使用-gravity center,则会生成两个输出文件:

左部分 右部分

PNG

正如fmw42所指出的那样,PNG文件存储虚拟画布的大小。建议使用+repage

magick convert in.png -gravity center -crop 3:2 +repage out+repage.png

GIMP、IrfanView、Chrome和Windows Explorer没有显示任何差异,但Imagemagick知道:

magick identify out*png
out_stndrd.png PNG 252x168 314x168+31+0 8-bit sRGB 78557B 0.000u 0:00.000
out+repage.png PNG 252x168 252x168+0+0 8-bit sRGB 78529B 0.000u 0:00.000

Imagemagick 6.9.9-34及以上版本

JPG

convert in.jpg -gravity center -crop 3:2 out.jpg

PNG

convert in. -gravity center -crop 3:2 +repage out.png

Imagemagick 6.9.9-33 / 7.0.7.21 及以下版本

注意:对于v7版本,您需要在任何convert之前添加magick

1. 特定目标分辨率

如果您的最终目标是具有特定的分辨率(例如1920x1080),那么可以使用-geometry、插入符号(^)和-crop来轻松实现:

convert in.jpg -geometry 1920x1080^ -gravity center -crop 1920x1080+0+0 out.jpg

循环遍历多个jpg文件:

for i in *jpg
  do convert "$i" -geometry 1920x1080^ -gravity center -crop 1920x1080+0+0 out-"$i"
done

2. 等比例裁剪

如果你想避免缩放,就需要在Imagemagick之外计算裁剪边缘的新长度。这需要更多的步骤:

aw=16 #desired aspect ratio width...
ah=9 #and height
in="in.jpg"
out="out.jpg"

wid=`convert "$in" -format "%[w]" info:`
hei=`convert "$in" -format "%[h]" info:`

tarar=`echo $aw/$ah | bc -l`
imgar=`convert "$in" -format "%[fx:w/h]" info:`

if (( $(bc <<< "$tarar > $imgar") ))
then
  nhei=`echo $wid/$tarar | bc`
  convert "$in" -gravity center -crop ${wid}x${nhei}+0+0 "$out"
elif (( $(bc <<< "$tarar < $imgar") ))
then
  nwid=`echo $hei*$tarar | bc`
  convert "$in" -gravity center -crop ${nwid}x${hei}+0+0 "$out"
else
  cp "$in" "$out"
fi

我在示例中使用16:9,期望对大多数读者比3:2更有用。要得到所需的横纵比,请将解决方案1中的两个1920x1080或解决方案2中的aw/ah变量替换为相应值。

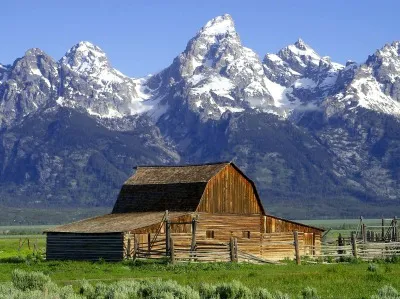
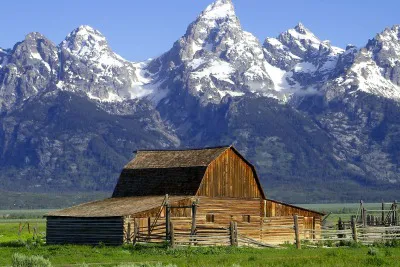
照片来源:Anders Krusberg / Peabody Awards


19

最近版本的Imagemagick(从6.9.9-34开始)具有纵横比裁剪功能。因此,您可以执行以下操作:

输入:

enter image description here

convert barn.jpg -gravity center -crop 3:2 +repage barn_crop_3to2.png

enter image description here

输出为400x267+0+0。但请注意,需要使用+repage来去除400x299+0+16的虚拟画布,因为PNG输出支持虚拟画布。JPG输出不需要+repage,因为它不支持虚拟画布。

根据变更日志,似乎是在7.0.7-22(2018年1月6日)中添加的? - André Laszlo
2
是的,在大约那个版本中,这也是IM 7的新功能。如果使用IM 7,则应使用magick而不是convert。 - fmw42

3
随着ImageMagick 7的推出,您可以使用FX表达式在单个命令中根据纵横比裁剪为可能的最大图像尺寸。唯一的诀窍是需要在同一命令中四个位置输入所需的纵横比,因此我发现最容易的方法是为该部分创建一个变量。纵横比可以是小数或作为字符串的分数,由fx表达式解析。
aspect="16/9"

magick input.png -gravity center \
    -extent  "%[fx:w/h>=$aspect?h*$aspect:w]x" \
    -extent "x%[fx:w/h<=$aspect?w/$aspect:h]" \
    output.png

一旦尺寸正确,您可以使用-extent操作后跟-resize调整图像大小以符合输出要求。上面的示例将其保持为尽可能大的输入图像。

1
你需要计算所需的尺寸,然后进行裁剪。以下是一个函数,给定图像的宽度高度以及所需的宽高比作为aspect_xaspect_y,将输出可以与Imagemagick一起使用的裁剪字符串。
def aspect(width, height, aspect_x, aspect_y)

  old_ratio = width.to_f / height
  new_ratio = aspect_x.to_f / aspect_y

  return if old_ratio == new_ratio

  if new_ratio > old_ratio
    height = (width / new_ratio).to_i # same width, shorter height
  else
    width = (height * new_ratio).to_i # shorter width, same height
  end

  "#{width}x#{height}#" # the hash mark gives centre-gravity

end

我正在使用类似于这个的东西,用于使用Dragonfly Gem的应用程序。


0

我需要使用A4(1x1.414)纸张比例垂直分割非常长的图像。因此,我想出了以下解决方案。假设图像文件名为ch1.jpg:

convert -crop $(identify -format "%w" ch1.jpg)x$(printf "%.0f" $(echo $(identify -format "%w" ch1.jpg) \* 1.414|bc)) +repage ch1.jpg ch1.jpg

网页内容由stack overflow 提供, 点击上面的
可以查看英文原文,
原文链接