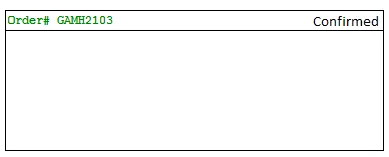
卡片视图中的项目对齐

11

我希望我的卡片看起来像下面这样

图片描述

我保留了我的布局

    <android.support.v7.widget.CardView
        android:layout_gravity="center"
        android:layout_width="fill_parent"
        android:layout_height="wrap_content"
        card_view:cardCornerRadius="2dp"
        >

        <LinearLayout
            android:layout_width="match_parent"
            android:layout_height="wrap_content"
            android:orientation="vertical">

        <LinearLayout
            android:layout_width="match_parent"
            android:layout_height="wrap_content"
            android:orientation="horizontal">
        <TextView
            android:layout_width="match_parent"
            android:layout_height="wrap_content"
            android:text="Order# GAMH2103"
            android:layout_marginStart="5dp"
            android:layout_marginLeft="5dp"
            android:gravity="start"
            android:textSize="15dp"/>

            <TextView
                android:layout_width="match_parent"
                android:layout_height="wrap_content"
                android:text="Confirmed"
                android:drawableRight="@drawable/check"
                android:textColor="#00FF00"
                android:gravity="end"
                android:textSize="15dp"/>

        </LinearLayout>
            <View
                android:layout_width="match_parent"
                android:layout_height="1dp"
                android:background="@android:color/darker_gray"
                android:layout_marginTop="5dp"
                />

        </LinearLayout>

不知何故,我无法将“已确认”文本视图显示出来。 我可以看到订单号。

我尝试过调整 gravitylayout_gravity 但总是不成功。

请帮帮我。

谢谢,Lakshman。


1
因为您将“order# though” TextView的宽度设置为android:layout_width="match_parent",所以“confirmed” TextView无法显示。请更改为android:layout_width="wrap_content"。如果您希望“confirmed” TextView始终可见,则可以添加android:layout_weight="1" - Hoang Nguyen
2个回答

13

请使用以下布局。这将对您有所帮助。

为了更好的视图对齐,始终建议使用相对布局而不是线性布局。

<android.support.v7.widget.CardView
    android:layout_gravity="center"
    android:layout_width="fill_parent"
    android:layout_height="wrap_content"
    card_view:cardCornerRadius="2dp">

    <RelativeLayout
        android:layout_width="match_parent"
        android:layout_height="wrap_content">

        <TextView
            android:layout_width="match_parent"
            android:layout_height="wrap_content"
            android:text="Order# GAMH2103"
            android:layout_marginStart="5dp"
            android:layout_marginLeft="5dp"
            android:gravity="start"
            android:textSize="15dp"/>

        <TextView
            android:layout_width="match_parent"
            android:layout_height="wrap_content"
            android:text="Confirmed"
            android:textColor="#00FF00"
            android:gravity="end"
            android:textSize="15dp"/>


    </RelativeLayout>

    </android.support.v7.widget.CardView>

1
一个简单的相对布局应该就能完成任务。
<RelativeLayout
        android:layout_width="match_parent"
        android:layout_height="wrap_content">
    <TextView
        android:layout_width="match_parent"
        android:layout_height="wrap_content"
        android:text="Order# GAMH2103"
        android:layout_marginStart="5dp"
        android:layout_marginLeft="5dp"
        android:gravity="start"
        android:textSize="15dp"/>

    <TextView
        android:layout_width="wrap_content"
        android:layout_height="wrap_content"
        android:text="Confirmed"
        android:drawableRight="@drawable/check"
        android:textColor="#00FF00"
        android:layout_gravity="end"
        android:textSize="15dp"/>

</RelativeLayout>

请注意gravitylayout_gravity之间的区别。如果您在TextView中使用gravity,它涉及到文本在TextView边框内不可见框中的位置,因此例如,layout_gravity则涉及视图在父级内的位置。

网页内容由stack overflow 提供, 点击上面的
可以查看英文原文,
原文链接