我对MAUI还不熟悉,只了解Xamarin.Forms的基础知识。
我想在MAUI中的一个Entry控件上添加底边框(以及边框厚度)。
在Xamarin.Forms中,我们需要为每个平台创建自定义控件和渲染器。
在发布这条消息之前,我在互联网上进行了研究。这涉及到处理程序,我有一种印象,即它只允许进行基本修改(更改背景颜色等)。
所有这些信息让我有点困惑,如果有人能为我解答,我将不胜感激。
我对MAUI还不熟悉,只了解Xamarin.Forms的基础知识。
我想在MAUI中的一个Entry控件上添加底边框(以及边框厚度)。
在Xamarin.Forms中,我们需要为每个平台创建自定义控件和渲染器。
在发布这条消息之前,我在互联网上进行了研究。这涉及到处理程序,我有一种印象,即它只允许进行基本修改(更改背景颜色等)。
所有这些信息让我有点困惑,如果有人能为我解答,我将不胜感激。
自定义特定控件实例展示了一个简单的自定义Entry示例,仅根据平台自定义某些属性。
我已经开始创建一个.Net Maui高级自定义Entry示例。请查看该存储库以获取到目前为止的实现。
状态:
限制(当前):
Entry 属性映射到包含的文本框中。Entry 事件,以查看它们是否需要任何特殊处理。如果您想进一步扩展此功能,请谷歌搜索xamarin forms customize entry renderer以获取平台特定代码的示例。希望我已经展示了足够的内容,以便了解如何/在哪里添加此类代码。
目前看来,做一个高级示例似乎比相应的Xamarin Forms“自定义渲染器”更加费力。
原因:
IEntry和IEntryHandler所需的类型,扩展现有的EntryHandler变得困难。如何覆盖PlatformView类型?待定:也许有一种避免遇到的复杂问题的方法。
另外,我可能复制了可以省略的代码。
下面是需要执行的步骤:
MyEntry : Entry类。MyEntryHandler类。1.定义带有所需附加属性的MyEntry : Entry类。
在此处,我们添加UnderlineColor和UnderlineThickness。
public class MyEntry : Entry
{
    /// <summary>
    /// Color and Thickness of bottom border.
    /// </summary>
    public static BindableProperty UnderlineColorProperty = BindableProperty.Create(
            nameof(UnderlineColor), typeof(Color), typeof(MyEntry), Colors.Black);
    public Color UnderlineColor
    {
        get => (Color)GetValue(UnderlineColorProperty);
        set => SetValue(UnderlineColorProperty, value);
    }

    public static BindableProperty UnderlineThicknessProperty = BindableProperty.Create(
            nameof(UnderlineThickness), typeof(int), typeof(MyEntry), 0);
    public int UnderlineThickness
    {
        get => (int)GetValue(UnderlineThicknessProperty);
        set => SetValue(UnderlineThicknessProperty, value);
    }

    public MyEntry()
    {
    }
}
2. 定义类MyEntryHandler以呈现本机 UI 对象。
使用partial class完成此操作。一部分是跨平台的,然后需要为您实现的每个平台添加另一部分。
在我的存储库中,找到MyEntryHandler.cs、Windows/MyEntryHandler.Windows.cs和Android/MyEntryHandler.Android.cs。
MyEntryHandler.cs:
此文件包含 MyEntryHandler 的“Mapper”。
    // Cross-platform partial of class. See Maui repo maui\src\Core\src\Handlers\Entry\EntryHandler.cs
    public partial class MyEntryHandler : IMyEntryHandler //: EntryHandler
    {
        // static c'tor.
        static MyEntryHandler()
        {
            // TBD: Fill MyMapper here by copying from Entry.Mapper, then add custom ones defined in MyEntry?
        }

        //public static IPropertyMapper<IEntry, IEntryHandler> MyMapper => Mapper;
        public static IPropertyMapper<IEntry, MyEntryHandler> MyMapper = new PropertyMapper<IEntry, MyEntryHandler>(ViewMapper)
        {
            // From Entry.
            [nameof(IEntry.Background)] = MapBackground,
            [nameof(IEntry.CharacterSpacing)] = MapCharacterSpacing,
            [nameof(IEntry.ClearButtonVisibility)] = MapClearButtonVisibility,
            [nameof(IEntry.Font)] = MapFont,
            [nameof(IEntry.IsPassword)] = MapIsPassword,
            [nameof(IEntry.HorizontalTextAlignment)] = MapHorizontalTextAlignment,
            [nameof(IEntry.VerticalTextAlignment)] = MapVerticalTextAlignment,
            [nameof(IEntry.IsReadOnly)] = MapIsReadOnly,
            [nameof(IEntry.IsTextPredictionEnabled)] = MapIsTextPredictionEnabled,
            [nameof(IEntry.Keyboard)] = MapKeyboard,
            [nameof(IEntry.MaxLength)] = MapMaxLength,
            [nameof(IEntry.Placeholder)] = MapPlaceholder,
            [nameof(IEntry.PlaceholderColor)] = MapPlaceholderColor,
            [nameof(IEntry.ReturnType)] = MapReturnType,
            [nameof(IEntry.Text)] = MapText,
            [nameof(IEntry.TextColor)] = MapTextColor,
            [nameof(IEntry.CursorPosition)] = MapCursorPosition,
            [nameof(IEntry.SelectionLength)] = MapSelectionLength,
            // From MyEntry
            [nameof(MyEntry.UnderlineThickness)] = MapUnderlineThickness
        };

        // TBD: What is this for? Cloned one on Entry.
        private static void MapUnderlineThickness(MyEntryHandler arg1, IEntry arg2)
        {
        }


        public MyEntryHandler() : base(MyMapper)
        {
        }
我还没有在所有平台的文件夹中创建最小的部分类。在repo的跨平台MyEntryHandler中,您会看到#if WINDOWS标记内的代码。目的是这个不需要用#if来包装。您还会看到很多注释掉的代码; 这样我可以看到每个平台上需要实现哪些方法。
MyEntryHandler.Windows.cs:
本质上是CreatePlatformView()。在Windows上,我选择将其实现为一个Border(四周都为零,除了底部) 包含一个TextBox。
        protected override PlatformView CreatePlatformView()
        {
            var myentry = VirtualView as MyEntry;

            var textbox = new MauiPasswordTextBox
            {
                // From EntryHandler.
                IsObfuscationDelayed = s_shouldBeDelayed

                // TODO: pass some entry properties through to textbox?
            };

            MauiColor color = myentry != null
                    ? myentry.UnderlineColor
                    : MyEntry.UnderlineColorProperty.DefaultValue as MauiColor;
            int thickness = myentry != null
                    ? myentry.UnderlineThickness
                    : (int)MyEntry.UnderlineThicknessProperty.DefaultValue;

            var border = new Border
            {
                Child = textbox,
                BorderBrush = color.ToPlatform(),
                BorderThickness = new Thickness(0, 0, 0, thickness)
            };


            return border;
        }
Windows Handler中还有许多其他行。这些都是从Maui源代码中复制的。尚未确定是否需要其中哪些(如果有)。如果我想出了如何仅从Maui的EntryHandler继承的简单方法,那么这些就不再需要。但是当我继承时出现了type冲突。
3:在MauiProgram中添加Handler。
MauiProgram.cs
    public static MauiApp CreateMauiApp()
    {
        var builder = MauiApp.CreateBuilder();
        builder
            .UseMauiApp<App>()
            .ConfigureMauiHandlers(handlers =>
            {
                handlers.AddHandler(typeof(MyEntry), typeof(MyEntryHandler));
            })
        ...
您会在 Maui 项目的 repo 中看到添加了其他类。这些类是从 Maui 源代码中复制而来的。
这些其他类由上面提到的类引用。
希望一旦更好地理解了这个主题,大多数其他类都会消失。
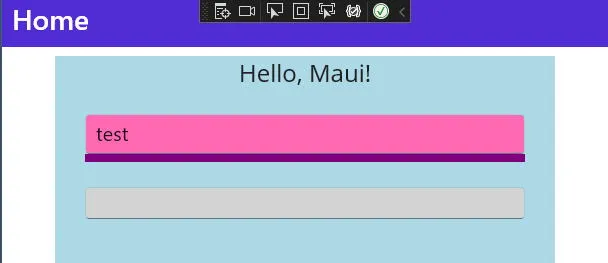
在 Windows 上,AppShell + MainPage 使用两个 MyEntry。其中一个有下划线并且有颜色。
<ContentPage xmlns="http://schemas.microsoft.com/dotnet/2021/maui"
             xmlns:x="http://schemas.microsoft.com/winfx/2009/xaml"
             xmlns:myviews="clr-namespace:MauiCustomEntryHandler"
             x:Class="MauiCustomEntryHandler.MainPage">

    <ScrollView>
        <VerticalStackLayout
                WidthRequest="500" HeightRequest="400"
                Spacing="25" Padding="30,0" BackgroundColor="LightBlue"
                HorizontalOptions="Center" VerticalOptions="Center">
            <Label Text="Hello, Maui!" FontSize="24" HorizontalOptions="Center" />
            <myviews:MyEntry Text="test" FontSize="20" UnderlineThickness="8"
                 UnderlineColor="Purple" BackgroundColor="HotPink" />
            <myviews:MyEntry UnderlineThickness="0" BackgroundColor="LightGray" />
        </VerticalStackLayout>
    </ScrollView>

</ContentPage>
create a stylesheet style.css (call it what you like) and put it in the '/Resources' I don't think the location matters that much
.bottom-border {
border-bottom:1px solid black;
}
Add an entry in App.xaml to access the stylesheet
<Application.Resources>
<StyleSheet Source="/Resources/style.css" />
</Application.Resources>
... StyleClass="bottom-border"添加到您的元素中,然后就完成了!
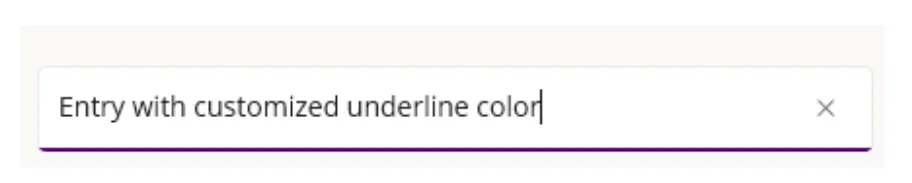
如果有人因为(看起来)简单的需要仅更改下划线颜色而来到此页面,请继续阅读。以下解决方案只需几行代码,适用于所有使用高亮/强调颜色的 MAUI 控件。
接受的答复似乎是一个有价值的教程,用于描述如何自定义 MAUI 控件的通用说明(这再次对应于可能过于泛化的原始问题标题)。但是,如果颜色行为是您唯一的目标,那么这将是完全不必要的。
MAUI 实现基于操作系统个性化方案。不幸的是,似乎无法在一个地方通用地覆盖它,但可以在特定于平台的层上控制它。
我最终得到的是仅修改一个文件,即./Platforms/Windows/App.xaml:
    <maui:MauiWinUIApplication.Resources>
        <ResourceDictionary>
            <Color x:Key="Primary">#500073</Color>
            <StaticResource x:Key="SystemAccentColorDark1" ResourceKey="Primary"/>
            <StaticResource x:Key="SystemAccentColorDark2" ResourceKey="Primary"/>
            <StaticResource x:Key="SystemAccentColorDark3" ResourceKey="Primary"/>
            <StaticResource x:Key="SystemAccentColorLight1" ResourceKey="Primary"/>
            <StaticResource x:Key="SystemAccentColorLight2" ResourceKey="Primary"/>
            <StaticResource x:Key="SystemAccentColorLight3" ResourceKey="Primary"/>
        </ResourceDictionary>
    </maui:MauiWinUIApplication.Resources>
这样做可以覆盖操作系统的颜色,据我最好的猜测,这将修改使用此强调颜色的给定平台上所有控件的行为。
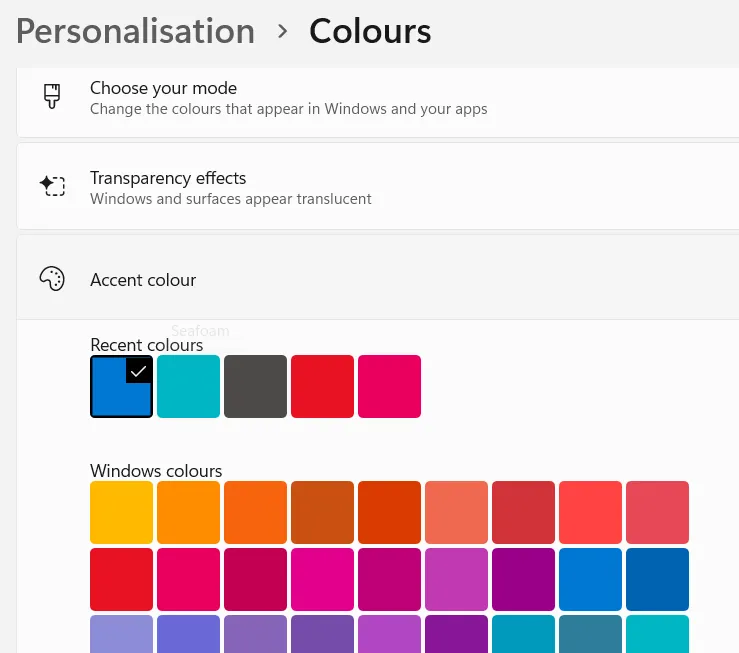
最初,我尝试修改通用的./Resources/Styles/Colors.xaml文件,以期在所有平台上一次性覆盖此行为,但似乎并没有成功。希望 MAUI 团队有朝一日能够实现通用的行为。
被接受的答案实在太复杂了。不妨像这样使用 Grid、Frame、Entry 和 BoxView:
<Grid>
    <Frame Padding="0" />
    <Entry
        Margin="5,0,5,0"
        Placeholder="Put some text here..."
    />
    <BoxView
        HeightRequest="1"
        Color="LightGray"
        VerticalOptions="End"
        Margin="0,0,0,5"
    />
</Grid>
当然需要根据需要进行微调
<Color x:Key="Primary">#00FFFF</Color><color name="colorPrimary">#00FFFF</color>