我在寻找如何使用Visual Studio Code开发和调试C# .NET程序的命令行/控制台/库,这些程序无法在.NET Core上运行,即它们需要.NET Framework。 我需要访问Oracle,而它没有.NET Core提供程序,但它确实有一个受管理的.NET Framework提供程序。 我目前使用VS 2015/2017完成这个任务,但如果我能够编写、构建和调试.NET Framework目标的C#程序,我想切换到VS Code。 我已经尝试了谷歌搜索,但没有找到任何相关信息。
Visual Studio Code 用于 .NET Framework。
83
- Acid Rider
6
请查看此处发布的问题:https://dev59.com/U10a5IYBdhLWcg3wxrON - Matthew Pigram
2我看到了这个,它并没有回答我的问题。如果您认为它有用,请剪切并粘贴相关的段落在这里。谢谢。 - Acid Rider
你尝试过在 .NET Core 中使用 Oracle 提供程序吗? - Neville Nazerane
我尝试在Core中使用.NET提供程序,但是遇到了许多具有各种DLL依赖项的异常,而且它也不受支持,所以我放弃了...... system.data.odbc在Core中可以工作,但非常缓慢。 - Acid Rider
这个问题目前是从使用VS Code与C#的文档中引用的。我认为暗示是不要尝试使用VS Code开发.NET Framework代码,而是使用Visual Studio。否则,Microsoft/OmniSharp会使其正常工作并正确记录。 - Rich N
最近发现了这个可能会对你有帮助:https://www.coderedcorp.com/blog/using-vs-code-with-a-legacy-net-project/ - Matt W
6个回答
86
首先,Visual Studio Code的最新更新确实支持构建和调试.NET Framework项目,但是功能非常有限。
负责C#扩展的OmniSharp的GitHub页面表示:
引用:
以下是参考资料:
负责C#扩展的OmniSharp的GitHub页面表示:
引用:
C#扩展支持有限的完整.NET框架调试。它只能使用可移植PDBs调试64位应用程序。
但是,即使阅读了许多与此主题相关的问题和讨论,对于我来说仍然不太清楚需要哪些步骤,因此我将在这里公布一个小指南,介绍我所遵循的步骤,并希望这些步骤也适用于您。The necessary files/folders are:
a.
.vscodewithlaunch.jsonandtasks.json.b.
bin\Debugfolder for your .exe application and the assemblies you might want to create a reference to.d. the
<project>.csprojandProgram.csfiles.e. optionally a batch file, whose purpose I will describe later.
Install MSBuild 15 (2017).
In the
<project>.csprojfile:change the
Project Sdk="Microsoft.NET.Sdk"toProject ToolsVersion="15.0" xmlns="http://schemas.microsoft.com/developer/msbuild/2003".in the first
PropertyGroupwe must set theOutputTypetoExe(the default may bedll), remove theTargetFrameworkproperty, replacing withTargetFrameworkVersionwith valuev4.6.1(example for .NET Framwork 4.6.1, it may be 4.7 for instance), and finally put the runtimes win-x64 and win7-x64 (and any other that the compiler may complain). This firstPropertyGroupshould look like this:<PropertyGroup> <OutputType>Exe</OutputType> <TargetFrameworkVersion>v4.6.1</TargetFrameworkVersion> <RuntimeIdentifiers>win-x64;win7-x64</RuntimeIdentifiers> </PropertyGroup>set another PropertyGroup` with the following items:
<PropertyGroup Condition=" '$(Configuration)|$(Platform)' == 'Debug|AnyCPU' ">
  <PlatformTarget>x64</PlatformTarget>
  <DebugSymbols>true</DebugSymbols>
  <DebugType>portable</DebugType>
  <Optimize>false</Optimize>
  <OutputPath>bin\Debug\</OutputPath>
  <DefineConstants>DEBUG;TRACE</DefineConstants>
  <ErrorReport>prompt</ErrorReport>
  <WarningLevel>4</WarningLevel>
</PropertyGroup>
Some comments: the condition used signals that these properties only apply when the configuration passed to the compiler is Debug and the Platform is "AnyCPU", you might want to insert other conditions with different values, or even don't use a condition at all; the most import values here are: The PlatformTarget property must be x64 and the DebugType must be portable; the output path is set to bin\Debug.
As we are not using the Microsoft SDK we must include the
Program.cs, so that the compiler can find it:<ItemGroup> <Compile Include="Program.cs" /> </ItemGroup>create the necessary references to your project, for example:
<ItemGroup>
  <Reference Include="mscorlib" />
  <Reference Include="System.Core" />
  <Reference Include="System.Windows" />
  <Reference Include="System.ServiceModel" />
  <Reference Include="System.Net" />
  <Reference Include="System.Xml" />
  <Reference Include="System" />
  <Reference Include="System.Xml.Linq" />
  <Reference Include="System.Data.DataSetExtensions" />
  <Reference Include="Microsoft.CSharp" />
  <Reference Include="System.Data" />
  <Reference Include="System.Net.Http" />
</ItemGroup>
finally import the following tools (make sure you follow the order exposed here, placing this in the beginning for instance you generate an error)
The whole thing should look like this:
<Project ToolsVersion="15.0" xmlns="http://schemas.microsoft.com/developer/msbuild/2003">

  <PropertyGroup>
    <OutputType>Exe</OutputType>
    <TargetFrameworkVersion>v4.6.1</TargetFrameworkVersion>
    <RuntimeIdentifiers>win-x64;win7-x64</RuntimeIdentifiers>
  </PropertyGroup>

  <PropertyGroup Condition=" '$(Configuration)|$(Platform)' == 'Debug|AnyCPU' ">
    <PlatformTarget>x64</PlatformTarget>
    <DebugSymbols>true</DebugSymbols>
    <DebugType>portable</DebugType>
    <Optimize>false</Optimize>
    <OutputPath>bin\Debug\</OutputPath>
    <DefineConstants>DEBUG;TRACE</DefineConstants>
    <ErrorReport>prompt</ErrorReport>
    <WarningLevel>4</WarningLevel>
  </PropertyGroup>

  <PropertyGroup Condition=" '$(Configuration)|$(Platform)' == 'Release|AnyCPU' ">
    <PlatformTarget>x64</PlatformTarget>
    <DebugType>portable</DebugType>
    <Optimize>true</Optimize>
    <OutputPath>bin\Release\</OutputPath>
    <DefineConstants>TRACE</DefineConstants>
    <ErrorReport>prompt</ErrorReport>
    <WarningLevel>4</WarningLevel>
  </PropertyGroup>

  <ItemGroup>
    <Compile Include="Program.cs" />
  </ItemGroup>

  <ItemGroup>
    <Reference Include="mscorlib" />
    <Reference Include="System.Core" />
    <Reference Include="System.Windows" />
    <Reference Include="System.ServiceModel" />
    <Reference Include="System.Net" />
    <Reference Include="System.Xml" />
    <Reference Include="System" />
    <Reference Include="System.Xml.Linq" />
    <Reference Include="System.Data.DataSetExtensions" />
    <Reference Include="Microsoft.CSharp" />
    <Reference Include="System.Data" />
    <Reference Include="System.Net.Http" />
  </ItemGroup>

  <Import Project="$(MSBuildToolsPath)\Microsoft.CSharp.targets" />

</Project>
In the
launch.json:Create a new configuration(e.g.
MyLauncher), whose type must be clr, and that points to your program; thepreLaunchTaskwill be set to a manually configured one ("mybuild", for instance) that will be specified in thetasks.json; an example of the configuration is:{ "version": "0.2.0", "configurations": [ { "name": "MyLauncher", "type":"clr", "request": "launch", "preLaunchTask": "mybuild", "program": "${workspaceFolder}/bin/Debug/<project>.exe", "args":[], "console": "internalConsole", "stopAtEntry": false, "internalConsoleOptions": "openOnSessionStart" }, { other configurations... } ,] }
In the
tasks.json:Create a task
"mybuild"with the commands to build your project.We will use the MSBuild 15 here (don't use the dotnet build - at least it has not worked for me).
You can directly point to the
(path)\MSBuild.exe(ormsbuild.exe, if it is in the%PATH%) file with the arguments to build the project. One example is shown below, note that I've set the Configuration to Debug and the platform to AnyCPU, matching the condition Ive set in the.csprojfile, also note that the backslashes in\"AnyCPU\"are because of the use of the quotation marks.{ "version": "2.0.0", "tasks": [ { "label": "mybuild", "command":"<path to msbuild>\MSBuild.exe", "type":"shell", "args":[ "<project>.csproj", "/t:Build", "/p:Configuration=Debug", "/p:Platform=\"AnyCPU\"" ] } ] }but there is another way, using the
.batfile; in my case the path to theMSBuild.exehad spaces and that was generating an error when the task run, so that I've put the following code in a.batfile (save notepad asname.bat):"(path)\MSBuild.exe" (project).csproj /t:Build /p:Configuration=Debug /p:Platform="AnyCPU"and then set the
"mybuild"task to:{ "label": "mybuild", "command":"build.bat", "type":"shell", "args":[] }Where
build.batis the batch file I have created with the previous code.
After this, you might have to save, close and reopen the files (this many times fixes problems for me).
Set your configuration in the debugger to
MyLauncher: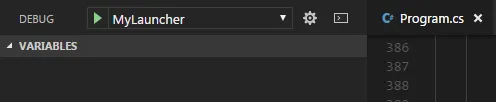
Run your code with the green play button; it will call the
MyLauncher, that first will build your project with MSBuild 15 and then run the exe file
以下是参考资料:
- Mario Figueiredo
5
10谢谢您的长篇回答,但我想我会回到Visual Studio。它比这个花费更少的时间。 - Luke
我想在工作中使用Visual Studio Code。MSBuild 15有哪种类型的许可证?另外,我在哪里可以获取MSBuild 15? - user1164199
定位批处理文件的提示:您的launch.json位于"./.vscode/lauch.json"。 - Davi Fiamenghi
2@Abr 如果你想要“只是工作”,你应该使用Visual Studio,而不是VS Code。 - Yehor Androsov
30
我刚刚创建了一个简单的控制台应用程序并自定义了csproj文件。之后,我可以将OmniSharp调试器附加到完整的.NET框架应用程序上。csproj文件如下所示:
<Project Sdk="Microsoft.NET.Sdk">

  <PropertyGroup>
    <OutputType>Exe</OutputType>
    <TargetFramework>net47</TargetFramework>
    <PlatformTarget>x64</PlatformTarget>
    <DebugType>portable</DebugType>
  </PropertyGroup>

</Project>
我只是按照官方文档的说明操作:将 TargetFramework 更改为 .NET 4.7,PlatformTarget 更改为 64 位,DebugType 更改为可移植。
此外,我更新了 launch.json:
{
   // Use IntelliSense to find out which attributes exist for C# debugging
   // Use hover for the description of the existing attributes
   // For further information visit https://github.com/OmniSharp/omnisharp-vscode/blob/master/debugger-launchjson.md
   "version": "0.2.0",
   "configurations": [
        {
            "name": ".NET Launch (console)",
            "type": "clr",
            "request": "launch",
            "preLaunchTask": "build",
            // If you have changed target frameworks, make sure to update the program path.
            "program": "${workspaceFolder}/bin/Debug/net47/FullNetInVsCode.exe",
            "args": [],
            "cwd": "${workspaceFolder}",
            // For more information about the 'console' field, see https://github.com/OmniSharp/omnisharp-vscode/blob/master/debugger-launchjson.md#console-terminal-window
            "console": "internalConsole",
            "stopAtEntry": false,
            "internalConsoleOptions": "openOnSessionStart"
        },
        {
            "name": ".NET Attach",
            "type": "clr",
            "request": "attach",
            "processId": "${command:pickProcess}"
        }
    ,]
}
type更改为clr,并将program定位到exe文件。之后,我可以设置断点,然后只需按F5即可在完整的.NET框架上开始调试:

- feO2x
1
也可以在没有调试类型的情况下工作。 - Michael Csitkovics
5
https://code.visualstudio.com/docs/languages/csharp
引用:
注意:VS Code不支持调试在桌面.NET Framework上运行的应用程序。
看起来Visual Studio“全能”IDE仍然是使用.Net Framework的必要条件。非常可惜。
- Acid Rider
1
164位可执行文件与便携式PDB文件的支持有限。更多信息请参见链接:https://github.com/Microsoft/vscode-docs/issues/1339 - Cameron
1
这个问题已经有很多扎实的答案了,但是它们可以被简化。
(截至2023年6月28日,此答案有效。)
(截至2023年6月28日,此答案有效。)
调试一个.NET Framework项目
在VS Code中调试一个.NET Framework项目就像创建一个启动配置和一个可选的构建任务一样简单。
启动配置
启动配置指定您希望附加到的应用程序,并存储在名为launch.json的文件中,该文��存储在名为.vscode的工作区根目录下的文件夹中。以下示例可以用作通用模板,以根据您的需求进行调整:
{
    "version": "0.2.0",
    "configurations": [
         {
             "name": "Sample Console",
             "type": "clr",
             "request": "launch",
             "preLaunchTask": "buildSampleConsole",
             "program": "pathToExecutable.exe",
             "args": [],
             "cwd": "pathToWorkingDirectory",
             "console": "internalConsole",
             "stopAtEntry": false,
             "internalConsoleOptions": "openOnSessionStart"
         }
    ]
 }
要了解有关启动配置的更多信息,请访问 OmniSharp文档。
name属性
name属性是不言自明的,它只是为配置命名。我建议为更复杂的项目指定一个独特的名称,因为这是您在开始调试过程时识别配置的方式:
program 属性
program 属性是您希望调试的可执行文件的路径。建议使用 ${workspaceFolder} 词汇来处理工作区本身的路径:
"program": "${workspaceFolder}/src/SampleConsole/bin/Debug/net48/SampleConsole.exe"
cwd 属性
cwd 属性是指当前工作目录。这是正在调试的程序的工作目录:
"cwd": "${workspaceFolder}/src/SampleConsole"
preLaunchTask属性
该属性仅指定在启动之前要运行的任务的名称。从技术上讲,它不是必需的,但强烈建议使用,以确保您正在调试应用程序的最新状态。
构建任务
构建任务是可选的,但存储在名为tasks.json的文件中,位于工作区根目录下的同一.vscode文件夹中:
{
    "label": "buildSampleConsole",
    "detail": "Builds the sample console.",
    "command": "dotnet",
    "type": "process",
    "args": [
        "build",
        "src/SampleConsole/SampleConsole.csproj"
    ],
    "problemMatcher": "$msCompile"
}
免责声明
我使用两个用于处理C#的扩展:
如果没有它们,我不能百分之百确定这个答案是否有效,请记住这一点。
- Hazel へいぜる
0
很遗憾,它不支持C/C++的Intellisense,只有语法高亮:code.visualstudio.com/docs/languages 编辑:C/C++也没有调试器集成。但是Git集成非常好用!看起来更适合Web应用程序,调试器适用于node.js。
虽然这并没有具体指定C#,但可以推断出相同的标准适用(即没有调试器和编译功能)。
引用自Visual Studio Code到底是什么?第一个答案的评论。
虽然这并没有具体指定C#,但可以推断出相同的标准适用(即没有调试器和编译功能)。
引用自Visual Studio Code到底是什么?第一个答案的评论。
- Matthew Pigram
1
根据YouTube上有关VS Code的视频,C/C++得到了支持并且具备调试器支持。无论如何,截至2017年12月,.Net Framework C#和VS Code不太兼容。遗憾。我们继续前进。 - Acid Rider
-1
首先,安装Visual Studio 2019的构建工具。
将.vscode文件夹添加到您的VS Code工作区,并添加tasks.json以构建您的项目。下面是一个示例tasks.json,可用于大多数.Net Framework项目。
{
  "version": "2.0.0",
  "command": "msbuild",
  "args": [ "/property:GenerateFullPaths=true" ],
  "tasks": [{
    "label": "build",
    "problemMatcher": "$msCompile"
  }]
}{
"version": "0.2.0",
"configurations": [
{
"name": ".NET Framework Launch",
"type": "clr",
"request": "launch",
"preLaunchTask": "build",
"program": "demo.console.exe",
"args": [],
"cwd": "${workspaceFolder}\\demo.console\\bin\\debug\\net461\\",
"stopAtEntry": false
},
{
"name": ".NET Framework",
"type": "clr",
"request": "attach",
"processId": "${command:pickProcess}"
}
]
}- Om Mishra
网页内容由stack overflow 提供, 点击上面的可以查看英文原文,
原文链接
原文链接
- 相关问题
- 10 Visual Studio Code 错误:"找不到 .NET CLI 工具..."
- 3 .NET Framework和Visual Studio安装顺序
- 3 .NET Framework 4.0的Visual Studio单元测试
- 7 Visual Studio 2012中缺少.NET Framework 4.5.1
- 3 Visual Studio 2010无法识别.NET Framework 4.0.3
- 61 从Visual Studio浏览.NET Framework源代码
- 45 在Visual Studio 2012中调试.NET Framework源代码?
- 9 Visual Studio Code - .NET Core 测试浏览器
- 3 Visual Studio 2010中的.NET Framework 3.5不可用。
- 16 Visual Studio Code 取代 Visual Studio