我正在寻找一份指南或教程,展示如何仅使用代码设置简单的UICollectionView。
我正在阅读苹果网站上的文件(CollectionView Programming Guide for iOS),并且也在使用参考手册。
但是,我真的需要一份简单的指南,可以向我展示如何设置UICollectionView,而无需使用Storyboards或XIB / NIB文件 - 但不幸的是,当我搜索时,我只能找到以Storyboard为特色的教程。
我正在寻找一份指南或教程,展示如何仅使用代码设置简单的UICollectionView。
我正在阅读苹果网站上的文件(CollectionView Programming Guide for iOS),并且也在使用参考手册。
但是,我真的需要一份简单的指南,可以向我展示如何设置UICollectionView,而无需使用Storyboards或XIB / NIB文件 - 但不幸的是,当我搜索时,我只能找到以Storyboard为特色的教程。
头文件:--
@interface ViewController : UIViewController<UICollectionViewDataSource,UICollectionViewDelegateFlowLayout>
{
    UICollectionView *_collectionView;
}
实现文件:--
- (void)viewDidLoad
{
[super viewDidLoad];
self.view = [[UIView alloc] initWithFrame:[[UIScreen mainScreen] bounds]];
UICollectionViewFlowLayout *layout=[[UICollectionViewFlowLayout alloc] init];
_collectionView=[[UICollectionView alloc] initWithFrame:self.view.frame collectionViewLayout:layout];
[_collectionView setDataSource:self];
[_collectionView setDelegate:self];
[_collectionView registerClass:[UICollectionViewCell class] forCellWithReuseIdentifier:@"cellIdentifier"];
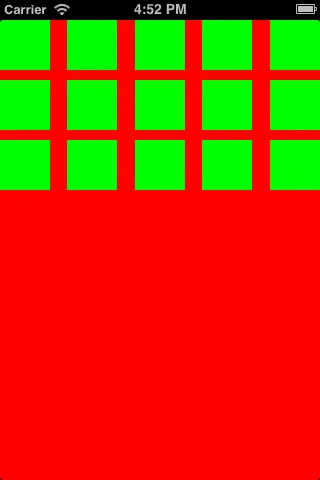
[_collectionView setBackgroundColor:[UIColor redColor]];
[self.view addSubview:_collectionView];
// Do any additional setup after loading the view, typically from a nib.
}
- (NSInteger)collectionView:(UICollectionView *)collectionView numberOfItemsInSection:(NSInteger)section
{
return 15;
}
// The cell that is returned must be retrieved from a call to -dequeueReusableCellWithReuseIdentifier:forIndexPath:
- (UICollectionViewCell *)collectionView:(UICollectionView *)collectionView cellForItemAtIndexPath:(NSIndexPath *)indexPath
{
UICollectionViewCell *cell=[collectionView dequeueReusableCellWithReuseIdentifier:@"cellIdentifier" forIndexPath:indexPath];
cell.backgroundColor=[UIColor greenColor];
return cell;
}
- (CGSize)collectionView:(UICollectionView *)collectionView layout:(UICollectionViewLayout*)collectionViewLayout sizeForItemAtIndexPath:(NSIndexPath *)indexPath
{
return CGSizeMake(50, 50);
}
输出---
@property (strong, nonatomic) UICollectionView *collectionView;。 - zontragonUICollectionViewCell 添加任何子视图,你真的不想注册 UICollectionViewCell,而是要继承它,在 initWithFrame 方法中进行单元格配置,然后使用单元格标识符注册这个子类,而不是 UICollectionViewCell。 - Rob对于 Swift 4 用户:--
class TwoViewController: UIViewController, UICollectionViewDataSource, UICollectionViewDelegateFlowLayout, UICollectionViewDelegate {

    override func viewDidLoad() {
        super.viewDidLoad()

        self.collectionView = UICollectionView(frame: self.view.bounds, collectionViewLayout: flowLayout)
        collectionView.register(UICollectionViewCell.self, forCellWithReuseIdentifier: "collectionCell")
        collectionView.delegate = self
        collectionView.dataSource = self
        collectionView.backgroundColor = UIColor.cyan
        self.view.addSubview(collectionView)
    }

    func collectionView(_ collectionView: UICollectionView, numberOfItemsInSection section: Int) -> Int {
        return 20
    }

    func collectionView(_ collectionView: UICollectionView, cellForItemAt indexPath: IndexPath) -> UICollectionViewCell {
       var cell = collectionView.dequeueReusableCell(withReuseIdentifier: "collectionCell", for: indexPath as IndexPath)

       cell.backgroundColor = UIColor.green
       return cell
    }

    func collectionView(collectionView: UICollectionView, layout collectionViewLayout: UICollectionViewLayout, sizeForItemAtIndexPath indexPath: NSIndexPath) -> CGSize {
        return CGSize(width: 50, height: 50)
    }

    func collectionView(collectionView: UICollectionView, layout collectionViewLayout: UICollectionViewLayout, insetForSectionAtIndex section: Int) -> UIEdgeInsets {
        return UIEdgeInsets(top: 5, left: 5, bottom: 5, right: 5)
    }
}
针对Swift 2.0版本
不需要实现绘制CollectionViewCells所需的方法:
func collectionView(collectionView: UICollectionView, layout collectionViewLayout: UICollectionViewLayout, sizeForItemAtIndexPath indexPath: NSIndexPath) -> CGSize
    {
        return CGSizeMake(50, 50);
    }

    func collectionView(collectionView: UICollectionView, layout collectionViewLayout: UICollectionViewLayout, insetForSectionAtIndex section: Int) -> UIEdgeInsets
    {
        return UIEdgeInsetsMake(5, 5, 5, 5); //top,left,bottom,right
    }
使用UICollectionViewFlowLayout
func createCollectionView() {
    let flowLayout = UICollectionViewFlowLayout()

    // Now setup the flowLayout required for drawing the cells
    let space = 5.0 as CGFloat

    // Set view cell size
    flowLayout.itemSize = CGSizeMake(50, 50)

    // Set left and right margins
    flowLayout.minimumInteritemSpacing = space

    // Set top and bottom margins
    flowLayout.minimumLineSpacing = space

    // Finally create the CollectionView
    let collectionView = UICollectionView(frame: CGRectMake(10, 10, 300, 400), collectionViewLayout: flowLayout)

    // Then setup delegates, background color etc.
    collectionView?.dataSource = self
    collectionView?.delegate = self
    collectionView?.registerClass(UICollectionViewCell.self, forCellWithReuseIdentifier: "cellID")
    collectionView?.backgroundColor = UIColor.whiteColor()
    self.view.addSubview(collectionView!)
}
然后按照需要实现UICollectionViewDataSource方法:
func collectionView(collectionView: UICollectionView, numberOfItemsInSection section: Int) -> Int {
        return 20;
    }
func collectionView(collectionView: UICollectionView, cellForItemAtIndexPath indexPath: NSIndexPath) -> UICollectionViewCell {
    var cell:UICollectionViewCell=collectionView.dequeueReusableCellWithReuseIdentifier("collectionCell", forIndexPath: indexPath) as UICollectionViewCell;
    cell.backgroundColor = UIColor.greenColor();
    return cell;
}
func numberOfSectionsInCollectionView(collectionView: UICollectionView) -> Int {
    // #warning Incomplete implementation, return the number of sections
    return 1
}
Swift 3
class TwoViewController: UIViewController, UICollectionViewDataSource, UICollectionViewDelegateFlowLayout, UICollectionViewDelegate {

    override func viewDidLoad() {
        super.viewDidLoad()

        let flowLayout = UICollectionViewFlowLayout()

        let collectionView = UICollectionView(frame: self.view.bounds, collectionViewLayout: flowLayout)
        collectionView.register(UICollectionViewCell.self, forCellWithReuseIdentifier: "collectionCell")
        collectionView.delegate = self
        collectionView.dataSource = self
        collectionView.backgroundColor = UIColor.cyan

        self.view.addSubview(collectionView)
    }

    func collectionView(_ collectionView: UICollectionView, numberOfItemsInSection section: Int) -> Int
    {
        return 20
    }

    func collectionView(_ collectionView: UICollectionView, cellForItemAt indexPath: IndexPath) -> UICollectionViewCell
    {
        let cell = collectionView.dequeueReusableCell(withReuseIdentifier: "collectionCell", for: indexPath as IndexPath)

        cell.backgroundColor = UIColor.green
        return cell
    }

    func collectionView(_ collectionView: UICollectionView, layout collectionViewLayout: UICollectionViewLayout, sizeForItemAt indexPath: IndexPath) -> CGSize
    {
        return CGSize(width: 50, height: 50)
    }

    func collectionView(_ collectionView: UICollectionView, layout collectionViewLayout: UICollectionViewLayout, insetForSectionAt section: Int) -> UIEdgeInsets
    {
        return UIEdgeInsets(top: 5, left: 5, bottom: 5, right: 5)
    }

}
- (void)viewDidLoad
{
UINib *nib2 = [UINib nibWithNibName:@"YourCustomCell" bundle:nil];
[CollectionVW registerNib:nib2 forCellWithReuseIdentifier:@"YourCustomCell"];
UICollectionViewFlowLayout *flowLayout = [[UICollectionViewFlowLayout alloc] init];
[flowLayout setItemSize:CGSizeMake(200, 230)];
flowLayout.minimumInteritemSpacing = 0;
[flowLayout setScrollDirection:UICollectionViewScrollDirectionVertical];
[CollectionVW setCollectionViewLayout:flowLayout];
[CollectionVW reloadData];
}
#pragma mark - COLLECTIONVIEW
#pragma mark Collection View CODE
-(NSInteger)numberOfSectionsInCollectionView:(UICollectionView *)collectionView
{
return 1;
}
- (NSInteger)collectionView:(UICollectionView *)collectionView numberOfItemsInSection:(NSInteger)section
{
return Array.count;
}
- (UICollectionViewCell *)collectionView:(UICollectionView *)collectionView cellForItemAtIndexPath:(NSIndexPath *)indexPath
{
static NSString *cellIdentifier = @"YourCustomCell";
YourCustomCell *cell = (YourCustomCell *)[collectionView dequeueReusableCellWithReuseIdentifier:cellIdentifier forIndexPath:indexPath];
cell.MainIMG.image=[UIImage imageNamed:[Array objectAtIndex:indexPath.row]];
return cell;
}
-(void)collectionView:(UICollectionView *)collectionView didSelectItemAtIndexPath:(NSIndexPath *)indexPath
{
}
#pragma mark Collection view layout things
// Layout: Set cell size
- (CGSize)collectionView:(UICollectionView *)collectionView layout:(UICollectionViewLayout*)collectionViewLayout sizeForItemAtIndexPath:(NSIndexPath *)indexPath
{
CGSize mElementSize;
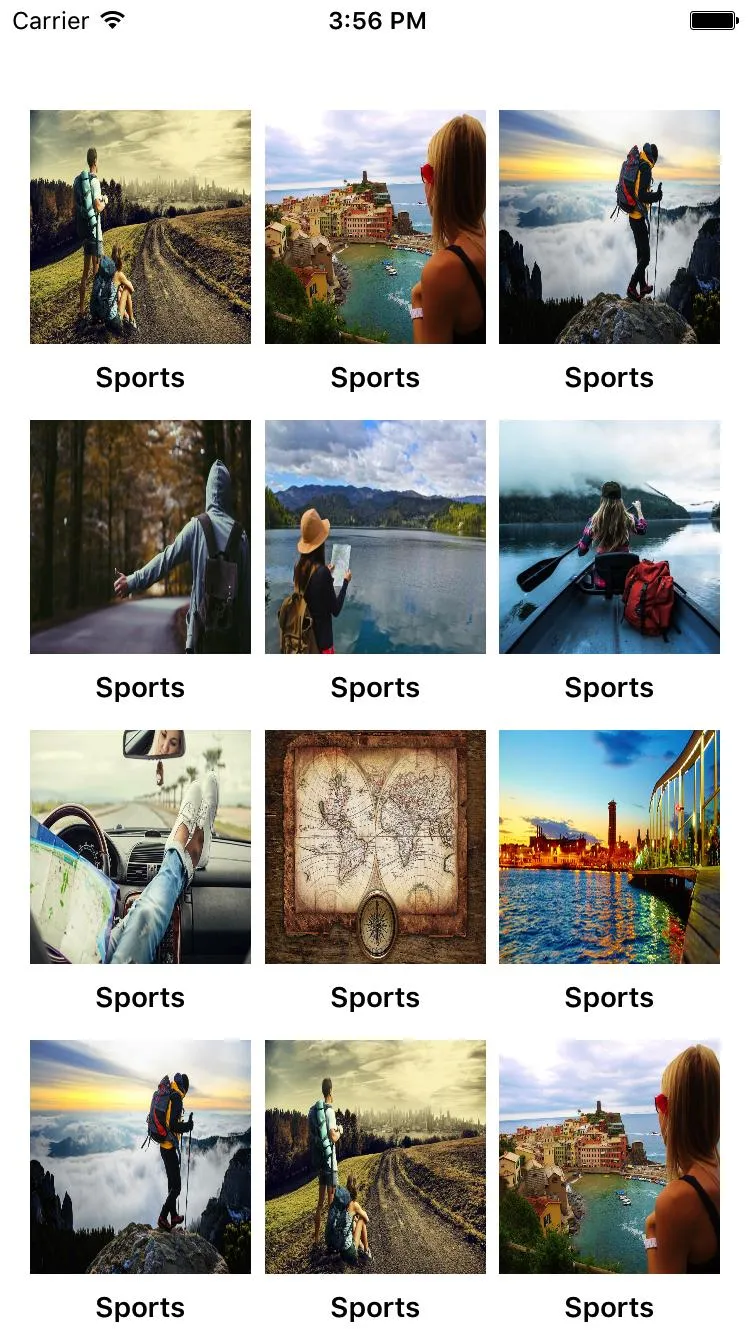
mElementSize=CGSizeMake(kScreenWidth/3.4, 150);
return mElementSize;
}
- (CGFloat)collectionView:(UICollectionView *)collectionView layout:(UICollectionViewLayout*)collectionViewLayout minimumLineSpacingForSectionAtIndex:(NSInteger)section
{
return 5.0;
}
// Layout: Set Edges
- (UIEdgeInsets)collectionView: (UICollectionView *)collectionView layout:(UICollectionViewLayout*)collectionViewLayout insetForSectionAtIndex:(NSInteger)section
{
if (isIphone5 || isiPhone4)
{
return UIEdgeInsetsMake(15,15,5,15); // top, left, bottom, right
}
else if (isIphone6)
{
return UIEdgeInsetsMake(15,15,5,15); // top, left, bottom, right
}
else if (isIphone6P)
{
return UIEdgeInsetsMake(15,15,5,15); // top, left, bottom, right
}
return UIEdgeInsetsMake(15,15,5,15); // top, left, bottom, right
}
在@Warewolf的回答基础上,下一步是创建您自己的自定义单元格。
转到文件 -> 新建 -> 文件 -> 用户界面 -> 空白 -> 调用此nib"customNib"。
在您的customNib中拖入一个UICollectionView单元格。给它重用单元格标识符@"Cell"。
文件 -> 新建 -> 文件 -> Cocoa Touch Class -> Class命名为"CustomCollectionViewCell",子类为UICollectionViewCell。
返回到自定义nib,点击单元格并将此自定义类设为"CustomCollectionViewCell"。
转到您的viewDidLoad viewcontroller,并替换为
UINib *nib = [UINib nibWithNibName:@"customNib" bundle:nil];
[_collectionView registerNib:nib forCellWithReuseIdentifier:@"Cell"];
同时,更改以下内容(更改为新的单元格标识符)
UICollectionViewCell *cell=[collectionView dequeueReusableCellWithReuseIdentifier:@"Cell" forIndexPath:indexPath];
苹果文档:
- (id)initWithFrame:(CGRect)frame
      collectionViewLayout:(UICollectionViewLayout *)layoutParameters
UICollectionView。在此处提供了frame和UICollectionViewLayout对象。UICollectionViewFlowLayout *layout = [[UICollectionViewFlowLayout alloc]init];
UICollectionView作为subview添加到您的视图中。
现在集合视图已经以编程方式添加。您可以继续学习。
愉快的学习!希望它能帮助您。Swift 5
XCode 11.5
import UIKit

// 1. When creating this view, instanciate this class with the param "collectionViewLayout: UICollectionViewFlowLayout".

class BespokeCollectionViewController: UICollectionViewController, UICollectionViewDelegateFlowLayout {
    var cellId = "AwesomeCell"

    override func viewDidLoad() {
        super.viewDidLoad()

        // 2. Register a reusable cell:
        collectionView.register(UICollectionViewCell.self, forCellWithReuseIdentifier: cellId)
    }

    // 3. Return number of items:
    override func collectionView(_ collectionView: UICollectionView, numberOfItemsInSection section: Int) -> Int {
        return 5
    }

    // 4. Define the reusable cell:
    override func collectionView(_ collectionView: UICollectionView, cellForItemAt indexPath: IndexPath) -> UICollectionViewCell {
        let cell = collectionView.dequeueReusableCell(withReuseIdentifier: cellId, for: indexPath)
        // You can cast type above as such: ...for: indexPath) as! BespokeCell
        return cell
    }

    // 5. Define the size of the cell. This depends on protocol 'UICollectionViewDelegateFlowLayout' to work:
    func collectionView(_ collectionView: UICollectionView, layout collectionViewLayout: UICollectionViewLayout, sizeForItemAt indexPath: IndexPath) -> CGSize {
        let width = view.frame.width // In this example the width is the same as the whole view.
        let height = CGFloat(200)
        return CGSize(width: width, height: height)
    }
}
要使用您的自定义类,请不要忘记collectionViewLayout参数:
let layout = UICollectionViewFlowLayout()
let myViewController = WorkoutViewController(collectionViewLayout: layout)
如果您不使用故事板,您需要将此视图附加到窗口。这是一个不同的问题。iOS 12及以下的系统将在AppDelegate文件中处理窗口逻辑。在iOS 13+上,此逻辑在SceneDelegate文件中处理。
window?.rootViewController = someController
祝你好运!
    #pragma mark -
    #pragma mark - UICollectionView Datasource and Delegates

    -(NSInteger)numberOfSectionsInCollectionView:(UICollectionView *)collectionView
    {
        return 1;
    }

    -(NSInteger)collectionView:(UICollectionView *)collectionView numberOfItemsInSection:(NSInteger)section
    {
        return Arr_AllCulturalButtler.count;
    }

    -(UICollectionViewCell *)collectionView:(UICollectionView *)collectionView cellForItemAtIndexPath:(NSIndexPath *)indexPath
    {
        static NSString *coll=@"FromCulturalbutlerCollectionViewCell";
        FromCulturalbutlerCollectionViewCell *cell=[collectionView dequeueReusableCellWithReuseIdentifier:coll forIndexPath:indexPath];
        cell.lbl_categoryname.text=[[Arr_AllCulturalButtler objectAtIndex:indexPath.row] Category_name];
        cell.lbl_date.text=[[Arr_AllCulturalButtler objectAtIndex:indexPath.row] event_Start_date];
        cell.lbl_location.text=[[Arr_AllCulturalButtler objectAtIndex:indexPath.row] Location_name];
        [cell.Img_Event setImageWithURL:[APPDELEGATE getURLForMediumSizeImage:[(EventObj *)[Arr_AllCulturalButtler objectAtIndex:indexPath.row] Event_image_name]] placeholderImage:nil usingActivityIndicatorStyle:UIActivityIndicatorViewStyleGray];
        cell.button_Bookmark.selected=[[Arr_AllCulturalButtler objectAtIndex:indexPath.row] Event_is_bookmarked];
        [cell.button_Bookmark addTarget:self action:@selector(btn_bookmarkClicked:) forControlEvents:UIControlEventTouchUpInside];
        cell.button_Bookmark.tag=indexPath.row;


        return cell;
    }
    - (void)collectionView:(UICollectionView *)collectionView didSelectItemAtIndexPath:(NSIndexPath *)indexPath
    {

        [self performSegueWithIdentifier:SEGUE_CULTURALBUTLER_KULTURELLIS_DETAIL sender:self];
    }

// stroy board navigation
- (void)prepareForSegue:(UIStoryboardSegue *)segue sender:(id)sender
{
    if ([segue.identifier isEqualToString:@"Overview_Register"])
    {
        WDRegisterViewController *obj=(WDRegisterViewController *)[segue destinationViewController];
        obj.str_Title=@"Edit Profile";
        obj.isRegister=NO;
    }
}

            [self performSegueWithIdentifier:@"Overview_Measure" sender:nil];


    UIStoryboard *sb = [UIStoryboard storyboardWithName:@"Main" bundle:nil];
    WDPeekViewController *Peek = (WDPeekViewController *)[sb instantiateViewControllerWithIdentifier:@"WDPeekViewController"];
 [self.navigationController pushViewController:tabBarController animated:YES];
想要创建自定义单元格的人:
CustomCell.h
#import <UIKit/UIKit.h>

@interface HeaderCollectionViewCell : UICollectionViewCell
@property (strong,nonatomic) UIImageView *image;
@end
CustomCell.m
#import "HeaderCollectionViewCell.h"

@implementation HeaderCollectionViewCell
#define IMAGEVIEW_BORDER_LENGTH 5

- (instancetype)initWithFrame:(CGRect)frame
{
    self = [super initWithFrame:frame];
    if (self) {
        [self setup];
    }
    return self;
}


-(void)setup{
    _image = [[UIImageView alloc] initWithFrame:(CGRectInset(self.bounds, IMAGEVIEW_BORDER_LENGTH, IMAGEVIEW_BORDER_LENGTH))];
    [self addSubview:_image];

}
@end
UIViewController.h
#import <UIKit/UIKit.h>


@interface HomeViewController : UIViewController<UICollectionViewDataSource,UICollectionViewDelegateFlowLayout>
@property (strong,nonatomic) UICollectionView *collectionView;

@end
UIViewController.m
#import "HomeViewController.h"
#import "HomeView.h"
#import "HeaderCollectionViewCell.h"

@interface HomeViewController ()
@property (nonatomic) NSString *cellID;

@end

@implementation HomeViewController


- (void)viewDidLoad {
    [super viewDidLoad];
    self.view.backgroundColor = UIColor.whiteColor;

    _cellID = @"id";

    UICollectionViewFlowLayout *layout = [[UICollectionViewFlowLayout alloc] init];
    _collectionView = [[UICollectionView alloc] initWithFrame:self.view.frame collectionViewLayout:layout];


    [_collectionView registerClass:[HeaderCollectionViewCell class] forCellWithReuseIdentifier:_cellID];


    [_collectionView setDataSource:self];
    [_collectionView setDelegate:self];

    _collectionView.backgroundColor = UIColor.redColor;


    [self.view addSubview:_collectionView];


}

- (NSInteger)collectionView:(UICollectionView *)collectionView numberOfItemsInSection:(NSInteger)section{
    return 4;
}

- (__kindof UICollectionViewCell *)collectionView:(UICollectionView *)collectionView cellForItemAtIndexPath:(NSIndexPath *)indexPath{

    HeaderCollectionViewCell *cell = [collectionView dequeueReusableCellWithReuseIdentifier:_cellID forIndexPath:indexPath];

    cell.image.image = [UIImage imageNamed:@"premium-icon"];

    return cell;
}

-(UITabBarItem*) tabBarItem{
    return [[UITabBarItem alloc] initWithTitle:@"Início" image:[UIImage imageNamed:@"home-icon"] tag:0];
}


@end