我正在尝试找出颜色差异,并将图像中的该部分裁剪出来。
有没有一种方法可以获取像素颜色?
我不认为可以基于这些方法,因为它是位图图像。
我知道有一个设置透明的方法,但问题是我需要将标志的宽度或高度设置为相同的高度/宽度,而透明函数不会更改图片的大小。
如果有一种方法可以做到这点,我会编写一个函数,找出图像从白色变化的地方,然后从顶部、中间和底部进行裁剪。
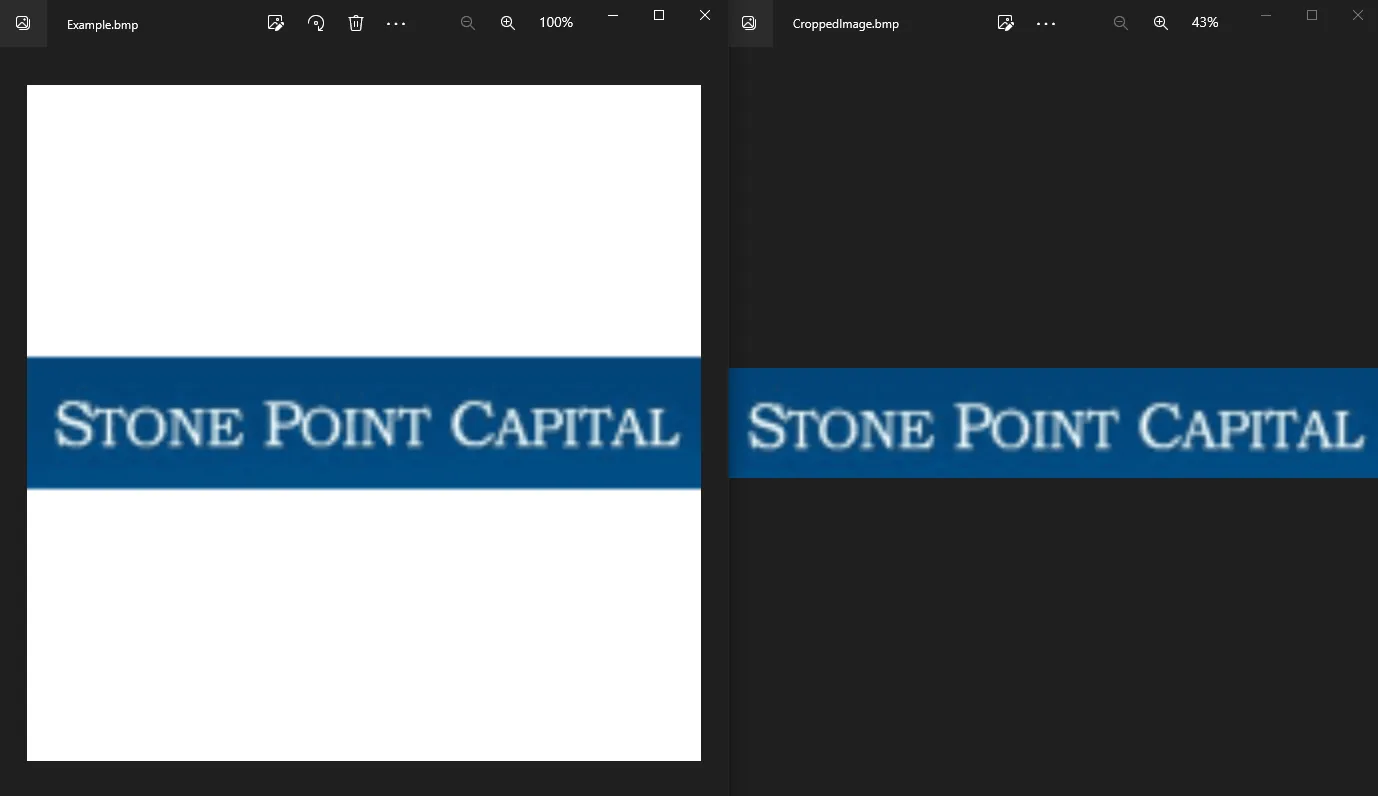
示例图片

我正在尝试找出颜色差异,并将图像中的该部分裁剪出来。
有没有一种方法可以获取像素颜色?
我不认为可以基于这些方法,因为它是位图图像。
我知道有一个设置透明的方法,但问题是我需要将标志的宽度或高度设置为相同的高度/宽度,而透明函数不会更改图片的大小。
如果有一种方法可以做到这点,我会编写一个函数,找出图像从白色变化的地方,然后从顶部、中间和底部进行裁剪。
示例图片
我最近在解决一个类似的问题,我开发了一个VBA解决方案,用于自动裁剪图像中的白色边框。
在那个答案中,我只看了图像的一侧,因为我假设边框在四周都是均匀的,所以它不会直接适用于这种情况。此外,该示例仅修改幻灯片,而不生成输出文件。
在下面的示例中,将检查图像的每一侧,并根据找到的空白量进行裁剪。然后将结果幻灯片导出回原始目录,并命名为croppedFile。
Private Declare PtrSafe Function SelectObject Lib "gdi32" (ByVal hdc As Long, ByVal hObject As Long) As Long
Private Declare PtrSafe Function CreateCompatibleDC Lib "gdi32" (ByVal hdc As Long) As Long
Private Declare PtrSafe Function DeleteDC Lib "gdi32" (ByVal hdc As Long) As Long
Private Declare PtrSafe Function GetPixel Lib "gdi32" (ByVal hdc As Long, ByVal X As Long, ByVal Y As Long) As Long
Private Function PixelTest(objPict As Object, ByVal X As Long, ByVal Y As Long) As Long
 Dim lDC As Variant
 lDC = CreateCompatibleDC(0)
 SelectObject lDC, objPict.Handle
 PixelTest = GetPixel(lDC, X, Y)
 DeleteDC lDC
End Function
Sub AutoCropper()
    Dim myDocument As Slide, fileSystem As Object, fileFolder As Object
    Dim fileItem As Object, objPict As Object, objImage As Object
    Dim i As Integer, startingPoint As Integer, endingPoint As Integer
    Dim MidPoint As Integer, filePath As String, fileName As String
    Dim cropScale As Single, margin As Single, reverseScan As Integer
    Dim importHeight As Single, importWidth As Single, resolutionScale As Integer
    Dim xlocation As Single, yLocation As Single
    Dim restoreLayout As Boolean
    filePath = "D:\Pictures"
    fileName = "Example.bmp"
    Set fileSystem = CreateObject("Scripting.FileSystemObject")
    Set fileFolder = fileSystem.GetFolder(filePath)
    Set objImage = CreateObject("WIA.ImageFile")
    cropScale = 3.4
    resolutionScale = 10
    importWidth = 330
    importHeight = 250
    xlocation = 390
    yLocation = 200
    For Each fileItem In fileFolder.Files
        If fileItem.Name = fileName Then
            i = i + 1
            On Error GoTo insertSlide
            Set myDocument = ActivePresentation.Slides(i)
            If myDocument.CustomLayout.Name = "Picture with Caption" Then
                myDocument.Layout = ppLayoutText
                restoreLayout = True
            End If
            Set preCroppedPic = myDocument.Shapes.AddPicture(fileName:=fileFolder & "\" & _
                fileItem.Name, LinkToFile:=msoTrue, SaveWithDocument:=msoTrue, _
                Left:=xlocation, Top:=yLocation, Width:=importWidth, Height:=importHeight)
            preCroppedPic.Export filePath & "\Temp.bmp", ppShapeFormatBMP, preCroppedPic.Width, preCroppedPic.Height, ppScaleToFit
            Set objImage = CreateObject("WIA.ImageFile")
            objImage.LoadFile filePath & "\Temp.bmp"
            Set objPict = LoadPicture(filePath & "\Temp.BMP")
            endingPoint = objImage.Width
            MidPoint = (0.5 * objImage.Height)
            For marginScan = 1 To endingPoint
                On Error Resume Next
                If Not (PixelTest(objPict, marginScan, MidPoint) Like "1677*") Then
                    margin = marginScan * cropScale
                    preCroppedPic.PictureFormat.CropLeft = margin
                    Exit For
                End If
            Next
            For marginScan = 1 To endingPoint
                reverseScan = endingPoint - marginScan
                If Not (PixelTest(objPict, reverseScan, MidPoint) Like "1677*") Then
                    margin = marginScan * cropScale
                    preCroppedPic.PictureFormat.CropRight = margin
                    Exit For
                End If
            Next
            endingPoint = objImage.Height
            MidPoint = (0.5 * objImage.Width)
            For marginScan = 1 To endingPoint
                If Not (PixelTest(objPict, MidPoint, marginScan) Like "1677*") Then
                    margin = marginScan * cropScale
                    preCroppedPic.PictureFormat.CropTop = margin
                    Exit For
                End If
            Next
            For marginScan = 1 To endingPoint
                reverseScan = endingPoint - marginScan
                If Not (PixelTest(objPict, MidPoint, reverseScan) Like "1677*") Then
                    margin = marginScan * cropScale
                    preCroppedPic.PictureFormat.CropBottom = margin
                  '  finalHeight = finalHeight - margin
                    Exit For
                End If
            Next
            If restoreLayout Then
                myDocument.Layout = ppLayoutPictureWithCaption
                restoreLayout = False
            End If
            preCroppedPic.Export filePath & "\CroppedImage.bmp", ppShapeFormatBMP, (resolutionScale * importWidth), (resolutionScale * importHeight), ppScaleToFit
            Exit For
        End If
    Next fileItem
    Exit Sub
insertSlide:
    Set myDocument = ActivePresentation.Slides.Add(i, ppLayoutText)
    Resume Next
End Sub
If Not Like参数来修改此脚本以裁剪任何边框颜色甚至渐变颜色,但从像素分析器返回的颜色不是RGB值,而是Long值。