好的 - 既然你可以在“正常”视图中按照自己的意愿获取UIPickerView的外观,那么你可以创建一个“正常”视图作为你的.inputView,然后将你的选择器视图作为子视图添加进去。
这是一个快速示例 - 只需在IB中添加一个UITextField并将其连接到IBOutlet:
class MyViewController: UIViewController
{
@IBOutlet weak var theTextField: UITextField!
let cancelButton: UIButton = {
let b = UIButton()
b.setTitle("Cancel", for: .normal)
b.translatesAutoresizingMaskIntoConstraints = false
return b
}()
let doneButton: UIButton = {
let b = UIButton()
b.setTitle("Done", for: .normal)
b.translatesAutoresizingMaskIntoConstraints = false
return b
}()
let pvToolbar: UIView = {
let v = UIView(frame: CGRect(x: 0, y: 0, width: 10, height: 40))
v.translatesAutoresizingMaskIntoConstraints = false
v.backgroundColor = .black
return v
}()
let pvBackground: UIView = {
let v = UIView(frame: CGRect(x: 0, y: 0, width: 10, height: 10))
v.backgroundColor = .white
v.translatesAutoresizingMaskIntoConstraints = false
return v
}()
let pickerView: UIPickerView = {
let p = UIPickerView(frame: CGRect(x: 0, y: 0, width: 10, height: 10))
p.showsSelectionIndicator = true
p.translatesAutoresizingMaskIntoConstraints = false
return p
}()
override func viewDidLoad() {
super.viewDidLoad()
pvToolbar.addSubview(cancelButton)
pvToolbar.addSubview(doneButton)
cancelButton.leftAnchor.constraint(equalTo: pvToolbar.leftAnchor, constant: 8.0).isActive = true
cancelButton.topAnchor.constraint(equalTo: pvToolbar.topAnchor, constant: 6.0).isActive = true
cancelButton.bottomAnchor.constraint(equalTo: pvToolbar.bottomAnchor, constant: -6.0).isActive = true
doneButton.rightAnchor.constraint(equalTo: pvToolbar.rightAnchor, constant: -8.0).isActive = true
doneButton.centerYAnchor.constraint(equalTo: cancelButton.centerYAnchor).isActive = true
pvBackground.addSubview(pickerView)
pickerView.topAnchor.constraint(equalTo: pvBackground.topAnchor).isActive = true
pickerView.bottomAnchor.constraint(equalTo: pvBackground.bottomAnchor).isActive = true
pickerView.centerXAnchor.constraint(equalTo: pvBackground.centerXAnchor).isActive = true
pickerView.widthAnchor.constraint(equalTo: pvBackground.widthAnchor, multiplier: 1.0).isActive = true
pickerView.delegate = self
pickerView.dataSource = self
theTextField.inputView = pvBackground
theTextField.inputAccessoryView = pvToolbar
}
}
extension AnimConstraintsViewController: UIPickerViewDelegate, UIPickerViewDataSource {
func pickerView(_ pickerView: UIPickerView, titleForRow row: Int, forComponent component: Int) -> String? {
return "Row: \(row)"
}
func pickerView(_ pickerView: UIPickerView, numberOfRowsInComponent component: Int) -> Int {
return 30
}
func numberOfComponents(in pickerView: UIPickerView) -> Int {
return 1
}
func pickerView(_ pickerView: UIPickerView, viewForRow row: Int, forComponent component: Int, reusing view: UIView?) -> UIView {
let label = UILabel()
label.backgroundColor = .white
label.textColor = .black
label.textAlignment = .center
label.font = UIFont.systemFont(ofSize: 17.0, weight: UIFontWeightRegular)
label.text = "Row: \(row)"
return label
}
}
结果:
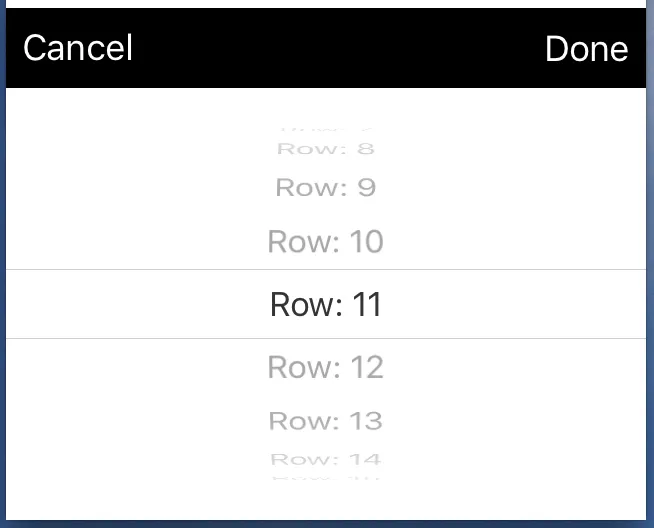
(注:此内容为HTML代码,已翻译为中文,保留了HTML标签)
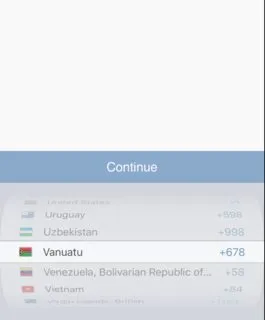

myTextField.inputView.backgroundColor = UIColor.blue吗?那么self.inputView是什么? - Subramanian Pself.inputView是"// Called and presented when object becomes first responder. Goes up the responder chain.",它会用UIPickerView替换键盘。 - Tarvo MäeseppUIPickerView作为inputView的一个示例(我怀疑你不想要这些颜色):http://imgur.com/a/dk94Y - DonMag