我正在制作一款游戏,希望用户能够从右侧滑动并通过Windows 8的魅力栏打开设置。
我尝试了很多方法,但都没有成功。如果有人成功过,请告诉我你是如何做到的。我正在使用Visual Studio 2012 Express。
3个回答
13
更新:
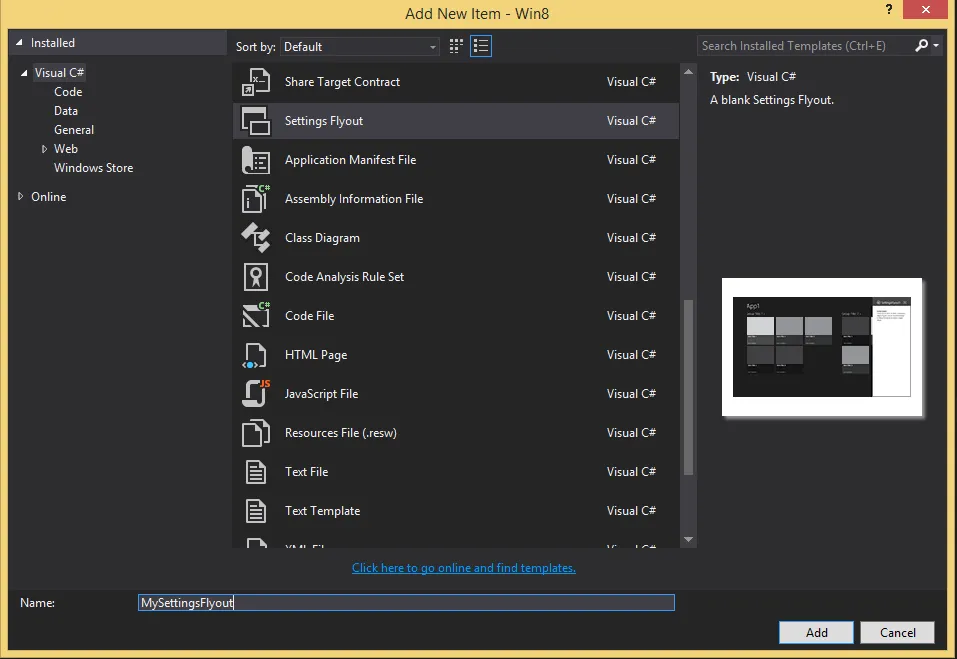
从Windows 8.1开始,Windows Store应用程序的控件集合中添加了SettingsFlyout控件。
添加 => 新建 => SettingsFlyout
sealed partial class App
{
public App()
{
this.InitializeComponent();
this.Suspending += OnSuspending;
}
protected override void OnWindowCreated(WindowCreatedEventArgs args)
{
SettingsPane.GetForCurrentView().CommandsRequested += OnCommandsRequested;
}
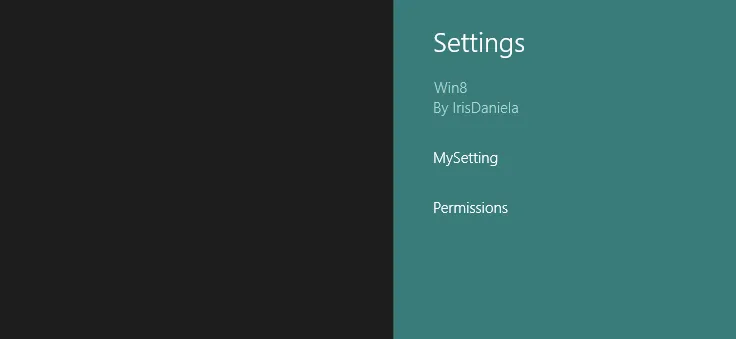
private void OnCommandsRequested(SettingsPane sender, SettingsPaneCommandsRequestedEventArgs args)
{
var setting = new SettingsCommand("MySetting", "MySetting", handler =>
new MySettingsFlyout().Show());
args.Request.ApplicationCommands.Add(setting);
}
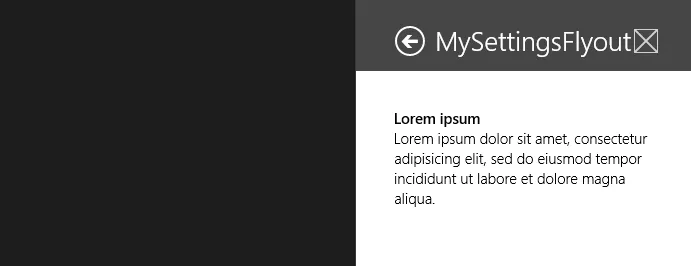
结果:
 旧的做法:
旧的做法:
以下是在Windows 8中使用xaml和c#的方法:
1.创建一个xaml用户控件
 <UserControl
    x:Class="CSharp_Settings.Settings.Help_Settings"
    xmlns="http://schemas.microsoft.com/winfx/2006/xaml/presentation"
    xmlns:x="http://schemas.microsoft.com/winfx/2006/xaml"
    xmlns:d="http://schemas.microsoft.com/expression/blend/2008"
    xmlns:mc="http://schemas.openxmlformats.org/markup-compatibility/2006"
    mc:Ignorable="d"
    d:DesignHeight="300"
    d:DesignWidth="646">
    <Border BorderBrush="#FF590151" BorderThickness="1">
        <Grid Background="White" VerticalAlignment="Stretch">
            <Grid.RowDefinitions>
                <RowDefinition Height="80"/>
                <RowDefinition Height="*"/>
            </Grid.RowDefinitions>
            <Grid Background="#FFFF00F2" Grid.Row="0">
                <Grid Margin="40,20,17,13">
                    <Grid.Transitions>
                        <TransitionCollection>
                            <EntranceThemeTransition FromHorizontalOffset="50" />
                        </TransitionCollection>
                    </Grid.Transitions>
                    <Grid.ColumnDefinitions>
                        <ColumnDefinition Width="50" />
                        <ColumnDefinition Width="*" />
                        <ColumnDefinition />
                    </Grid.ColumnDefinitions>
                    <Button Click="Button_Click_1" Margin="0,3,0,0" Grid.Column="0"

HorizontalAlignment="Left" Style="{StaticResource BackButtonStyle}"/>
                    <TextBlock Margin="10,5,0,0" Grid.Column="1" FontFamily="Segoe UI"

FontWeight="SemiLight" FontSize="24.6667" Text="Help" HorizontalAlignment="Left" />
                    <Image Source="/Assets/icon.png" HorizontalAlignment="Right" Grid.Column="2"

Margin="0,0,6,0" />
                </Grid>
            </Grid>
            <Grid Grid.Row="1" Margin="40,24,23,0" VerticalAlignment="Top">
                <Grid.Transitions>
                    <TransitionCollection>
                        <EntranceThemeTransition FromHorizontalOffset="120" />
                    </TransitionCollection>
                </Grid.Transitions>
                <TextBlock Text="Something" Foreground="Black"/>
            </Grid>
        </Grid>
    </Border>
</UserControl>
用户控件的代码后台
using Windows.UI.ApplicationSettings;
using Windows.UI.Xaml;
using Windows.UI.Xaml.Controls.Primitives;
namespace CSharp_Settings.Settings
{
    public sealed partial class Help_Settings
    {
        public Help_Settings()
        {
            InitializeComponent();
        }

        private void Button_Click_1(object sender, RoutedEventArgs e)
        {
            if (Parent is Popup)
                ((Popup)Parent).IsOpen = false;
            SettingsPane.Show();
        }
    }
}
在应用程序中注册设置面板。
using CSharp_Settings.Settings;
using Windows.Foundation;
using Windows.UI.ApplicationSettings;
using Windows.UI.Core;
using Windows.UI.Popups;
using Windows.UI.Xaml;
using Windows.UI.Xaml.Controls;
using Windows.UI.Xaml.Controls.Primitives;

namespace CSharp_Settings
{
    public sealed partial class MainPage
    {
        public MainPage()
        {
            InitializeComponent();
            _window = Window.Current.Bounds;
            Window.Current.SizeChanged += OnWindowSizeChanged;
            SettingsPane.GetForCurrentView().CommandsRequested += CommandsRequested;
        }

        private Rect _window;
        private Popup _popUp;
        private const double WIDTH = 646;

        private void OnWindowSizeChanged(object sender, WindowSizeChangedEventArgs e)
        {
            _window = Window.Current.Bounds;
        }

        private void CommandsRequested(SettingsPane sender, SettingsPaneCommandsRequestedEventArgs args)
        {
            args.Request.ApplicationCommands.Add(new SettingsCommand("help", "Help", Handler));
        }

        private void Handler(IUICommand command)
        {
            _popUp = new Popup
                         {
                             Width = WIDTH,
                             Height = _window.Height,
                             IsLightDismissEnabled = true,
                             IsOpen = true
                         };
            _popUp.Closed += OnPopupClosed;
            Window.Current.Activated += OnWindowActivated;
            _popUp.Child = new Help_Settings {Width = WIDTH, Height = _window.Height};
            _popUp.SetValue(Canvas.LeftProperty, SettingsPane.Edge == SettingsEdgeLocation.Right ? (_window.Width - WIDTH) : 0);
            _popUp.SetValue(Canvas.TopProperty, 0);
        }

        private void OnWindowActivated(object sender, WindowActivatedEventArgs e)
        {
            if (e.WindowActivationState == CoreWindowActivationState.Deactivated)
                _popUp.IsOpen = false;
        }

        private void OnPopupClosed(object sender, object e)
        {
            Window.Current.Activated -= OnWindowActivated;
        }
    }
}
在JavaScript和HTML中,你确实是在HTML中创建:
<!doctype HTML>
<html>
<body>
    <div style="border: 1px solid #AB00A5" data-win-control="WinJS.UI.SettingsFlyout" data-win-options="{settingsCommandId:'help', width:'narrow'}">
        <div class="win-ui-dark win-header" style="background-color:#FF00F7">
            <button type="button" onclick="WinJS.UI.SettingsFlyout.show()" class="win-backbutton"></button>
            <div class="win-label"> Help</div>
            <img src="../images/icon.png" style="position: absolute; right: 40px; width:35px; height:35px"/>
        </div>
        <div class="win-content win-settings-section">
            <h3>Help!</h3>
            <p> No help for you muahahaha</p>
        </div>
    </div>
</body>
</html>

Function to register the settings pane:

    (function () {
    "use strict";
    WinJS.Application.onsettings = function (e) {
        e.detail.applicationcommands = {
            "about": {
                title: "About",
                href: "/html/settings_about.html"
            },
            "help": {
                title: "Help",
                href: "/html/settings_help.html"
            }
        };
        WinJS.UI.SettingsFlyout.populateSettings(e);
    };

    WinJS.Application.start();
})();
请记住以下几点:
- 使用单个词标签作为入口点
- 建议最多只有4个入口点
- 窄:346像素
- 宽:646像素
- 高度与屏幕相同
- 标题:返回按钮+入口点名称+应用程序图标,背景颜色与应用程序磁贴相同
- 设置面板边框颜色应比标题颜色暗20%,背景应为白色。
- 滚动允许但最多两倍高度
- 没有用于导航、命令或提交更改的按钮
- 如果点击入口点,则不进行直接操作,权限命令由系统控制
- 应该是带有进入动画的弹出式菜单
- 可以轻松关闭,应与设置位于同一侧(使用SettingsEdgeLocation属性)
- Iris Classon
7
1为了格式化代码块,请将每行缩进4个空格(除了它已经有的缩进)。 (复制/粘贴时,最简单的选项是选择所有代码,然后在编辑器中单击“ {}”按钮)。 对于项目符号列表,只需在每行前面加上一个普通的减号即可。 希望这对您以后有所帮助。 :) - jalf
jalf,这正是我所做的,结果是这样的 :( - Iris Classon
我看到至少有几行没有缩进,而且项目符号行以花式•开头而不是-,所以你错过了一些,至少 :) 我试图编辑它,但其他人已经在这样做了,所以我觉得在这里提出来会更简单和容易 :) - jalf
我真的希望 Stack Overflow 未来能够支持 gist 格式。 - larsw
你的第一个问题已经得到了回答,请标记一个答案并提出一个新问题,但不要将其作为评论,因为那是一个全新的问题。这样其他人也可以从论坛上的问题和答案中受益,而且你可能会得到更多的答案。你可能还想解释一下什么是监听器以及你想要进行什么样的更改,以及你已经尝试了什么。祝你好运。 - Iris Classon
显示剩余2条评论
0
- coder
0
最好的方法可能是使用Callisto的辅助类。
- Filip Skakun
网页内容由stack overflow 提供, 点击上面的可以查看英文原文,
原文链接
原文链接