你可以创建自己的注释视图:
@import MapKit;
@interface CustomAnnotationView : MKAnnotationView
@end
@interface CustomAnnotationView ()
@property (nonatomic) CGSize textSize;
@property (nonatomic) CGSize textBubbleSize;
@property (nonatomic, weak) UILabel *label;
@property (nonatomic) CGFloat lineWidth;
@property (nonatomic) CGFloat pinRadius;
@property (nonatomic) CGFloat pinHeight;
@property (nonatomic, strong) UIBezierPath *pinPath;
@property (nonatomic, strong) UIBezierPath *textBubblePath;
@end
@implementation CustomAnnotationView
- (instancetype)initWithAnnotation:(id<MKAnnotation>)annotation reuseIdentifier:(NSString *)reuseIdentifier {
self = [super initWithAnnotation:annotation reuseIdentifier:reuseIdentifier];
if (self) {
self.lineWidth = 1.0;
self.pinHeight = 40;
self.pinRadius = 15;
UILabel *label = [[UILabel alloc] init];
label.textAlignment = NSTextAlignmentCenter;
label.font = [UIFont preferredFontForTextStyle:UIFontTextStyleCallout];
label.textColor = [UIColor whiteColor];
[self addSubview:label];
self.label = label;
[self adjustLabelWidth:annotation];
self.opaque = false;
}
return self;
}
- (void)setAnnotation:(id<MKAnnotation>)annotation {
[super setAnnotation:annotation];
if (annotation) [self adjustLabelWidth:annotation];
}
- (void)adjustLabelWidth:(id<MKAnnotation>)annotation {
NSString *title = [annotation title];
NSDictionary *attributes = @{NSFontAttributeName : self.label.font};
self.textSize = [title sizeWithAttributes:attributes];
CGFloat delta = self.textSize.height * (1.0 - sinf(M_PI_4)) * 0.55;
self.textBubbleSize = CGSizeMake(self.textSize.width + delta * 2, self.textSize.height + delta * 2);
self.label.frame = CGRectMake(0, self.pinHeight, self.textBubbleSize.width, self.textBubbleSize.height);
self.label.text = title;
self.frame = CGRectMake(0, 0, self.textBubbleSize.width, self.pinHeight + self.textBubbleSize.height);
self.centerOffset = CGPointMake(0, self.frame.size.height / 2.0 - self.pinHeight);
}
- (void)drawRect:(CGRect)rect {
CGFloat radius = self.pinRadius - self.lineWidth / 2.0;
CGPoint startPoint = CGPointMake(self.textBubbleSize.width / 2.0, self.pinHeight);
CGPoint center = CGPointMake(self.textBubbleSize.width / 2, self.pinRadius);
CGPoint nextPoint;
self.pinPath = [UIBezierPath bezierPath];
[self.pinPath moveToPoint:startPoint];
nextPoint = CGPointMake(self.textBubbleSize.width / 2 - radius, self.pinRadius);
[self.pinPath addCurveToPoint:nextPoint
controlPoint1:CGPointMake(startPoint.x, startPoint.y - (startPoint.y - nextPoint.y) / 2.0)
controlPoint2:CGPointMake(nextPoint.x, nextPoint.y + (startPoint.y - nextPoint.y) / 2.0)];
[self.pinPath addArcWithCenter:center radius:radius startAngle:M_PI endAngle:0 clockwise:TRUE];
nextPoint = startPoint;
startPoint = self.pinPath.currentPoint;
[self.pinPath addCurveToPoint:nextPoint
controlPoint1:CGPointMake(startPoint.x, startPoint.y - (startPoint.y - nextPoint.y) / 2.0)
controlPoint2:CGPointMake(nextPoint.x, nextPoint.y + (startPoint.y - nextPoint.y) / 2.0)];
[[UIColor blackColor] setStroke];
[[UIColor colorWithRed:0.0 green:0.5 blue:1.0 alpha:0.8] setFill];
self.pinPath.lineWidth = self.lineWidth;
[self.pinPath fill];
[self.pinPath stroke];
[self.pinPath closePath];
if ([self.annotation.title length] > 0) {
self.textBubblePath = [UIBezierPath bezierPath];
CGRect bubbleRect = CGRectInset(CGRectMake(0, self.pinHeight, self.textBubbleSize.width, self.textBubbleSize.height), self.lineWidth / 2, self.lineWidth / 2);
self.textBubblePath = [UIBezierPath bezierPathWithRoundedRect:bubbleRect
cornerRadius:bubbleRect.size.height / 2];
self.textBubblePath.lineWidth = self.lineWidth;
[self.textBubblePath fill];
[self.textBubblePath stroke];
} else {
self.textBubblePath = nil;
}
self.pinPath = [UIBezierPath bezierPathWithArcCenter:center radius:radius / 3.0 startAngle:0 endAngle:M_PI * 2.0 clockwise:TRUE];
self.pinPath.lineWidth = self.lineWidth;
[[UIColor whiteColor] setFill];
[self.pinPath fill];
}
- (UIView *)hitTest:(CGPoint)point withEvent:(nullable UIEvent *)event {
if ([self.pinPath containsPoint:point] || [self.textBubblePath containsPoint:point])
return self;
return nil;
}
@end
这将产生类似于以下内容:
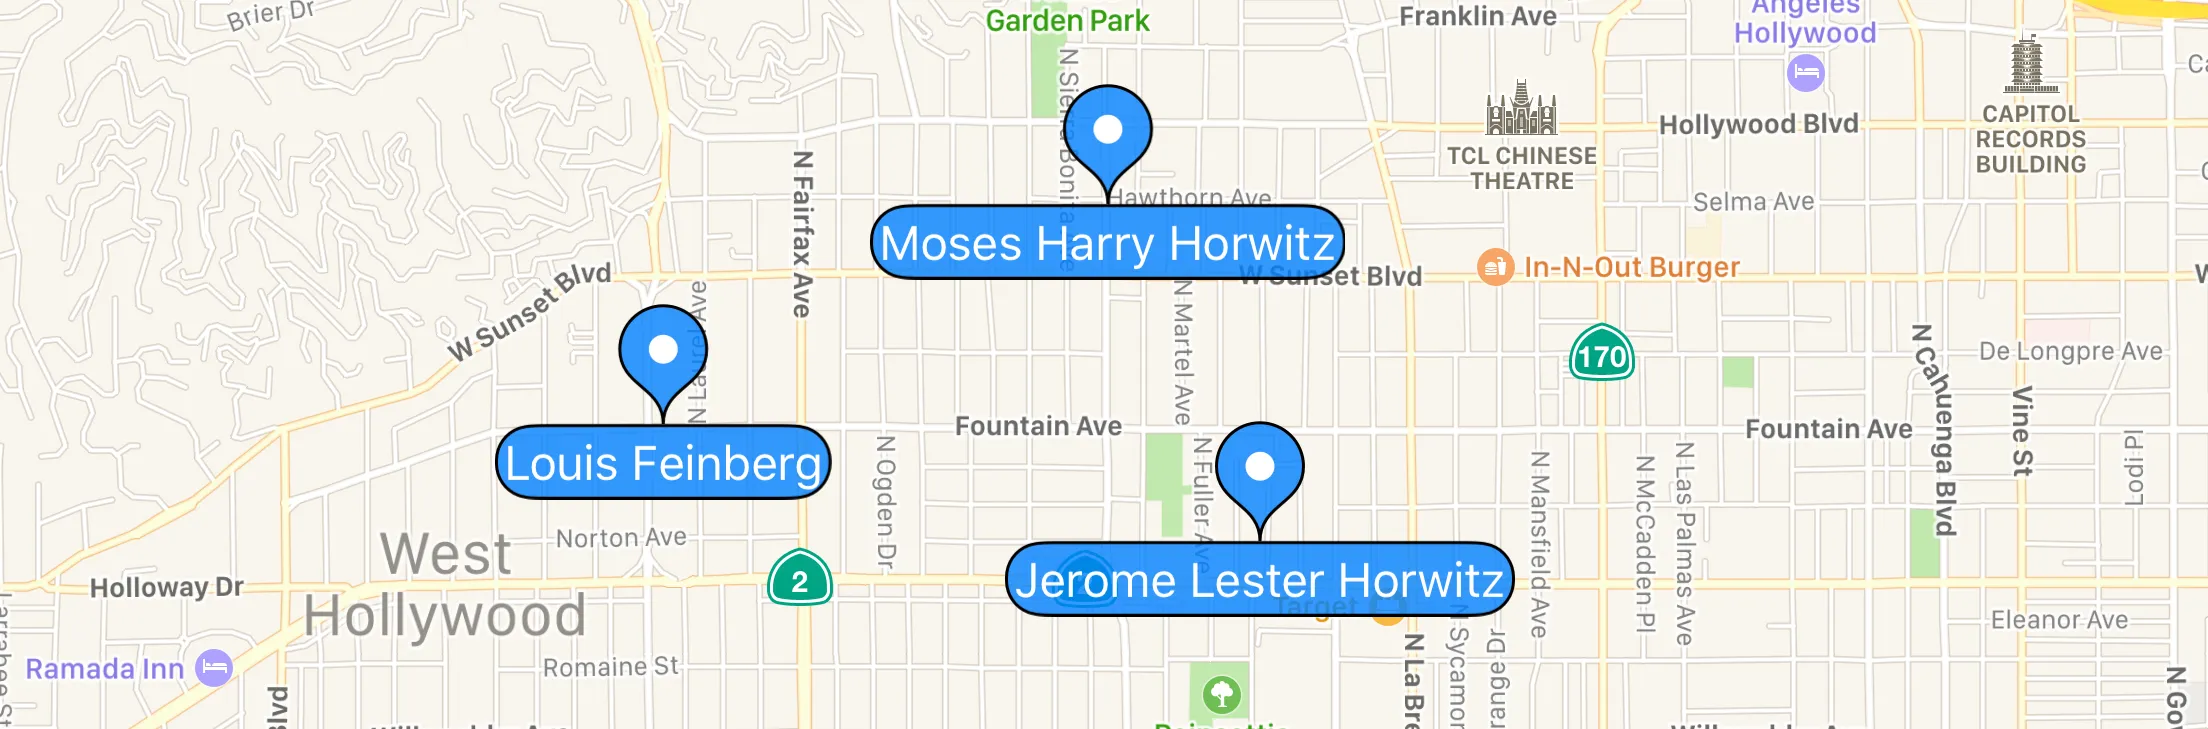
显然,您可以根据自己的需要对其进行自定义,但它说明了基本思想:编写一个
MKAnnotationView子类,覆盖
initWithAnnotation:reuseIdentifier:并实现自己的
drawRect。
