有几种实现你所需的方法。以下是两个示例:
请注意,这只是为了向您展示一个示例,您应该适应参数、颜色等,以获得您想要的精确效果。希望这有所帮助。
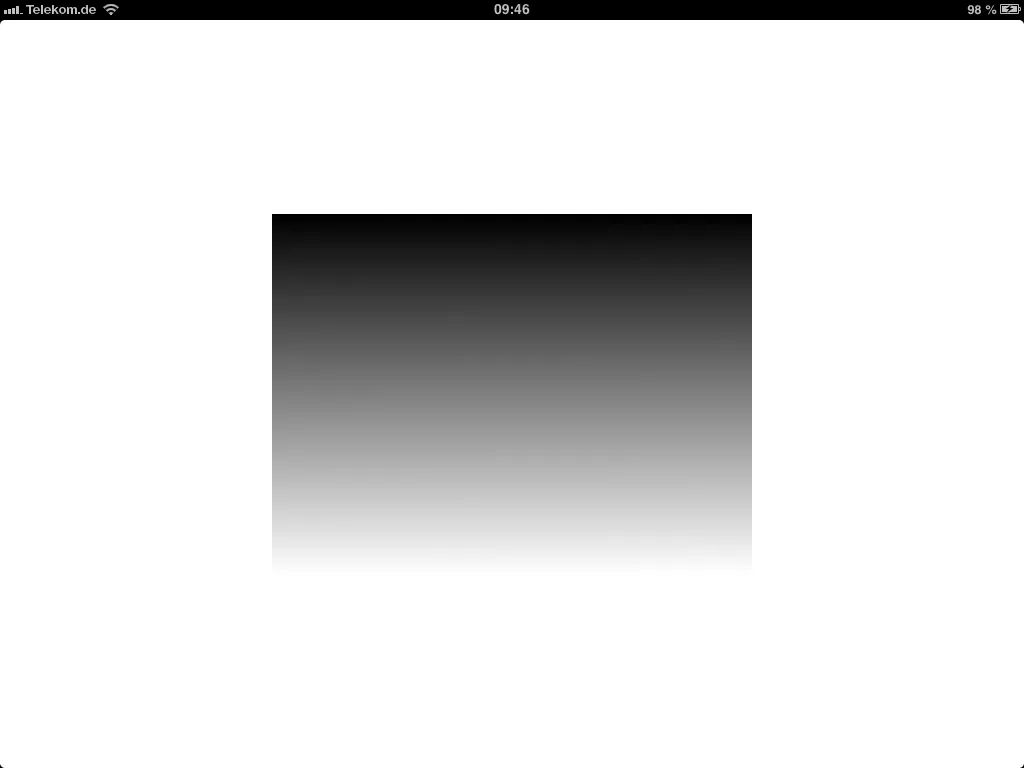
1) 直接在绘制矩形中绘制渐变。如果您希望进行其他绘制,请在视图实现中也调用 [super drawRect:rect]。
- (void)drawRect:(CGRect)rect {
CGPoint center = CGPointMake(CGRectGetMidX(self.bounds), CGRectGetMidY(self.bounds));
if (CGSizeEqualToSize(self.centerOffset, CGSizeZero) == NO) {
center.x += self.centerOffset.width;
center.y += self.centerOffset.height;
}
CGContextRef currentContext = UIGraphicsGetCurrentContext();
size_t num_locations = 2;
CGFloat locations[2] = { 0.0, 1.0 };
CGFloat components[8] = { 0.0, 0.0, 0.0, 0.5,
0.0, 0.0, 0.0, 0.7 };
CGColorSpaceRef rgbColorspace = CGColorSpaceCreateDeviceRGB();
CGGradientRef gradient = CGGradientCreateWithColorComponents(rgbColorspace, components, locations, num_locations);
CGGradientDrawingOptions options = kCGGradientDrawsBeforeStartLocation | kCGGradientDrawsAfterEndLocation;
CGFloat endRadius = [UIApplication sharedApplication].keyWindow.bounds.size.height / 2;
CGContextDrawRadialGradient(currentContext, gradient, center, 50.0f, center, endRadius, options);
CGGradientRelease(gradient);
CGColorSpaceRelease(rgbColorspace);
}
2) 使用CAGradientLayer
    UIColor *startEndColour = [UIColor redColor];
    UIColor *middleColor = [UIColor blueColor];

    NSArray *horizontalGradientColorsArray = [NSArray arrayWithObjects:(id)[startEndColour CGColor], (id)[middleColor CGColor],(id)[middleColor CGColor], (id)[startEndColour CGColor],nil];

    UIView *horizontalGradient1View = [[UIView alloc] initWithFrame:CGRectMake(0.f, 0.f, self.bounds.size.width, 1.f)];
    horizontalGradient1View.autoresizingMask = UIViewAutoresizingFlexibleWidth | UIViewAutoresizingFlexibleBottomMargin;
    CAGradientLayer *horizontalGradient1 = [CAGradientLayer layer];
    horizontalGradient1.frame = horizontalGradient1View.bounds;
    horizontalGradient1.colors = horizontalGradientColorsArray;
    horizontalGradient1.startPoint = CGPointMake(0, 0.5);
    horizontalGradient1.endPoint = CGPointMake(1.0, 0.5);
    [horizontalGradient1View.layer insertSublayer:horizontalGradient1 atIndex:0];
    [self addSubview:horizontalGradient1View];
    [horizontalGradient1View release];