Pressable按键设置了borderRadius后,效果会在角落处波及扩散。

23

我在查看这份文档pressable docs后,使用Pressable来创建按钮。

现在,我希望给按钮添加涟漪效果,但是它没有正常工作。

      <Pressable
        android_ripple={{color: 'red', borderless: false}}
        style={{backgroundColor: 'blue',borderRadius : 10}}>
        <Text style={{alignSelf: 'center'}}>Button</Text>
      </Pressable>

如果按钮有圆角,则涟漪效果没有边框半径。 涟漪效果的角落超出了曲线半径,看起来很尴尬。

Ripple effect on Android

演示问题的小程序: https://snack.expo.dev/6U8dxxzLx


如果您删除 alignSelf: center 样式会发生什么? - wobsoriano
请查看此实现 https://reactnativeforyou.com/how-to-create-a-button-with-ripple-effect-in-react-native/ - wobsoriano
在Pressable样式中添加"overflow: 'hidden'"怎么样? - D10S
@naanu,你在使用Expo吗?如果是的话,请尝试创建一个snack,这样我们就可以轻松地编辑和玩耍。 - wobsoriano
@wobsoriano 不是的,先生,我正在处理实时项目。我甚至不知道什么是 Expo。我是 React Native 的新手,才刚开始学习两天。 - Vikas Acharya
显示剩余5条评论
6个回答

30

没什么用,所以我自己解决了。

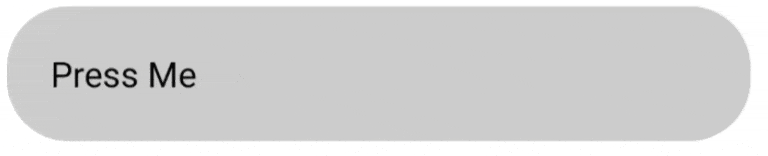
  • pressable 应该被包裹在一个视图(View)中
  • 视图(View)必须有边距(margin),而不是内边距(padding)
  • 圆角(border radius)必须在视图(View)上而不是在 pressable 上
  • pressable 组件必须有填充(padding)而不是外边距(margin)
  • 然后通过 android_ripple={{color: 'black', borderless: true}} 添加涟漪效果到 pressable 上。
<View style={styles.buttonView}>
              <Pressable
                onPress={() => {}}
                android_ripple={{color: 'black', borderless: true}}
                style={styles.loginButton}>
                <Text style={styles.buttonText}>Login</Text>
              </Pressable>
            </View>
buttonView: {
    alignSelf: 'stretch',
    justifyContent: 'center',
    borderRadius: 10,
    elevation: 25,
    margin: 10,
  },
  loginButton: {
    height: 50,
    backgroundColor: '#0f4c75',
    padding: 10,
    alignItems: 'center',
    justifyContent: 'center',
  },
  buttonText: {
    color: 'white',
    fontSize: 16,
    textTransform: 'uppercase',
    fontFamily: 'sans-serif-light',
  },

更新:- 浮动可按组件的波纹泄漏问题已得到修复

<View style={{
                position: 'absolute',
                bottom: 250,
                borderRadius: 50,
                overflow: 'hidden',
                alignSelf: 'center'
            }}>
                <Pressable
                    style={{
                        height: 60,
                        width: 60,
                        borderRadius: 50,
                        backgroundColor: 'red',
                        justifyContent: 'center',
                        alignItems: 'center',
                        elevation: 4,
                    }}
                    android_ripple={{
                        color: 'black',
                    }}
                    onPress={() => { console.log('om') }}>
                    <Text>O</Text>
                </Pressable>
            </View>

26

你可以将Pressable包装到View中,并将borderRadius:10和overflow:'hidden'传递到View样式中。

<View style={{ borderRadius: 10, overflow: 'hidden' }}>
    <Pressable
      android_ripple={{ color: 'red', borderless: false, }}
      style={{ backgroundColor: 'blue', borderRadius: 10 }}>
      <Text style={{ alignSelf: 'center' }}>Button</Text>
    </Pressable>
  </View>

这个正在运作。干杯。 - Lasitha Lakmal

2
只需将此添加到样式中,
style={{ overflow: 'hidden' }}

在配置文件中,只需添加这两个属性即可。
android_ripple={{ color: 'red', borderless: false, foreground: true }}

最佳答案!这个有效! - undefined

1
对于使用 Button 元素的人,我找到了一个简单的解决方法。由于这个问题总是发生在按钮边框被改变时(例如变成圆角),我只需将所有属性和我的按钮边框半径传递给按钮的 containerStyle。我还添加了带有隐藏属性的 overflow 属性。
一些小上下文:myButtonStyle 是我想应用于该按钮的样式。如果它为 null,我将应用默认样式。对于 myContainerStyle 也是如此。
return() 之前实现的函数:
function fixRippleBorder() {
  const borderRadius = myButtonStyle
    ? EStyleSheet.flatten(myButtonStyle).borderRadius
    : EStyleSheet.flatten(defaultButtonStyle).borderRadius;

  return {
    borderRadius: borderRadius,
    overflow: 'hidden',
  };
}

按钮本身:

<Button
  containerStyle={[    myContainerStyle ?? defaultContainerStyle,    fixRippleBorder(),  ]}
  buttonStyle={myButtonStyle ?? defaultButtonStyle}
...

0

您可以在包裹可按压对象的视图中添加样式overFlow: 'hidden',只要该视图还包含您的borderRadius。以下是我最近处理的一个文件的示例

import React from 'react';
import {Pressable, View, Text, StyleSheet, Platform} from 'react-native';

export default function CategoryGridTile({title, color, onPress}) {
  return (
    <View style={styles.gridItem}>
      <Pressable
        android_ripple={{color: '#ccc'}}
        style={({pressed}) => [
          styles.button,
          pressed ? styles.buttonPressed : null,
        ]}
        onPress={onPress}>
        <View style={[styles.innerContainer, {backgroundColor: color}]}>
          <Text style={styles.title}>{title}</Text>
        </View>
      </Pressable>
    </View>
  );
}

const styles = StyleSheet.create({
  gridItem: {
    flex: 1,
    margin: 16,
    height: 150,
    borderRadius: 8,
    elevation: 4,
    backgroundColor: 'white',
    shadowColor: 'black',
    shadowOpacity: 0.25,
    shadowOffset: {width: 0, height: 2},
    shadowRadius: 8,
    overflow: 'hidden',
  },
  button: {
    flex: 1,
  },
  buttonPressed: {
    opacity: 0.5,
  },
  innerContainer: {
    flex: 1,
    padding: 16,
    borderRadius: 8,
    justifyContent: 'center',
    alignItems: 'center',
  },
  title: {
    fontWeight: 'bold',
    fontSize: 18,
  },
});


0
原来另一个解决方案并没有覆盖所有边缘情况...我需要将视图包装两次才能在iOS上管理elevationshadow。(按钮也处于绝对位置)。
export const PNFloatingButton = ({ children, ...props }) => {
    return (
        <View style={thisStyles.shadow}>
            <View style={thisStyles.parentContainer}>
                <Pressable style={thisStyles.button}
                           android_ripple={{ borderless: false, color: "#0F0" }}>
                    <Text>Button</Text>
                </PNPressable>
            </View>
        </View>
    )
}

const thisStyles = StyleSheet.create({
    shadow: {
        shadowColor: '#000',
        shadowOffset: { width: 0, height: 2 },
        shadowOpacity: 0.4,
        shadowRadius: 4,
        width: 56,
        height: 56,
        position: 'absolute',
        elevation: 2,
        right: 0,
        bottom: 0,
    },
    button: {
        padding: 4,
        backgroundColor: "#F00",
    },
    parentContainer: {
        // Pressable has issues with borderRadius on the ripple on android
        overflow: "hidden",
        borderRadius: 40,
    },
})


网页内容由stack overflow 提供, 点击上面的
可以查看英文原文,
原文链接