我有一个支持横屏和竖屏模式的应用程序。我需要与iOS 6上相同的状态栏行为。最简单的方法是什么?
我已经尝试了Stack Overflow问题“iOS 7状态栏回到iOS 6样式?”中的解决方案,但没有效果。我的子视图依赖于视图大小,我的视图无法正确地拉伸。我不想更新我的XIB文件; 我只想添加一些帮助我的东西。我不知道它可能是什么(黑客或祈祷)。
我有一个支持横屏和竖屏模式的应用程序。我需要与iOS 6上相同的状态栏行为。最简单的方法是什么?
我已经尝试了Stack Overflow问题“iOS 7状态栏回到iOS 6样式?”中的解决方案,但没有效果。我的子视图依赖于视图大小,我的视图无法正确地拉伸。我不想更新我的XIB文件; 我只想添加一些帮助我的东西。我不知道它可能是什么(黑客或祈祷)。
您可以尝试在ViewWillAppear或DidAppear中编写此代码。这里我们将视图框架下移20像素。
CGRect frame = self.view.frame;
frame.origin.y = 20;

if (self.view.frame.size.height == 1024 ||
    self.view.frame.size.height == 768)
{
    frame.size.height -= 20;
}

self.view.frame = frame;
这种方法可以实现,但并不是一个很好的想法。如果有需要,您也可以通过调用以下方法将状态栏文本颜色更改为浅色或深色,以适应您的应用程序背景。
-(UIStatusBarStyle)preferredStatusBarStyle
{
     return UIStatusBarStyleLightContent; // For light status bar

     return UIStatusBarStyleDefault // For Dark status bar
}
最近我也遇到了类似的问题,但是我采用了略微不同的方法来解决它...
我的方法是使用一个额外的视图控制器作为原本根视图控制器的容器视图控制器。首先,我像这样设置了一个容器:
_containerView = [[UIView alloc] initWithFrame:[self containerFrame]];
_containerView.autoresizingMask = UIViewAutoresizingFlexibleHeight | UIViewAutoresizingFlexibleWidth;
_containerView.clipsToBounds = YES;

[self.view addSubview:_containerView];
[self.view setBackgroundColor:[UIColor blackColor]];

[UIApplication.sharedApplication setStatusBarStyle:UIStatusBarStyleLightContent animated:NO];
containerFrame 的定义如下:
- (CGRect)containerFrame
{
    if ([MyUtilityClass isSevenOrHigher])
    {
        CGFloat statusBarHeight = [MyUtility statusBarHeight]; //20.0f
        return CGRectMake(0, statusBarHeight, self.view.bounds.size.width, self.view.bounds.size.height - statusBarHeight);
    }

    return self.view.bounds;
}
//Add the ChildViewController
self.childController.view.frame = self.containerView.bounds;
self.childController.view.autoresizingMask = UIViewAutoresizingFlexibleHeight | UIViewAutoresizingFlexibleWidth;
[self addChildViewController:self.childController];
[self.containerView addSubview:self.childController.view];
[self.childController didMoveToParentViewController:self];
需要注意的事项: - Modal视图控制器仍将以iOS7样式呈现,因此我仍然必须对此进行考虑。
希望这能帮助到某些人!
这个指南对我很有帮助。
http://www.doubleencore.com/2013/09/developers-guide-to-the-ios-7-status-bar/
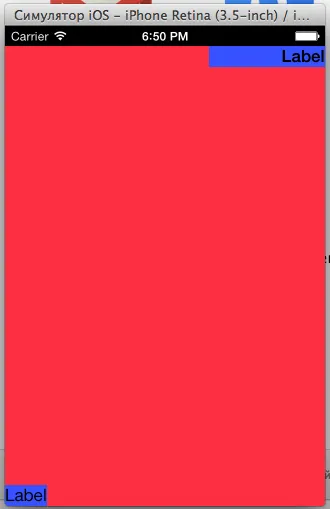
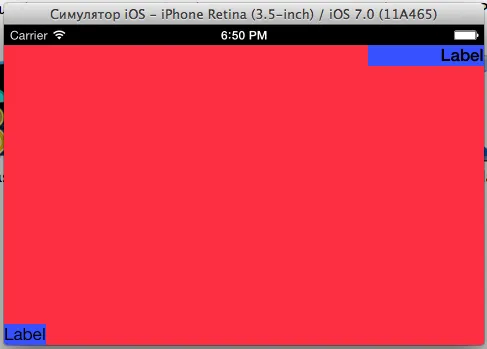
处理 20 点大小差异最健壮的方法是使用自动布局。1) 这是一个hack,但它有效!
#import <objc/runtime.h>

@interface UIScreen (I_love_ios_7)
- (CGRect)bounds2;
- (CGRect)boundsForOrientation:(UIInterfaceOrientation)orientation;
@end

@implementation UIScreen (I_love_ios_7)
- (CGRect)bounds2
{
    return [self boundsForOrientation:[[UIApplication sharedApplication] statusBarOrientation]];
}

- (CGRect)boundsForOrientation:(UIInterfaceOrientation)orientation
{
    CGRect resultFrame = [self bounds2];
    if(UIInterfaceOrientationIsLandscape(orientation))
        resultFrame.size.width -= 20;
    else
        resultFrame.size.height -= 20;
    return resultFrame;
}
@end

void Swizzle(Class c, SEL orig, SEL new)
{
    Method origMethod = class_getInstanceMethod(c, orig);
    Method newMethod = class_getInstanceMethod(c, new);
    if(class_addMethod(c, orig, method_getImplementation(newMethod), method_getTypeEncoding(newMethod)))
        class_replaceMethod(c, new, method_getImplementation(origMethod), method_getTypeEncoding(origMethod));
    else
        method_exchangeImplementations(origMethod, newMethod);
}


@implementation AppDelegate

- (BOOL)application:(UIApplication *)application didFinishLaunchingWithOptions:(NSDictionary *)launchOptions
{

    if ([[[UIDevice currentDevice] systemVersion] floatValue] >= 7) {
        Swizzle([UIScreen class], @selector(bounds2), @selector(bounds));
        [application setStatusBarStyle:UIStatusBarStyleLightContent];
        self.window.clipsToBounds =YES;

        [[NSNotificationCenter defaultCenter] addObserver:self
                                                 selector:@selector(applicationDidChangeStatusBarOrientation:)
                                                     name:UIApplicationWillChangeStatusBarOrientationNotification
                                                   object:nil];
        NSDictionary* userInfo = @{UIApplicationStatusBarOrientationUserInfoKey : @([[UIApplication sharedApplication] statusBarOrientation])};
        [[NSNotificationCenter defaultCenter] postNotificationName:UIApplicationWillChangeStatusBarOrientationNotification
                                                            object:nil
                                                          userInfo:userInfo];
    }

    return YES;
}

- (void)applicationDidChangeStatusBarOrientation:(NSNotification *)notification
{
    UIInterfaceOrientation orientation = [[notification.userInfo objectForKey: UIApplicationStatusBarOrientationUserInfoKey] intValue];
    CGSize size = [[UIScreen mainScreen] boundsForOrientation:orientation].size;
    int w = size.width;
    int h = size.height;
    float statusHeight = 20.0;
    switch(orientation){
        case UIInterfaceOrientationPortrait:
            self.window.frame =  CGRectMake(0,statusHeight,w,h);
            break;
        case UIInterfaceOrientationPortraitUpsideDown:
            self.window.frame =  CGRectMake(0,0,w,h);
            break;
        case UIInterfaceOrientationLandscapeLeft:
            self.window.frame =  CGRectMake(statusHeight,0,w,h);
            break;
        case UIInterfaceOrientationLandscapeRight:
            self.window.frame =  CGRectMake(0,0,w,h);
            break;
    }
}
@end
2) 创建类别,并始终使用 contentView 而不是 view
@interface UIViewController(iOS7_Fix)
@property (nonatomic, readonly) UIView* contentView;
- (void)updateViewIfIOS_7;
@end

@implementation UIViewController(iOS7_Fix)
static char defaultHashKey;
- (UIView *)contentView
{
    return objc_getAssociatedObject(self, &defaultHashKey)?: self.view;
}

- (void)setContentView:(UIView *)val
{
    objc_setAssociatedObject(self, &defaultHashKey, val, OBJC_ASSOCIATION_RETAIN_NONATOMIC) ;
}

- (void)updateViewIfIOS_7
{
    if([[[UIDevice currentDevice] systemVersion] floatValue] < 7 || objc_getAssociatedObject(self, &defaultHashKey))
        return;

    UIView* exchangeView = [[UIView alloc] initWithFrame:self.view.bounds];
    exchangeView.autoresizingMask = self.view.autoresizingMask;
    exchangeView.backgroundColor = [UIColor blackColor];

    UIView* view = self.view;
    if(self.view.superview){
        [view.superview addSubview:exchangeView];
        [view removeFromSuperview];
    }
    [exchangeView addSubview:view];
    self.view = exchangeView;

    CGRect frame = self.view.bounds;
    frame.origin.y += 20.0;
    frame.size.height -= 20.0;
    view.frame = frame;
    view.autoresizingMask = UIViewAutoresizingFlexibleWidth | UIViewAutoresizingFlexibleHeight;

    [self setContentView:view];
}
UIViewController中:- (void)viewDidLoad
{
[super viewDidLoad];
[self updateViewIfIOS_7];
UILabel* lab = [[UILabel alloc] initWithFrame:CGRectMake(0, 0, 130, 30)];
lab.backgroundColor = [UIColor yellowColor];
[self.contentView addSubview:lab];
//...
}