如何在支持彩色显示的Linux终端中打印彩色字符?
如何判断终端是否支持颜色代码?
cout << "\033[1;31mbold red text\033[0m\n";
在这里,\033 是转义字符,ASCII代码为27。接下来是 [,然后是由 ; 分隔的零个或多个数字,最后是字母 m。这些数字描述了从那一点开始切换到的颜色和格式。
前景色和背景色的代码如下:
         foreground background
black        30         40
red          31         41
green        32         42
yellow       33         43
blue         34         44
magenta      35         45
cyan         36         46
white        37         47
此外,您还可以使用以下内容:
reset             0  (everything back to normal)
bold/bright       1  (often a brighter shade of the same colour)
underline         4
inverse           7  (swap foreground and background colours)
bold/bright off  21
underline off    24
inverse off      27
请参考维基百科上的表格,了解其他不太常见的代码。
要确定您的终端是否支持彩色序列,请读取TERM环境变量的值。它应该指定所使用的特定终端类型(例如vt100、gnome-terminal、xterm、screen等)。然后在terminfo数据库中查找并检查colors功能。
m代表什么? - nipponese\033[ 和 m 分别表示 ANSI 颜色代码转义序列的开始和结束。参考文献:http://en.wikipedia.org/wiki/ANSI_escape_code#CSI_codes - thameeraconst std::string red("\033[0;31m"); 或 const std::string reset("\033[0m");。然后,我可以简单地编写 cout << red << "red text" << reset << endl;。 - Daniel Langr我编写了一个C++类,可以用于设置输出的前景色和背景色。这个示例程序演示了如何打印This ->word<- is red.并对其进行格式化,以使word的前景色为红色。
#include "colormod.h" // namespace Color
#include <iostream>
using namespace std;
int main() {
    Color::Modifier red(Color::FG_RED);
    Color::Modifier def(Color::FG_DEFAULT);
    cout << "This ->" << red << "word" << def << "<- is red." << endl;
}
#include <ostream>
namespace Color {
    enum Code {
        FG_RED      = 31,
        FG_GREEN    = 32,
        FG_BLUE     = 34,
        FG_DEFAULT  = 39,
        BG_RED      = 41,
        BG_GREEN    = 42,
        BG_BLUE     = 44,
        BG_DEFAULT  = 49
    };
    class Modifier {
        Code code;
    public:
        Modifier(Code pCode) : code(pCode) {}
        friend std::ostream&
        operator<<(std::ostream& os, const Modifier& mod) {
            return os << "\033[" << mod.code << "m";
        }
    };
}
您可能希望为该类添加额外的功能。例如,可以添加颜色品红甚至像加粗这样的样式。要做到这一点,只需将另一个条目添加到Code枚举中。 这里是一个好的参考。
Code定义operator<<,那么你可以直接写std::cout << Color::FG_RED;而不是std::cout << Modifier(Color::FG_RED);。也就是说,不需要使用Modifier。 - Nawazbool sh; 并将构造函数更改为 Modifier (Code pCode, bool show = true) : code(pCode), sh(show) {}。最后,在 << 运算符的主体中,如果 sh 为真,则返回当前行,否则返回 << os;。这允许您使用 Color::Modifier red(Color::FG_RED, BoolVar); 编写代码,其中您可以将 BoolVar 设置为程序的初始化值,true 或 false。您可以将其打开以在屏幕上查看它,也可以将其关闭以重定向到文件。 - rpsml在输出任何颜色之前,请确保您处于终端中:
[ -t 1 ] && echo 'Yes I am in a terminal' # isatty(3) call in C
接下来您需要检查终端是否支持颜色。
在基于terminfo(基于Linux)的系统上,您可以通过以下方式获取支持的颜色数量:
Number_Of_colors_Supported=$(tput colors)
termcap (基于BSD的) 的系统上,您可以通过以下方式获取支持颜色数量:Number_Of_colors_Supported=$(tput Co)
接下来做出你的决定:
[ ${Number_Of_colors_Supported} -ge 8 ] && {
    echo 'You are fine and can print colors'
} || {
    echo 'Terminal does not support color'
}
顺便说一下,不要像之前建议的那样使用ESC字符进行着色。 使用标准的终端能力调用,将为您分配特定终端支持的正确颜色。
fg_black="$(tput AF 0)"
fg_red="$(tput AF 1)"
fg_green="$(tput AF 2)"
fg_yellow="$(tput AF 3)"
fg_blue="$(tput AF 4)"
fg_magenta="$(tput AF 5)"
fg_cyan="$(tput AF 6)"
fg_white="$(tput AF 7)"
reset="$(tput me)"
fg_black="$(tput setaf 0)"
fg_red="$(tput setaf 1)"
fg_green="$(tput setaf 2)"
fg_yellow="$(tput setaf 3)"
fg_blue="$(tput setaf 4)"
fg_magenta="$(tput setaf 5)"
fg_cyan="$(tput setaf 6)"
fg_white="$(tput setaf 7)"
reset="$(tput sgr0)"
echo -e "${fg_red} Red ${fg_green} Bull ${reset}"
[ -t 1 ] 是 sh/bash 特定的,但在 #(comment) 标记后面的右侧有一个执行相同操作的 C 函数。man 3 isatty 应该可以帮助理解;示例显示为 shell 命令,以简化主要点的说明。至于 tput,它是用于查询标准终端能力接口的开源实用程序。 - Alextput,并将所需的转义颜色代码存储在某些变量中,在程序运行时使用它。因此,在这种情况下可以忽略tput的缓慢性,特别是如果考虑到“color”程序处理的是比任何计算机都慢的人类。使用tput将确保所假定/想要的颜色在特定系统上得到支持,从而使其跨平台可移植。 - Alex正如其他人所言,您可以使用转义字符。您可以使用我的头文件来使它更容易:
#ifndef _COLORS_
#define _COLORS_

/* FOREGROUND */
#define RST  "\x1B[0m"
#define KRED  "\x1B[31m"
#define KGRN  "\x1B[32m"
#define KYEL  "\x1B[33m"
#define KBLU  "\x1B[34m"
#define KMAG  "\x1B[35m"
#define KCYN  "\x1B[36m"
#define KWHT  "\x1B[37m"

#define FRED(x) KRED x RST
#define FGRN(x) KGRN x RST
#define FYEL(x) KYEL x RST
#define FBLU(x) KBLU x RST
#define FMAG(x) KMAG x RST
#define FCYN(x) KCYN x RST
#define FWHT(x) KWHT x RST

#define BOLD(x) "\x1B[1m" x RST
#define UNDL(x) "\x1B[4m" x RST

#endif  /* _COLORS_ */
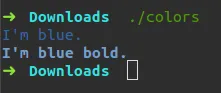
使用头文件中的宏的示例:
#include <iostream>
#include "colors.h"
using namespace std;

int main()
{
    cout << FBLU("I'm blue.") << endl;
    cout << BOLD(FBLU("I'm blue-bold.")) << endl;
    return 0;
}
据我的理解,典型的 ANSI 色彩代码是这样的:
"\033[{FORMAT_ATTRIBUTE};{FORGROUND_COLOR};{BACKGROUND_COLOR}m{TEXT}\033[{RESET_FORMATE_ATTRIBUTE}m"
由名称和编解码器组成
格式属性
 { "Default", "0" },
 { "Bold", "1" },
 { "Dim", "2" },
 { "Italics", "3"},
 { "Underlined", "4" },
 { "Blink", "5" },
 { "Reverse", "7" },
 { "Hidden", "8" }
前景色
 { "Default", "39" },
 { "Black", "30" },
 { "Red", "31" },
 { "Green", "32" },
 { "Yellow", "33" },
 { "Blue", "34" },
 { "Magenta", "35" },
 { "Cyan", "36" },
 { "Light Gray", "37" },
 { "Dark Gray", "90" },
 { "Light Red", "91" },
 { "Light Green", "92" },
 { "Light Yellow", "93" },
 { "Light Blue", "94" },
 { "Light Magenta", "95" },
 { "Light Cyan", "96" },
 { "White", "97" }
背景颜色
 { "Default", "49" },
 { "Black", "40" },
 { "Red", "41" },
 { "Green", "42" },
 { "Yellow", "43" },
 { "Blue", "44" },
 { "Megenta", "45" },
 { "Cyan", "46" },
 { "Light Gray", "47" },
 { "Dark Gray", "100" },
 { "Light Red", "101" },
 { "Light Green", "102" },
 { "Light Yellow", "103" },
 { "Light Blue", "104" },
 { "Light Magenta", "105" },
 { "Light Cyan", "106" },
 { "White", "107" }
文本
重置格式属性
 { "All", "0" },
 { "Bold", "21" },
 { "Dim", "22" },
 { "Underlined", "24" },
 { "Blink", "25" },
 { "Reverse", "27" },
 { "Hidden", "28" }
有了这些信息,就可以轻松地使用前景色“黄色”和背景色“绿色”对字符串“我是一个香蕉!”进行着色,就像这样:
"\033[0;33;42mI am a Banana!\033[0m"
或者使用C++库colorize
auto const& colorized_text = color::rize( "I am a banana!", "Yellow", "Green" );
std::cout << colorized_text << std::endl;
这里有更多FORMAT ATTRIBUTE示例 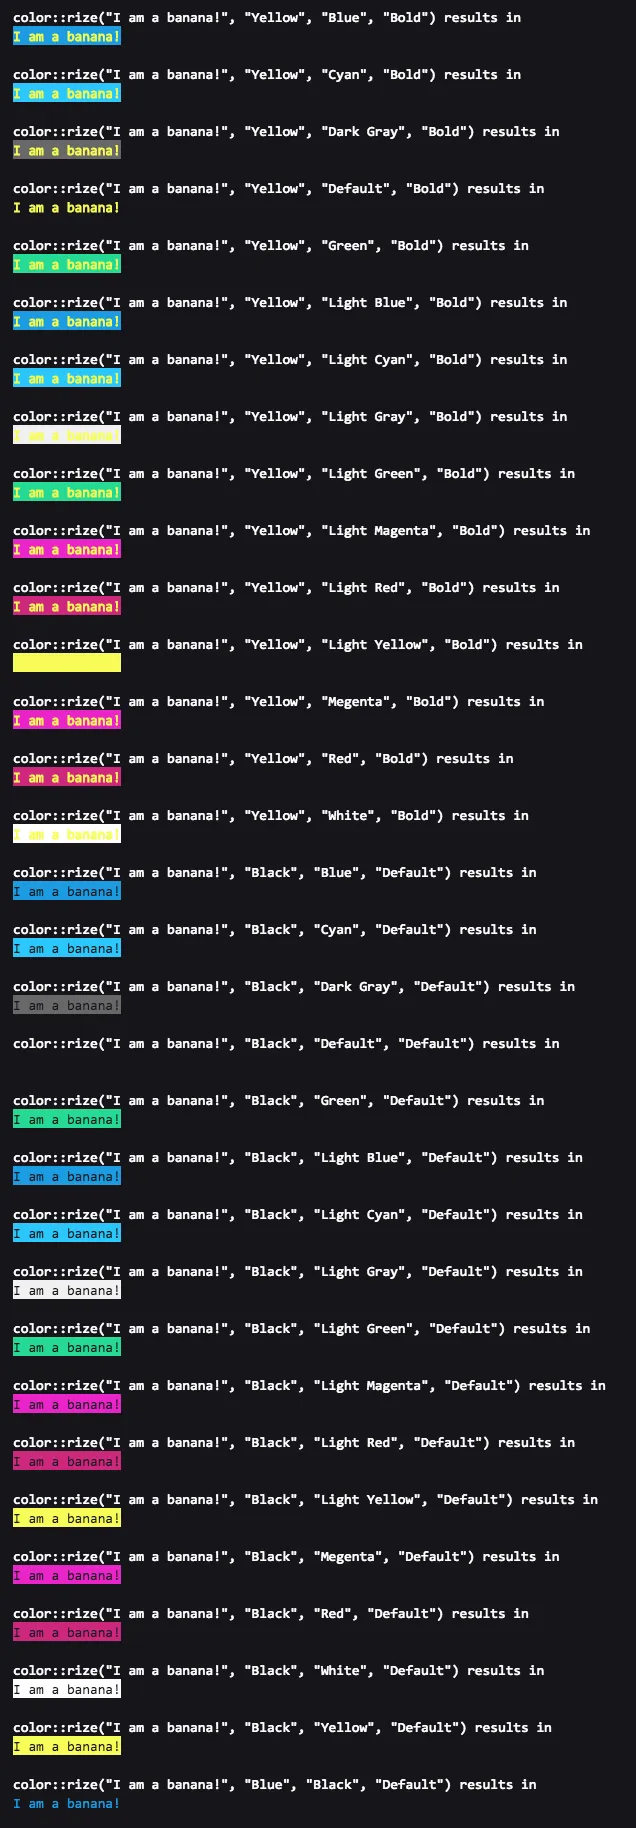
const std::string red("\033[0;31m");
const std::string green("\033[1;32m");
const std::string yellow("\033[1;33m");
const std::string cyan("\033[0;36m");
const std::string magenta("\033[0;35m");
const std::string reset("\033[0m");

std::cout << "Measured runtime: " << yellow << timer.count() << reset << std::endl;
这是一个老话题了,但我写了一个包含嵌套子类和静态成员的类,使用简单的C宏定义来定义颜色。
我从这篇帖子中得到了color函数:在C编程中彩色文本,作者为no2pencil。
我这样做是为了能够像这样在std :: cout流中使用静态常量:
cout << zkr::cc::fore::red << "This is red text. "
     << zkr::cc::console << "And changing to console default colors, fg, bg."
     << endl;
这个类和测试程序的源代码可以在这里下载。
cc::console将重置到控制台默认颜色和属性,cc::underline会给文本加下划线,在我测试过的putty上有效。
颜色:
black
blue
red
magenta
green
cyan
yellow
white

lightblack
lightblue
lightred
lightmagenta
lightgreen
lightcyan
lightyellow
lightwhite
这可以与cc静态类的fore和back静态子类一起使用。
编辑2017
我在这里添加了类代码以增加实用性。
颜色代码宏:
#define CC_CONSOLE_COLOR_DEFAULT "\033[0m"
#define CC_FORECOLOR(C) "\033[" #C "m"
#define CC_BACKCOLOR(C) "\033[" #C "m"
#define CC_ATTR(A) "\033[" #A "m"
还有一个主要的颜色函数,用于定义屏幕上的颜色或属性:
char *cc::color(int attr, int fg, int bg)
{
    static char command[13];

    /* Command is the control command to the terminal */
    sprintf(command, "%c[%d;%d;%dm", 0x1B, attr, fg + 30, bg + 40);
    return command;
}
ccolor.h
#include <stdio.h>

#define CC_CONSOLE_COLOR_DEFAULT "\033[0m"
#define CC_FORECOLOR(C) "\033[" #C "m"
#define CC_BACKCOLOR(C) "\033[" #C "m"
#define CC_ATTR(A) "\033[" #A "m"

namespace zkr
{
    class cc
    {
    public:

        class fore
        {
        public:
            static const char *black;
            static const char *blue;
            static const char *red;
            static const char *magenta;
            static const char *green;
            static const char *cyan;
            static const char *yellow;
            static const char *white;
            static const char *console;

            static const char *lightblack;
            static const char *lightblue;
            static const char *lightred;
            static const char *lightmagenta;
            static const char *lightgreen;
            static const char *lightcyan;
            static const char *lightyellow;
            static const char *lightwhite;
        };

        class back
        {
        public:
            static const char *black;
            static const char *blue;
            static const char *red;
            static const char *magenta;
            static const char *green;
            static const char *cyan;
            static const char *yellow;
            static const char *white;
            static const char *console;

            static const char *lightblack;
            static const char *lightblue;
            static const char *lightred;
            static const char *lightmagenta;
            static const char *lightgreen;
            static const char *lightcyan;
            static const char *lightyellow;
            static const char *lightwhite;
        };

        static char *color(int attr, int fg, int bg);
        static const char *console;
        static const char *underline;
        static const char *bold;
    };
}
ccolor.cpp
#include "ccolor.h"

using namespace std;

namespace zkr
{
    enum Color
    {
        Black,
        Red,
        Green,
        Yellow,
        Blue,
        Magenta,
        Cyan,
        White,
        Default = 9
    };

    enum Attributes
    {
        Reset,
        Bright,
        Dim,
        Underline,
        Blink,
        Reverse,
        Hidden
    };

    char *cc::color(int attr, int fg, int bg)
    {
        static char command[13];
        /* Command is the control command to the terminal */
        sprintf(command, "%c[%d;%d;%dm", 0x1B, attr, fg + 30, bg + 40);
        return command;
    }

    const char *cc::console = CC_CONSOLE_COLOR_DEFAULT;
    const char *cc::underline = CC_ATTR(4);
    const char *cc::bold = CC_ATTR(1);

    const char *cc::fore::black = CC_FORECOLOR(30);
    const char *cc::fore::blue = CC_FORECOLOR(34);
    const char *cc::fore::red = CC_FORECOLOR(31);
    const char *cc::fore::magenta = CC_FORECOLOR(35);
    const char *cc::fore::green = CC_FORECOLOR(92);
    const char *cc::fore::cyan = CC_FORECOLOR(36);
    const char *cc::fore::yellow = CC_FORECOLOR(33);
    const char *cc::fore::white = CC_FORECOLOR(37);
    const char *cc::fore::console = CC_FORECOLOR(39);

    const char *cc::fore::lightblack = CC_FORECOLOR(90);
    const char *cc::fore::lightblue = CC_FORECOLOR(94);
    const char *cc::fore::lightred = CC_FORECOLOR(91);
    const char *cc::fore::lightmagenta = CC_FORECOLOR(95);
    const char *cc::fore::lightgreen = CC_FORECOLOR(92);
    const char *cc::fore::lightcyan = CC_FORECOLOR(96);
    const char *cc::fore::lightyellow = CC_FORECOLOR(93);
    const char *cc::fore::lightwhite = CC_FORECOLOR(97);

    const char *cc::back::black = CC_BACKCOLOR(40);
    const char *cc::back::blue = CC_BACKCOLOR(44);
    const char *cc::back::red = CC_BACKCOLOR(41);
    const char *cc::back::magenta = CC_BACKCOLOR(45);
    const char *cc::back::green = CC_BACKCOLOR(42);
    const char *cc::back::cyan = CC_BACKCOLOR(46);
    const char *cc::back::yellow = CC_BACKCOLOR(43);
    const char *cc::back::white = CC_BACKCOLOR(47);
    const char *cc::back::console = CC_BACKCOLOR(49);

    const char *cc::back::lightblack = CC_BACKCOLOR(100);
    const char *cc::back::lightblue = CC_BACKCOLOR(104);
    const char *cc::back::lightred = CC_BACKCOLOR(101);
    const char *cc::back::lightmagenta = CC_BACKCOLOR(105);
    const char *cc::back::lightgreen = CC_BACKCOLOR(102);
    const char *cc::back::lightcyan = CC_BACKCOLOR(106);
    const char *cc::back::lightyellow = CC_BACKCOLOR(103);
    const char *cc::back::lightwhite = CC_BACKCOLOR(107);
}
gon1332的标题的扩展版本:
//
//  COLORS.h
//
//  Posted by Gon1332 May 15 2015 on StackOverflow
//  https://dev59.com/1XE85IYBdhLWcg3wx2j2
//
//  Description: An easy header file to make colored text output to terminal second nature.
//  Modified by Shades Aug. 14 2018

// PLEASE carefully read comments before using this tool, this will save you a lot of bugs that are going to be just about impossible to find.
#ifndef COLORS_h
#define COLORS_h

/* FOREGROUND */
// These codes set the actual text to the specified color
#define RESETTEXT  "\x1B[0m" // Set all colors back to normal.
#define FOREBLK  "\x1B[30m" // Black
#define FORERED  "\x1B[31m" // Red
#define FOREGRN  "\x1B[32m" // Green
#define FOREYEL  "\x1B[33m" // Yellow
#define FOREBLU  "\x1B[34m" // Blue
#define FOREMAG  "\x1B[35m" // Magenta
#define FORECYN  "\x1B[36m" // Cyan
#define FOREWHT  "\x1B[37m" // White

/* BACKGROUND */
// These codes set the background color behind the text.
#define BACKBLK "\x1B[40m"
#define BACKRED "\x1B[41m"
#define BACKGRN "\x1B[42m"
#define BACKYEL "\x1B[43m"
#define BACKBLU "\x1B[44m"
#define BACKMAG "\x1B[45m"
#define BACKCYN "\x1B[46m"
#define BACKWHT "\x1B[47m"

// These will set the text color and then set it back to normal afterwards.
#define BLK(x) FOREBLK x RESETTEXT
#define RED(x) FORERED x RESETTEXT
#define GRN(x) FOREGRN x RESETTEXT
#define YEL(x) FOREYEL x RESETTEXT
#define BLU(x) FOREBLU x RESETTEXT
#define MAG(x) FOREMAG x RESETTEXT
#define CYN(x) FORECYN x RESETTEXT
#define WHT(x) FOREWHT x RESETTEXT

// Example usage: cout << BLU("This text's color is now blue!") << endl;

// These will set the text's background color then reset it back.
#define BackBLK(x) BACKBLK x RESETTEXT
#define BackRED(x) BACKRED x RESETTEXT
#define BackGRN(x) BACKGRN x RESETTEXT
#define BackYEL(x) BACKYEL x RESETTEXT
#define BackBLU(x) BACKBLU x RESETTEXT
#define BackMAG(x) BACKMAG x RESETTEXT
#define BackCYN(x) BACKCYN x RESETTEXT
#define BackWHT(x) BACKWHT x RESETTEXT

// Example usage: cout << BACKRED(FOREBLU("I am blue text on a red background!")) << endl;

// These functions will set the background to the specified color indefinitely.
// NOTE: These do NOT call RESETTEXT afterwards. Thus, they will set the background color indefinitely until the user executes cout << RESETTEXT
// OR if a function is used that calles RESETTEXT i.e. cout << RED("Hello World!") will reset the background color since it calls RESETTEXT.
// To set text COLOR indefinitely, see SetFore functions below.
#define SetBackBLK BACKBLK
#define SetBackRED BACKRED
#define SetBackGRN BACKGRN
#define SetBackYEL BACKYEL
#define SetBackBLU BACKBLU
#define SetBackMAG BACKMAG
#define SetBackCYN BACKCYN
#define SetBackWHT BACKWHT

// Example usage: cout << SetBackRED << "This text's background and all text after it will be red until RESETTEXT is called in some way" << endl;

// These functions will set the text color until RESETTEXT is called. (See above comments)
#define SetForeBLK FOREBLK
#define SetForeRED FORERED
#define SetForeGRN FOREGRN
#define SetForeYEL FOREYEL
#define SetForeBLU FOREBLU
#define SetForeMAG FOREMAG
#define SetForeCYN FORECYN
#define SetForeWHT FOREWHT

// Example usage: cout << SetForeRED << "This text and all text after it will be red until RESETTEXT is called in some way" << endl;

#define BOLD(x) "\x1B[1m" x RESETTEXT // Embolden text then reset it.
#define BRIGHT(x) "\x1B[1m" x RESETTEXT // Brighten text then reset it. (Same as bold but is available for program clarity)
#define UNDL(x) "\x1B[4m" x RESETTEXT // Underline text then reset it.

// Example usage: cout << BOLD(BLU("I am bold blue text!")) << endl;

// These functions will embolden or underline text indefinitely until RESETTEXT is called in some way.

#define SetBOLD "\x1B[1m" // Embolden text indefinitely.
#define SetBRIGHT "\x1B[1m" // Brighten text indefinitely. (Same as bold but is available for program clarity)
#define SetUNDL "\x1B[4m" // Underline text indefinitely.

// Example usage: cout << setBOLD << "I and all text after me will be BOLD/Bright until RESETTEXT is called in some way!" << endl;

#endif /* COLORS_h */
正如您所看到的,它拥有更多的功能,例如暂时或长久地设置背景颜色以及其他特性。我还认为它对于初学者更加友好,容易记住所有的函数。
#include <iostream>
#include "COLORS.h"

int main() {
  std::cout << SetBackBLU << SetForeRED << endl;
  std::cout << "I am red text on a blue background! :) " << endl;
  return 0;
}
只需将头文件包含在您的项目中,您就可以使用彩色终端输出轻松愉快地工作了。
如果您的终端支持,您可以使用转义序列。例如:
echo \[\033[32m\]Hello, \[\033[36m\]colourful \[\033[33mworld!\033[0m\]
尝试使用Aedi的颜色标题,快速简便地为文本上色:
使用C++在Unix中对输出进行上色!
ATTRIBUTES_OFF, BOLD, UNDERSCORE, BLINK, REVERSE_VIDEO, CONCEALED
BLACK, RED, GREEN, YELLOW, BLUE, MAGENTA, CYAN, WHITE
通用格式,将您想要的值包含在$variable$中
COLOR_$Foreground_Color$_$Background_Color$
COLOR_$Text_Attribute$_$Foreground_Color$_$Background_Color$
COLOR_NORMAL  // To set color to default
e.g.
COLOR_BLUE_BLACK // Leave Text Attribute Blank if no Text Attribute appied
COLOR_UNDERSCORE_YELLOW_RED
COLOR_NORMAL
在输出文本之前,使用 来流式传输所需的颜色,并在输出文本后再次使用 将颜色设置为正常。
cout << COLOR_BLUE_BLACK << "TEXT" << COLOR_NORMAL << endl;
cout << COLOR_BOLD_YELLOW_CYAN << "TEXT" << COLOR_NORMAL << endl;
termcap(5)。 - jrockwayterminfo(5)数据库和相关库。--termcap(5)- OrangeDog