PyTest弃用警告:'junit_family'默认值将更改为'xunit2'

13

我在我的circleci流水线中收到了不建议使用的警告。

消息

/home/circleci/evobench/env/lib/python3.7/site-packages/_pytest/junitxml.py:436: PytestDeprecationWarning: The 'junit_family' default value will change to 'xunit2' in pytest 6.0.

命令

- run:
    name: Tests
    command: |
      . env/bin/activate
      mkdir test-reports
      python -m pytest --junitxml=test-reports/junit.xml

如何修改命令以使用xunit?是否可以使用默认工具,就像消息中提到的那样?我的意思是不指定xunit或junit。

这里是完整的流水线

4个回答

14
在以下方式下运行您的命令:

使用xunit2

python -m pytest -o junit_family=xunit2 --junitxml=test-reports/junit.xml

使用xunit1

python -m pytest -o junit_family=xunit1 --junitxml=test-reports/junit.xml 或者

python -m pytest -o junit_family=legacy --junitxml=test-reports/junit.xml

这里详细描述了更改内容:

The default value of junit_family option will change to xunit2 in pytest 6.0, given that this is the version supported by default in modern tools that manipulate this type of file.

In order to smooth the transition, pytest will issue a warning in case the --junitxml option is given in the command line but junit_family is not explicitly configured in pytest.ini:

PytestDeprecationWarning: The `junit_family` default value will change to 'xunit2' in pytest 6.0.   Add `junit_family=legacy` to your

pytest.ini file to silence this warning and make your suite compatible.

In order to silence this warning, users just need to configure the junit_family option explicitly:

[pytest]
junit_family=legacy

3
在您的pytest.ini文件中添加以下行:
junit_family=legacy

如果您想保留--junitxml选项的默认行为。或者您可以接受新版本xunit2,但不明确定义junit_family变量。
本质上,警告是在说您正在使用--junitxml选项。
run           
  name: Tests
未指定变量,您需要开始显式定义它以消除警告或接受新的默认值。

此线程更详细地介绍了在哪里找到pytest的.ini文件。


我如何在没有JUnit的情况下转储构件?我知道使用JUnit的技巧,但我想知道如何使用XUnit,因为我找不到它。 - Piotr Rarus

1

关于从 xunit1 迁移到 xunit2 的官方声明/文档,请阅读:docs.pytest.org

另外,如果您的项目包含 pytest.ini 文件,您可以直接从文件中设置 junit_family 的使用方式,例如:

# pytest.ini
[pytest]
minversion = 6.0
junit_family=xunit2
junit_suite_name = Pytest Tests
addopts = -ra -q -v -s --junitxml=path/to/pytest_results/pytest.xml

0
其他答案已经涵盖了指定Junit家族的方法,无论是在pytest.ini中还是通过ini选项覆盖在命令行上。
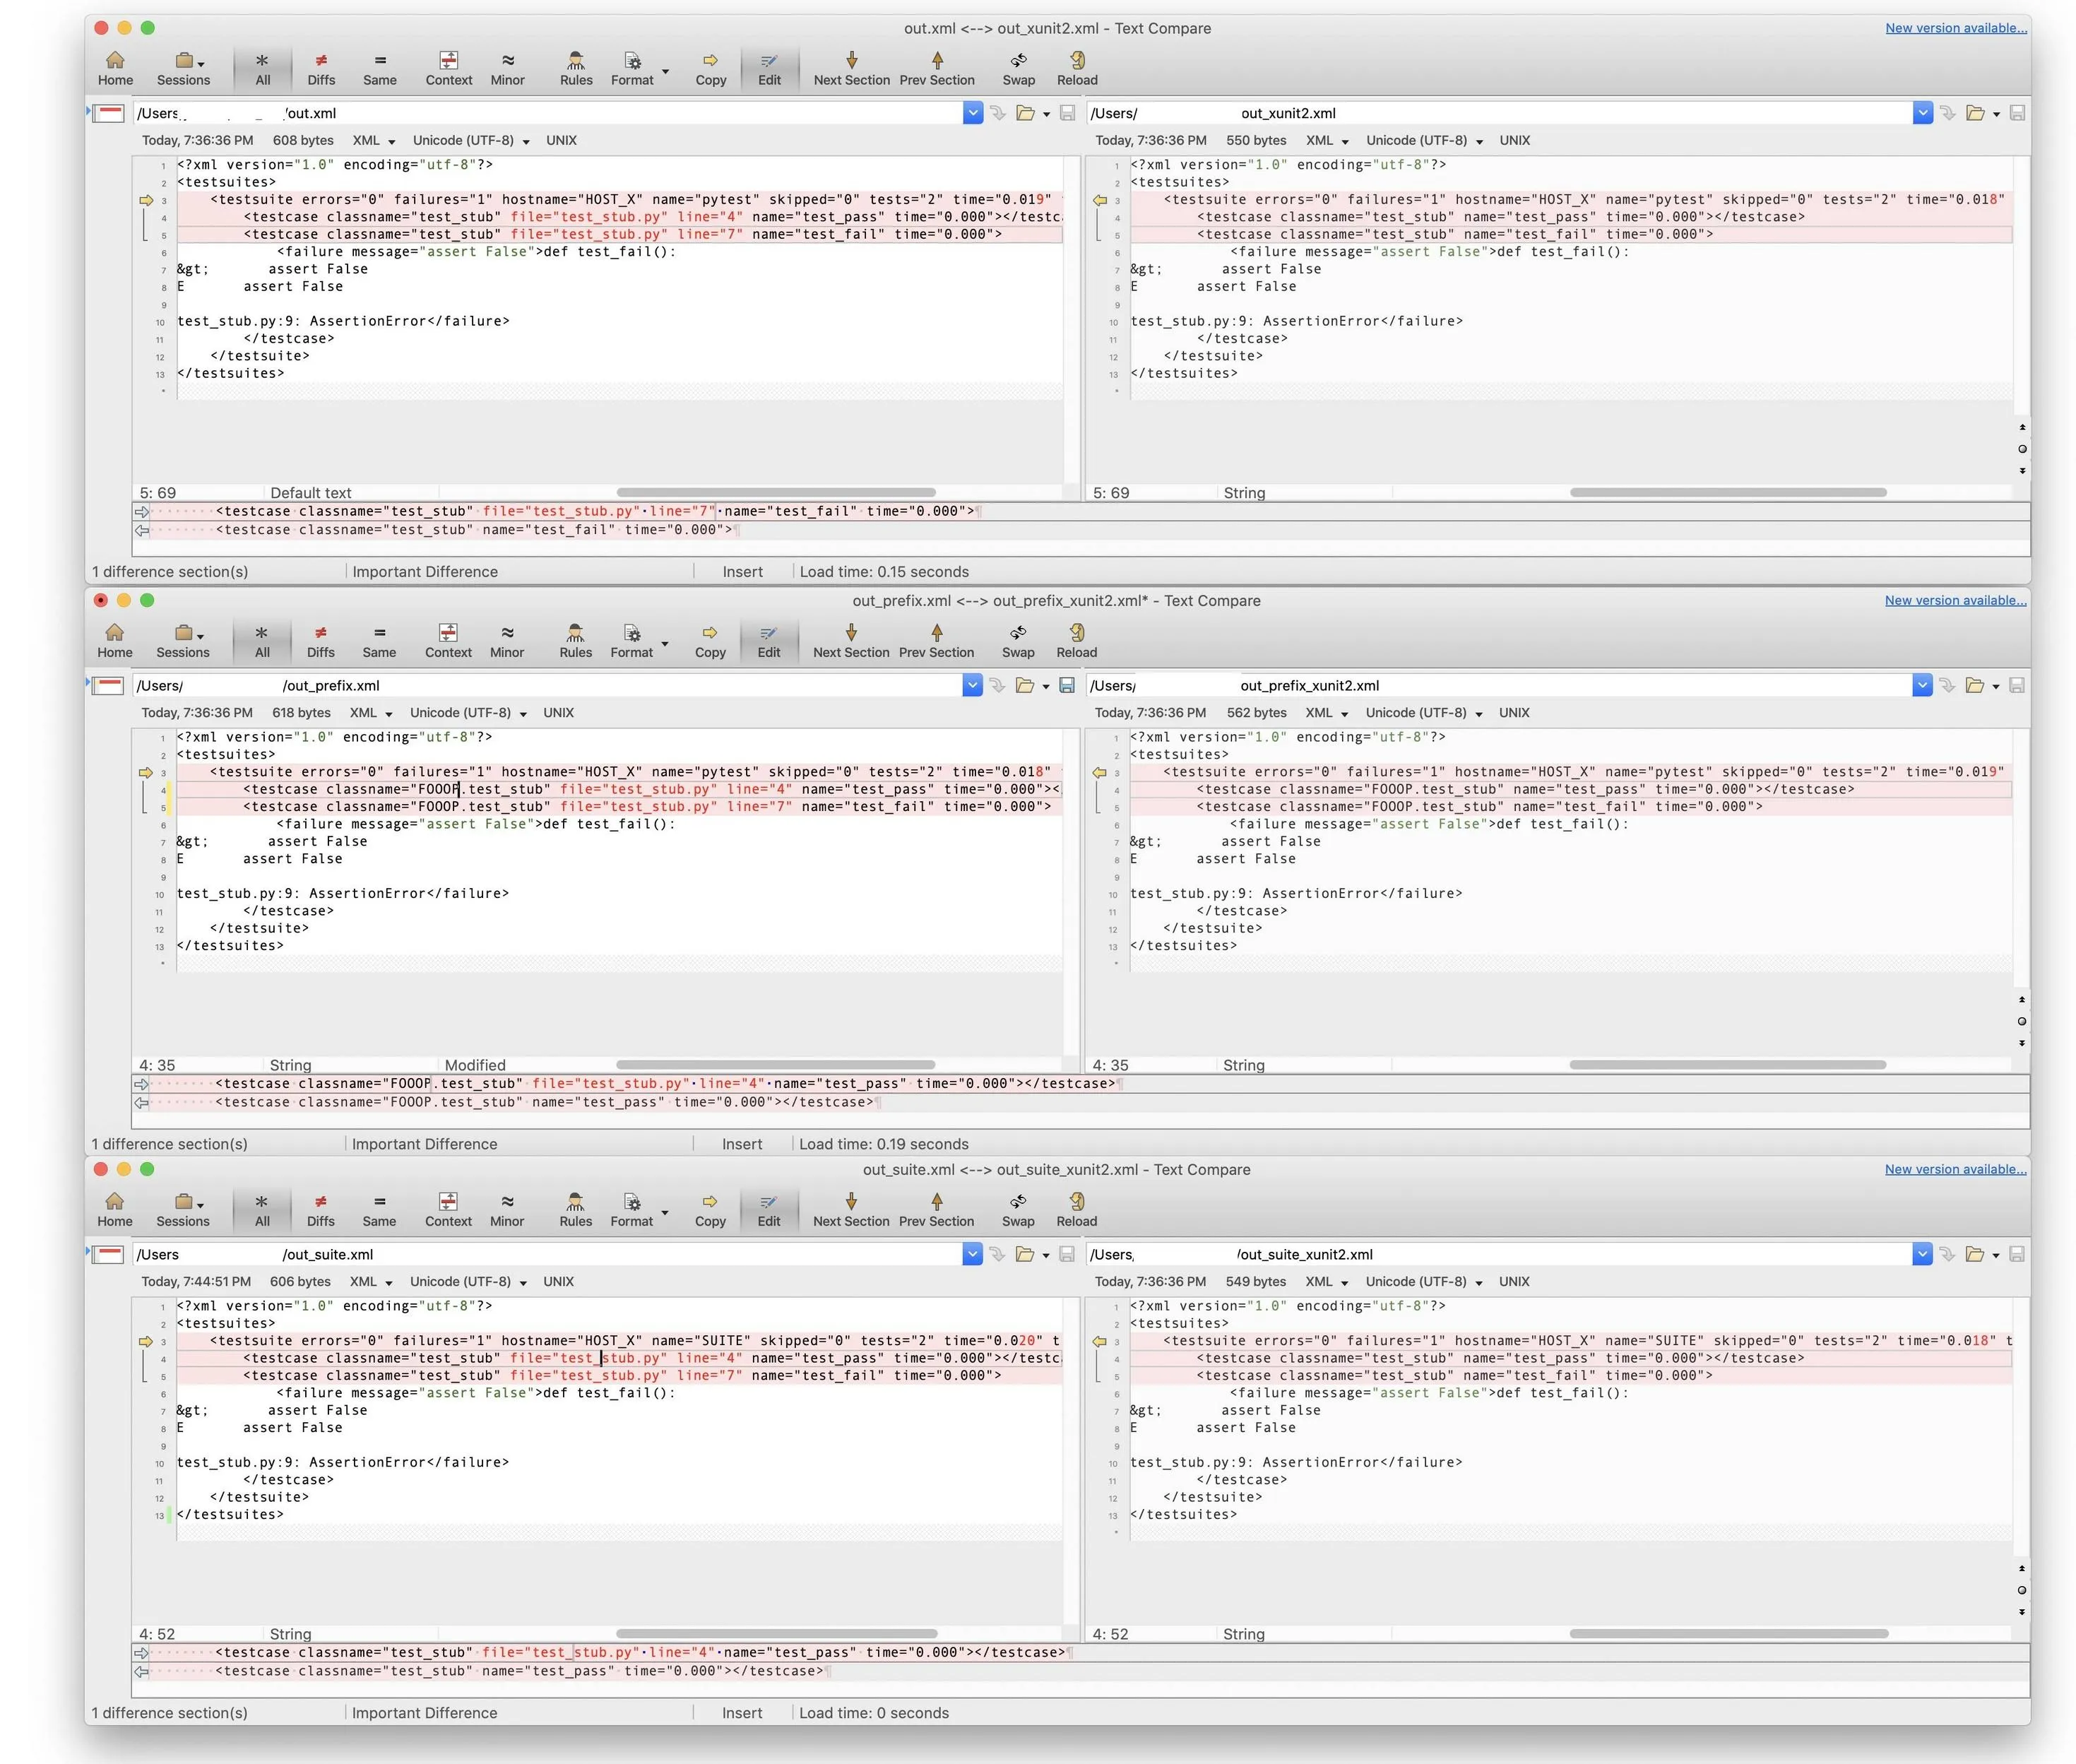
值得一提的是,对于具体的xml文件,查看xunit1和xunit2之间的差异也是很有意义的。针对以下测试模块,通过快速检查发现如下图像所示的差异...
# test_stub.py

import sys
import pytest

def test_pass():
    assert True

def test_fail():
    assert False


if __name__ == "__main__":
    sys.exit(pytest.main([__file__] + sys.argv[1:]))

Pytest在三个不同的配置下运行(与图像中的垂直顺序相匹配)

# Default execution
pytest test_stub.py --junit-xml=out.xml 
pytest test_stub.py --junit-xml=out_xunit2.xml -o junit_family=xunit2

# Junit prefix execution
pytest test_stub.py --junit-prefix=FOOOP --junit-xml=out_prefix.xml
pytest test_stub.py --junit-prefix=FOOOP --junit-xml=out_prefix_xunit2.xml -o junit_family=xunit2

# Junit suite execution
pytest -o junit_suite_name=SUITE test_stub.py --junit-xml=out_suite.xml
pytest -o junit_suite_name=SUITE test_stub.py --junit-xml=out_suite_xunit2.xml -o junit_family=xunit2

所有的差异都几乎突出了xunit2省略了先前在xunit1中出现的fileline属性。其他差异仅仅是时间戳的不同。 junit_suite_namejunit-prefix的行为与以前相同。

junit xml differences

另一个主要的区别是,由于某种原因,在xunit2模式下已经弃用了record_property
PytestWarning: record_property is incompatible with junit_family 'xunit2' (use 'legacy' or 'xunit1')

https://docs.pytest.org/en/7.1.x/reference/reference.html#pytest.junitxml.record_property


网页内容由stack overflow 提供, 点击上面的
可以查看英文原文,
原文链接