我想能够通过SSH远程登录而无需每次输入密码。
- 我该如何设置它?
- 执行无密码会话需要使用不同的命令吗?
我想能够通过SSH远程登录而无需每次输入密码。
执行此命令(如果您已经拥有SSH密钥,可以跳过此步骤):
ssh-keygen
ssh-copy-id user@host
## or if your server uses custom port no:
ssh-copy-id "user@host -p 1234"
ssh user@host
现在您可以在执行命令的特定机器上无需输入密码登录。
not-marco@rinzwind-desktop:~$ ssh-keygen
Generating public/private rsa key pair.
Enter file in which to save the key (/home/not-marco/.ssh/id_rsa):
Created directory '/home/not-marco/.ssh'.
Enter passphrase (empty for no passphrase):
Enter same passphrase again:
Your identification has been saved in /home/not-marco/.ssh/id_rsa.
Your public key has been saved in /home/not-marco/.ssh/id_rsa.pub.
The key fingerprint is:
b1:25:04:21:1a:38:73:38:3c:e9:e4:5b:81:e9:ac:0f not-marco@rinzwind-desktop
The key's randomart image is:
+--[ RSA 2048]----+
|.o= . oo.        |
|*B.+ . .         |
|*=o .   o .      |
| = .     =       |
|. o     S        |
|E.               |
| o               |
|  .              |
|                 |
+-----------------+

not-marco@rinzwind-desktop:~$ ssh-copy-id not-marco@server
not-marco@server's password:
Now try logging into the machine, with "ssh 'not-marco@server'", and check in:

  ~/.ssh/authorized_keys

to make sure we haven't added extra keys that you weren't expecting.
这假设您已经可以通过SSH成功连接到服务器。
您需要生成一个SSH密钥对,这将允许您在不使用密码的情况下识别自己。如果您愿意,您可以选择用密码保护密钥,但是也可以将其留空以实现完全无需密码的SSH访问。
ssh-keygen来创建您的SSH密钥对,这将创建一个id_rsa和id_rsa.pub文件。公钥文件(pub文件)放在服务器上,私钥(id_rsa)则留在您手中,用于身份验证。ssh-copy-id user@server将公钥复制到您的服务器上,将user替换为远程用户,server替换为机器的DNS名称或IP地址。它会提示您输入SSH密码,请输入密码,如果一切顺利完成,您将能够通过ssh user@server访问该机器,而无需密码。ssh-keygen,按照屏幕上的指示操作,然后输入 ssh-copy-id user@server,将user替换为你的远程用户,server替换为远程机器即可。 - Marco Ceppissh-copy-id "not-marco@127.0.0.1 -p 1234"。 - s3m3nssh-copy-id会复制它能找到的所有密钥,这可能会打开您不打算让其访问的权限。为了避免这种情况,请使用-i选项。 - Brent Bradburnssh-keygen
按下 Enter 键直到出现提示符
ssh-copy-id -i root@ip_address
(它会要求输入主机系统的密码一次)
ssh root@ip_address
现在您应该能够无需密码登录。
touch和chmod命令怎么样? - Oxwivi.ssh/authorized_keys文件的权限设置为0600,否则这个操作将无法完成。 - Marco Ceppisshpass来做这个,使用sudo apt-get install sshpass安装它,然后像这样使用。sshpass -p 'password' ssh your_username@your_server
sshpass是一个非常有用的技巧! - Jacob Krall_sshpass,其中 _ 表示空格),以避免密码出现在 bash 历史记录中。 - WinEunuuchs2UnixDisable Password Authentication
Because a lot of people with SSH servers use weak passwords, many online attackers will look for an SSH server, then start guessing passwords at random. An attacker can try thousands of passwords in an hour, and guess even the strongest password given enough time. The recommended solution is to use SSH keys instead of passwords. To be as hard to guess as a normal SSH key, a password would have to contain 634 random letters and numbers. If you'll always be able to log in to your computer with an SSH key, you should disable password authentication altogether.
If you disable password authentication, it will only be possible to connect from computers you have specifically approved. This massively improves your security, but makes it impossible for you to connect to your own computer from a friend's PC without pre-approving the PC, or from your own laptop when you accidentally delete your key.
It's recommended to disable password authentication unless you have a specific reason not to.
To disable password authentication, look for the following line in your sshd_config file:
#PasswordAuthentication yesreplace it with a line that looks like this:
PasswordAuthentication noOnce you have saved the file and restarted your SSH server, you shouldn't even be asked for a password when you log in.
https://help.ubuntu.com/community/SSH/OpenSSH/Configuring#disable-password-authentication
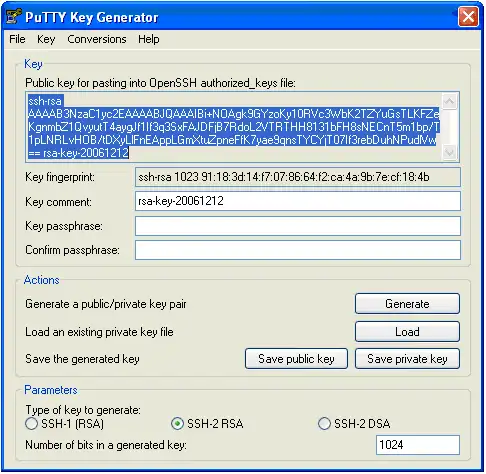
PasswordAuthentication no会影响所有用户吗?如果不是的话,我在测试时如何关闭普通用户的密码验证,同时保持root用户的密码验证不变?我真的不想搞砸了,完全被锁在外面。 - AdamPermission denied (publickey),并且PasswordAuthentication no。我应该怎么办?我需要在另一台主机上更改PasswordAuthentication no吗? - ParisaNputtygen puttygen下载winscp winscp下载如果您拥有私钥:
打开puttygen,点击加载按钮,选择您的私钥(*.pem)文件。
authorized_keys文件复制到.ssh目录中。authorized_keys文件,请注意此事)。运行命令设置权限:
sudo chmod 700 .ssh && chmod 600 .ssh/authorized_keys
~/.ssh/中生成一个相当强大的密钥:ssh-keygen -b 4096
~/.ssh/目录下,您会找到您的公钥文件id_rsa.pub。将其内容通过可传输媒介(例如U盘)添加到服务器的authorized_keys文件中,或者在服务器上暂时启用密码验证,然后使用ssh-copy-id ~/.ssh/id_rsa.pub username@server命令进行复制,之后再次禁用密码验证。ssh-agent或Ubuntu密钥环来本地保护该密码,以免每次都需要输入。用于远程登录和远程复制的应用程序ssh和scp允许您在不提供密码的情况下与远程主机通信。这需要您按照下面描述的身份验证过程进行操作。在此,客户端指的是您所在的计算机,服务器指的是您想要无需提供密码登录的计算机。身份验证过程的步骤如下:
$HOME/.ssh目录中的文件中。$HOME/.ssh/authorized_keys或$HOME/.ssh/authorized_keys2文件中。有三种不同类型的身份验证协议。在运行ssh-keygen时,您需要指定所需的类型:
SSH协议版本1,RSA1:这是默认选择,会生成identity文件(私钥,应该使用chmod 0700命令确保该文件对其他人不可读)和identity.pub文件(公钥)。您可以通过选项指定要使用的密钥类型给ssh;ssh -1强制使用RSA1密钥(协议版本1),而ssh -2强制ssh仅尝试使用RSA或DSA密钥(协议版本2)。在下面的示例中,我们生成并安装了远程主机上的RSA1和DSA密钥,以便您拥有更多的灵活性。您可以在.ssh目录中创建一个配置文件,并添加以下行:
Protocol 1,2
remote=user@remotehost   # fill in correct user and remotehost names
cd $HOME/.ssh
# create .ssh on remote host if it is non-existing:
ssh $remote 'if [ ! -d .ssh ]; then mkdir .ssh; fi'
# copy RSA1 key:
scp identity.pub ${remote}:.ssh
ssh $remote "cd .ssh; cat identity.pub >> authorized_keys"
remote=user@remotehost   # fill in correct user and remotehost names
cd $HOME/.ssh
# create .ssh on remote host if it is non-existing:
ssh $remote 'if [ ! -d .ssh ]; then mkdir .ssh; fi'
# copy DSA key:
scp id_dsa.pub ${remote}:.ssh
ssh $remote "cd .ssh; cat id_dsa.pub >> authorized_keys2"
#!/bin/sh

# create ssh connections without giving a password

if [ $# -lt 1 ]; then
  echo Usage: $0 username@remotehost
  exit
fi
remote="$1"  # 1st command-line argument is the user@remotehost address
this=$HOST   # name of client host

# first check if we need to run ssh-keygen for generating
# $HOME/.ssh with public and private keys:
if [ ! -d $HOME/.ssh ]; then
  echo "just type RETURN for each question:" # no passphrase - unsecure!!
  # generate RSA1, RSA and DSA keys:
  echo; echo; echo
  ssh-keygen
  echo; echo; echo
  ssh-keygen -t rsa
  echo; echo; echo
  ssh-keygen -t dsa
else
  # we have $HOME/.ssh, but check that we have all types of
  # keys (RSA1, RSA, DSA):
  if [ ! -f $HOME/.ssh/identity ]; then
     # generate RSA1 keys:
     echo "just type RETURN for each question:" # no passphrase - unsecure!!
     ssh-keygen
  fi
  if [ ! -f $HOME/.ssh/id_rsa ]; then
     # generate RSA keys:
     echo "just type RETURN for each question:" # no passphrase - unsecure!!
     ssh-keygen -t rsa
  fi
  if [ ! -f $HOME/.ssh/id_rsa ]; then
     # generate DSA keys:
     echo "just type RETURN for each question:" # no passphrase - unsecure!!
     ssh-keygen -t dsa
  fi
fi


cd $HOME/.ssh

if [ ! -f config ]; then
  # make ssh try ssh -1 (RSA1 keys) first and then ssh -2 (DSA keys)
  echo "Protocol 1,2" > config
fi

# copy public keys (all three types) to the destination host:

echo; echo; echo
# create .ssh on remote host if it's not there:
ssh $remote 'if [ ! -d .ssh ]; then mkdir .ssh; fi'
# copy RSA1 key:
scp identity.pub ${remote}:.ssh/${this}_rsa1.pub
# copy RSA key:
#scp id_rsa.pub ${remote}:.ssh/${this}_rsa.pub
# copy DSA key:
scp id_dsa.pub ${remote}:.ssh/${this}_dsa.pub
# make authorized_keys(2) files on remote host:

echo; echo; echo
# this one copies all three keys:
#ssh $remote "cd .ssh; touch authorized_keys authorized_keys2; cat ${this}_rsa1.pub >> authorized_keys; cat ${this}_rsa.pub >> authorized_keys2; cat ${this}_dsa.pub >> authorized_keys2;"
# this one copies RSA1 and DSA keys:
ssh $remote "cd .ssh; touch authorized_keys authorized_keys2; cat ${this}_rsa1.pub >> authorized_keys; cat ${this}_dsa.pub >> authorized_keys2;"

echo; echo; echo
echo "try an ssh $remote"
复制自: http://folk.uio.no/hpl/scripting/doc/ssh-no-password.html
ssh-keygen  # change the file to /home/yourname/.ssh/something
ssh-copy-id -i ~/.ssh/something.pub lerner@192.168.20.160
Host *
IdentitiesOnly yes
Host somename
HostName 192.168.20.160
User lerner
IdentityFile ~/.ssh/something
ssh somename就可以登录。