这个答案的很多内容都是从
Arch Wiki和
GnuPG文档中摘抄的。本答案中的任何建议都纯属个人意见,应该持保留态度。
创建PGP密钥
图形界面(GUI)
打开 密码和密钥 应用程序(也称为 seahorse),点击 +(或转到 文件->新建,或按下 CtrlN)以查看:
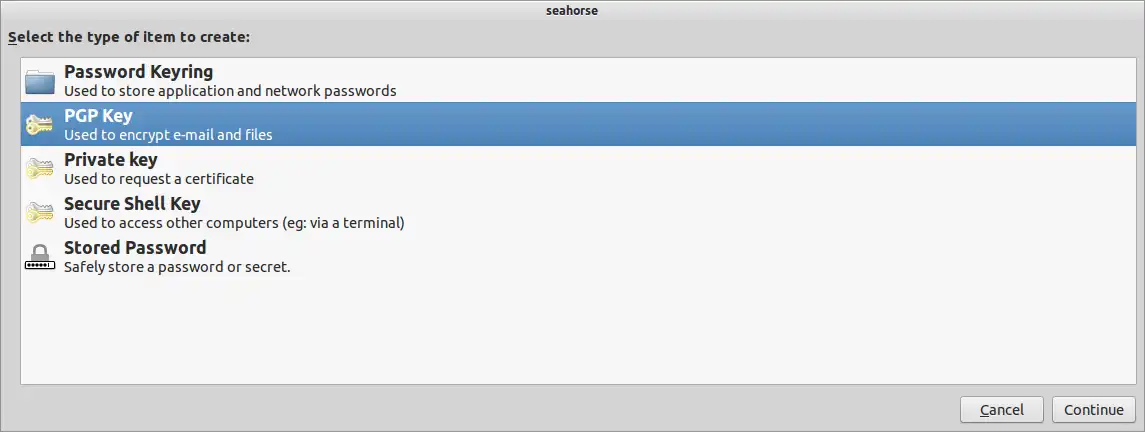
选择 PGP 密钥,并输入您的详细信息。我正在冒充 Byte Commander:
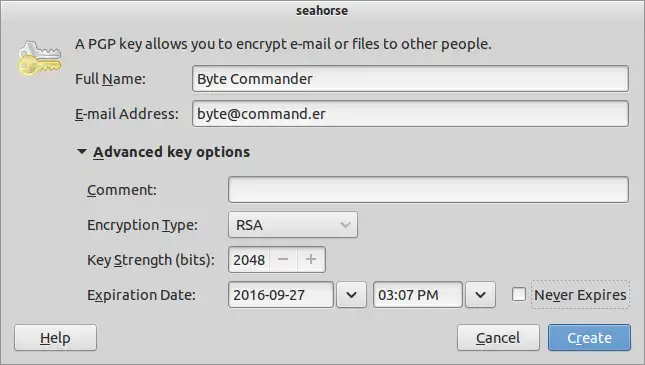
RSA 和 2048 位对于大多数目的来说都是可以的。如果您只想将其用于签名,请从下拉菜单中选择 RSA(仅签名) 选项,但您应该不需要这样做 - 这可以使用 子密钥 处理。您可以留下评论。在密钥上设置过期日期也很有用。点击 创建。
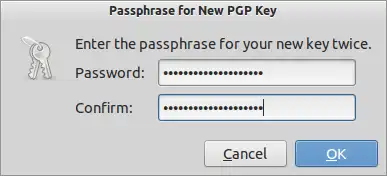
输入一个适当长的密码(我的示例是简短的,个人意见),然后点击 确定:
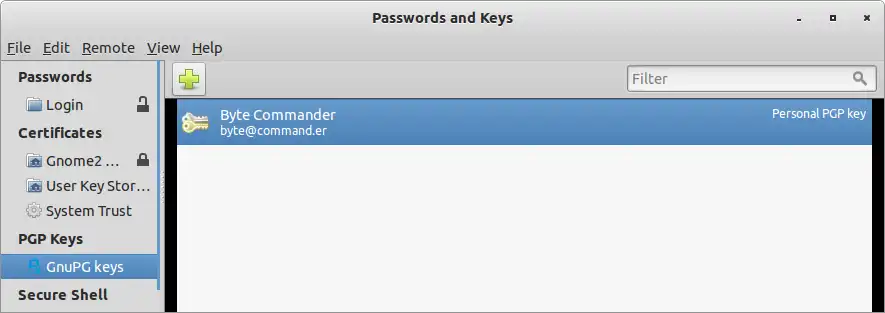
与 CLI 不同,Seahorse 似乎没有任何反馈。在等待期间,可以做任何您想做的事情,它会收集熵并创建密钥。这可能需要一些时间。之后,您将在 PGP 密钥 部分中看到该密钥:
命令行界面
要从命令行生成密钥,只需运行gpg --gen-key。它会要求您提供与图形用户界面相同的详细信息:
$ gpg --gen-key
gpg (GnuPG) 1.4.16; Copyright (C) 2013 Free Software Foundation, Inc.
This is free software: you are free to change and redistribute it.
There is NO WARRANTY, to the extent permitted by law.

Please select what kind of key you want:
   (1) RSA and RSA (default)
   (2) DSA and Elgamal
   (3) DSA (sign only)
   (4) RSA (sign only)
Your selection?
RSA keys may be between 1024 and 4096 bits long.
What keysize do you want? (2048)
Requested keysize is 2048 bits
Please specify how long the key should be valid.
         0 = key does not expire
      <n>  = key expires in n days
      <n>w = key expires in n weeks
      <n>m = key expires in n months
      <n>y = key expires in n years
Key is valid for? (0) 1y
Key expires at Tuesday 27 September 2016 03:45:19 PM IST
Is this correct? (y/N) y

You need a user ID to identify your key; the software constructs the user ID
from the Real Name, Comment and E-mail Address in this form:
    "Heinrich Heine (Der Dichter) <heinrichh@duesseldorf.de>"

Real name: Byte Commander
E-mail address: byte@command.er
Comment:
You selected this USER-ID:
    "Byte Commander <byte@command.er>"

Change (N)ame, (C)omment, (E)-mail or (O)kay/(Q)uit? o
You need a Passphrase to protect your secret key.

passphrase not correctly repeated; try again.
We need to generate a lot of random bytes. It is a good idea to perform
some other action (type on the keyboard, move the mouse, use the
disks) during the prime generation; this gives the random number
generator a better chance to gain enough entropy.

Not enough random bytes available.  Please do some other work to give
the OS a chance to collect more entropy!  (Need 186 more bytes)
.....+++++
+++++
We need to generate a lot of random bytes. It is a good idea to perform
some other action (type on the keyboard, move the mouse, use the
disks) during the prime generation; this gives the random number
generator a better chance to gain enough entropy.

Not enough random bytes available.  Please do some other work to give
the OS a chance to collect more entropy!  (Need 80 more bytes)
....+++++

Not enough random bytes available.  Please do some other work to give
the OS a chance to collect more entropy!  (Need 83 more bytes)
...+++++
gpg: key 8AE670A6 marked as ultimately trusted
public and secret key created and signed.

gpg: checking the trustdb
gpg: 3 marginal(s) needed, 1 complete(s) needed, PGP trust model
gpg: depth: 0  valid:   2  signed:   0  trust: 0-, 0q, 0n, 0m, 0f, 2u
gpg: next trustdb check due at 2016-09-26
pub   2048R/8AE670A6 2015-09-28 [expires: 2016-09-27]
      Key fingerprint = 82D9 0644 B265 8E75 1E01  538B B479 3CF4 8AE6 70A6
uid                  Byte Commander <byte@command.er>
sub   2048R/0E2F4FD8 2015-09-28 [expires: 2016-09-27]
注意GnuPG告诉我们它需要更多的熵。希望seahorse也是这样。不过话说回来,感觉GnuPG像奥利弗·特威斯一样行动。:P
发布你的密钥
现在,我们需要将我们的公钥传播出去,以便人们可以使用它进行验证。
图形界面
返回到seahorse应用程序中的PGP密钥列表(参见上一页的截屏)。选择要导出的密钥,在远程菜单中选择同步和发布密钥:
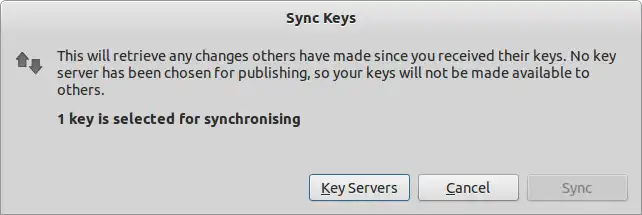
如果您尚未选择要发布到的服务器,
同步按钮将会被禁用。请点击
Key Servers按钮来进行选择:

我选择了Ubuntu的服务器。
现在,您可以单击同步按钮,并将其发布到Ubuntu的密钥服务器(很抱歉,Ubuntu!)。
CLI
使用CLI,您需要要发布的密钥的密钥ID。它是创建密钥时输出的最后一行(8AE670A6)。如果您不记得它是什么,请运行gpg --list-keys。要发布:
$ gpg  --keyserver pgp.mit.edu --send-keys 8AE670A6
gpg: sending key 8AE670A6 to hkp server pgp.mit.edu
抱歉,MIT。
签名
我还不知道一个方便的图形用户界面方法来签署文件。
一旦你创建好要签名的文件,转到终端。尝试使用gpg --list-keys命令:
$ gpg --list-keys
/home/muru/.gnupg/pubring.gpg
---------------------------
pub   2048R/F7878B0C 2015-09-28 [expires: 2016-09-26]
uid                  Byte Commander <byte@command.er>
sub   2048R/345B9A4F 2015-09-28 [expires: 2016-09-26]
你可以使用两种方法对文件进行签名:
使用加密进行签名
$ gpg --sign --output examples.sig examples.desktop
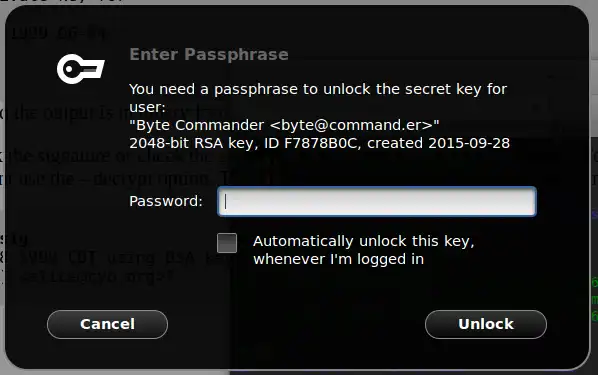
You need a passphrase to unlock the secret key for
user: "Byte Commander <byte@command.er>"
2048-bit RSA key, ID F7878B0C, created 2015-09-28
gpg: Invalid passphrase; please try again ...
You need a passphrase to unlock the secret key for
user: "Byte Commander <byte@command.er>"
2048-bit RSA key, ID F7878B0C, created 2015-09-28
如果您正在使用桌面会话,很可能会看到一个图形化的密码提示。例如,在GNOME中:
如果收件人拥有您的公钥,他们可以验证它,或获取解密后的内容:
$ gpg --verify examples.sig
gpg: Signature made Monday 28 September 2015 03:25:00 PM IST using RSA key ID F7878B0C
gpg: Good signature from "Byte Commander <byte@command.er>"
$ gpg --decrypt examples.sig
[Desktop Entry]
Version=1.0
Type=Link
Name=Examples
Name[aa]=Ceelallo
...
URL=file:///usr/share/example-content/
Icon=folder
X-Ubuntu-Gettext-Domain=example-content

gpg: Signature made Monday 28 September 2015 03:25:00 PM IST using RSA key ID F7878B0C
gpg: Good signature from "Byte Commander <byte@command.er>"
使用明文签名
在某些情况下,您可能不希望加密内容,例如发送电子邮件。这种情况下,请使用--clearsign选项:
$ gpg --clearsign examples.desktop

You need a passphrase to unlock the secret key for
user: "Byte Commander <byte@command.er>"
2048-bit RSA key, ID F7878B0C, created 2015-09-28

$ cat examples.desktop.asc
-----BEGIN PGP SIGNED MESSAGE-----
Hash: SHA1

[Desktop Entry]
Version=1.0
Type=Link
Name=Examples
Name[aa]=Ceelallo
...
URL=file:///usr/share/example-content/
Icon=folder
X-Ubuntu-Gettext-Domain=example-content

-----BEGIN PGP SIGNATURE-----
Version: GnuPG v1

iQEcBAEBAgAGBQJWCRAaAAoJEGUZkqX3h4sMBWsH/1yw+G0v5Ck+T3PBS90SkvC8
5C0FJeGVr0AgYQohhsE3zEGQ7nn53N7JsvNlF6VccvN99DZIp18JbrJ+qs5hWjtg
KU/ACleR5dvVrJgfjppkuC8Q3cAudvqciKlLjA7Xycr3P49oCNCy8k/ue2TrgCvS
mMb5IS/kqpO7wrOMBAR0c/2CjQsA91S1/YK7DbuUqeNgEzW1grsI7XZPhiDGpAib
D20HWrbdLhklAEJuo1EvuOIggW6MF6ksxDoVapsUzQalD0TWEq6OnvzIS5qhITrc
XaDPQJpiHyCyINnL5aZCUwr2uon7osJ+2a8Ahp1REpzIZTdND9jA5NWSel5+yAs=
=ZrtB
-----END PGP SIGNATURE-----
签名,使用单独的文件进行签名(分离式签名)
最后,对于某些文件,您不能在文档中进行签名。例如,打包文件或存储库的元数据都具有特定性质的内容,不容易允许嵌入式签名。在这种情况下,您可以使用--detached-sig选项:
$ gpg --output examples.desktop.sig --detach-sign examples.desktop

You need a passphrase to unlock the secret key for
user: "Byte Commander <byte@command.er>"
2048-bit RSA key, ID F7878B0C, created 2015-09-28

$ gpg --verify examples.desktop.sig examples.desktop
gpg: Signature made Monday 28 September 2015 03:35:55 PM IST using RSA key ID F7878B0C
gpg: Good signature from "Byte Commander <byte@command.er>"
注意
在加密+签名和分离签名中,gpg的输出是二进制的。您可以使用--armor选项(ASCII装甲)使GnuPG输出base64编码的数据。
自动化
要进行签名脚本编写,您可以:
rsa来轻松地签署数据,而不必为所有的GPG问题烦恼。一旦我开始真正发布和打包软件,这可能会非常有用,但对于我当前的目的来说可能有些过于繁琐。所以在那之前,它可能已经过时了! :) - Byte Commander