看了很多方法,我都理解了,但是其中的步骤让我有些不太愿意去执行,因为要按顺序逐步缩小一个树莓派IMG文件。所以我继续寻找,然后发现了一个名为
PiShrink的项目中的Bash脚本。
执行起来非常简单,并且在我的MacOS M1 Mac Mini上也能正常运行。
背景故事
在我这个特殊情况下,我有两张32GB的SD卡,但由于某种原因,其中一张比另一张稍微小一点(大约95MB),所以
balenaEtcher拒绝将IMG从看似更大的SD卡写入到较小的SD卡中。
我知道我只使用了32GB中的大约10GB,所以我可以缩小IMG文件的大小来适应。
步骤
首先,我有以下文件。.zip文件包含了.img文件,但我在下面展示的是解压后的文件。
$ ls -lh | grep -E 'img|zip'
-rw-r--r--  1 root staff  28G Jan 29 13:16 backup.zip
--w--wx-w-  1 slm  staff  30G Jan  1  1980 disk.img
我随后下载了PiShrink的shell脚本并将其设置为可执行文件。
$ wget https://raw.githubusercontent.com/Drewsif/PiShrink/master/pishrink.sh
$ chmod +x pishrink.sh
我然后这样运行它:
$ sudo pishrink disk.img pi.img
Copying disk.img to pi.img...
e2fsck 1.44.0 (7-Mar-2018)
Pass 1: Checking inodes, blocks, and sizes
Pass 2: Checking directory structure
Pass 3: Checking directory connectivity
Pass 4: Checking reference counts
Pass 5: Checking group summary information
STORAGE: 69402/7684096 files (0.2% non-contiguous), 9562823/30732288 blocks
resize2fs 1.44.0 (7-Mar-2018)
resize2fs 1.44.0 (7-Mar-2018)
Resizing the filesystem on /dev/disk4s2 to 9273700 (1k) blocks.
Begin pass 2 (max = 245358)
Relocating blocks             XXXXXXXXXXXXXXXXXXXXXXXXXXXXXXXXXXXXXXXX
Begin pass 3 (max = 3752)
Scanning inode table          XXXXXXXXXXXXXXXXXXXXXXXXXXXXXXXXXXXXXXXX
Begin pass 4 (max = 3420)
Updating inode references     XXXXXXXXXXXXXXXXXXXXXXXXXXXXXXXXXXXXXXXX
The filesystem on /dev/disk4s2 is now 9273700 (1k) blocks long.

"disk4" ejected.
fdisk: could not open MBR file /usr/standalone/i386/boot0: No such file or directory
Enter 'help' for information
fdisk: 1>          Starting       Ending
 #: id  cyl  hd sec -  cyl  hd sec [     start -       size]
------------------------------------------------------------------------
 2: 83 1023   3  32 - 1023 254   2 [   1056768 -   61464576] Linux files*
Partition id ('0' to disable)  [0 - FF]: [83] (? for help) Do you wish to edit in CHS mode? [n] Partition offset [0 - 62521344]: [1056768] Partition size [1 - 61464576]: [61464576] fdisk:*1> Writing MBR at offset 0.
fdisk: 1> Shrunk pi.img from 30G to 9.3G
生成的IMG文件现在大约有9GB。
$ ls -lh | grep -E 'img|zip'
-rw-r--r--  1 root staff  28G Jan 29 13:16 backup.zip
--w--wx-w-  1 slm  staff  30G Jan  1  1980 disk.img
--w---x---  1 root staff 9.4G Jan 29 17:04 pi.img
我随后将其重新打包为ZIP文件,只是为了在处理磁盘上的文件时保持最高效的大小。
$ sudo zip pi.zip pi.img
我们现在有以下一套文件。
$ ls -lh | grep -E 'img|zip'
-rw-r--r--  1 root staff  28G Jan 29 13:16 backup.zip
--w--wx-w-  1 slm  staff  30G Jan  1  1980 disk.img
--w---x---  1 root staff 9.4G Jan 29 17:04 pi.img
-rw-r--r--  1 root staff 8.3G Jan 29 17:08 pi.zip
我可以使用
balenaEtcher或
ApplePi-Baker将ZIP文件刻录到“较小”的SD卡上。
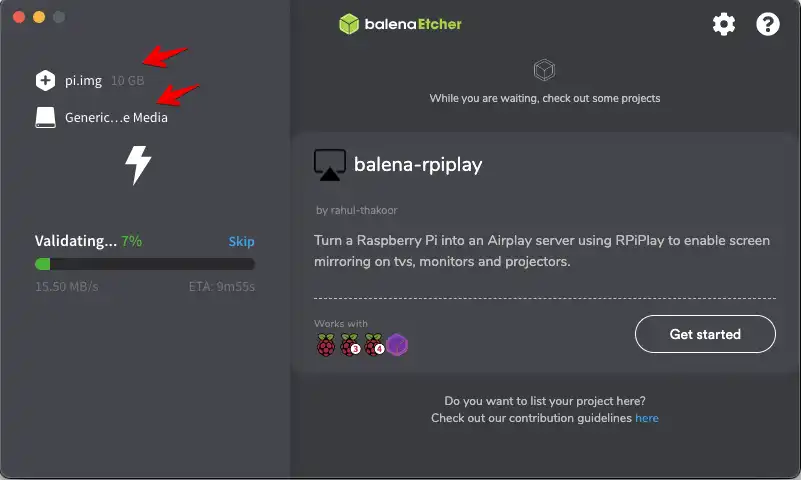
在我的Mac上检查SD卡,我可以看到它显示大约10GB的容量。
$ diskutil list /dev/disk4
/dev/disk4 (external, physical):
   #:                       TYPE NAME                    SIZE       IDENTIFIER
   0:     FDisk_partition_scheme                        *31.9 GB    disk4
   1:             Windows_FAT_32 LIBREELEC               536.9 MB   disk4s1
   2:                      Linux                         10.0 GB    disk4s2
                    (free space)                         21.3 GB    -
注意:我可以在Linux系统中使用lsblk等命令执行相同的操作。
后续操作
在使用上述方法后,我注意到SD卡中的文件系统不足32GB。主要显示如下:
$ df -h | grep -E "File|mmc"
Filesystem                Size      Used Available Use% Mounted on
/dev/mmcblk0p1          511.7M    141.7M    370.0M  28% /flash
/dev/mmcblk0p2            8.6G      8.2G    377.4M  96% /storage
这个问题应该很容易解决,只需要在重新启动后从内部扩展SD文件系统即可。
首先,我使用
parted来扩展分区。
$ parted /dev/mmcblk0 resizepart 2 100%
Warning: Partition /dev/mmcblk0p2 is being used. Are you sure you want to
continue?
Yes/No? yes
yes
Information: You may need to update /etc/fstab.
我随后重新启动了系统。
$ reboot
在我使用
resize2fs在线扩展文件系统后:
$ resize2fs /dev/mmcblk0p2
resize2fs 1.45.6 (20-Mar-2020)
Filesystem at /dev/mmcblk0p2 is mounted on /storage; on-line resizing required
old_desc_blocks = 71, new_desc_blocks = 234
The filesystem on /dev/mmcblk0p2 is now 30638592 (1k) blocks long.
现在它显示了SD卡上的所有可用空间。
$ df -h | grep -E "File|mmc"
Filesystem                Size      Used Available Use% Mounted on
/dev/mmcblk0p1          511.7M    141.7M    370.0M  28% /flash
/dev/mmcblk0p2           28.3G      8.2G     20.1G  29% /storage