在终端中,有哪些命令可以替代键盘上的“PrtSc”(打印屏幕)按钮?
我正在运行Ubuntu GNOME操作系统。
我正在运行Ubuntu GNOME操作系统。
import工具(如果系统上没有安装该软件包,您需要先安装它)。import screenshot.png
import 实际上是一个非常强大的命令,可以用多种方式来捕捉屏幕。例如,要在延迟一段时间后捕捉整个屏幕并调整大小,请使用以下命令:import -window root -resize 400x300 -delay 200 screenshot.png
import命令的所有可用选项,请访问ImageMagick 网站。
scrot。sudo apt-get install scrot
scrot命令进行截屏。scrot MyScreenshot.png
scrot 的更多选项在这里:scrot -b -d 5 '%Y:%m:%d:%H:%M:%S.png' -e 'mv $f ~/Desktop/'
-b指定截图应包括窗口边框。
--d指定延迟五秒。
-'%Y:%m:%d:%H:%M:%S.png'将以基于当前日期和时间的指定格式保存截图,本例中为.png。
--e 'mv $f ~/Desktop/'告诉scrot将截图保存在桌面上。import命令会将KDE桌面效果中的透明窗口边框/发光效果渲染为纯黑色。而scrot根本不愿意参与管道操作,而我正是使用管道操作来避免在从Xinerama设置中裁剪所需屏幕时产生不必要的中间文件。我改用xwd命令,并使用ImageMagick的convert命令将xwd格式转换为PNG并进行裁剪。(请参阅下面的回答) - Christian Hujerexport DISPLAY=:0(或适当的值)。 - Jackgnome-screenshot
gnome-screenshot -d xx来延迟操作。例如,将截屏操作延迟10秒:gnome-screenshot -d 10
或者
sleep 10;gnome-screenshot
~/Pictures目录下。gnome-screenshot --help 会给你很多选项。 - somethisgnome-screenshot --interactive - Luis Souzasudo add-apt-repository ppa:shutter/ppa
sudo apt-get update
sudo apt-get install shutter
要截取活动窗口的屏幕截图,
shutter -a -o shot.png -e
shutter -f -o shot.png -e
shutter --help命令。Usage:
shutter [options]
Options:
Example 1
shutter -a -p=myprofile --min_at_startup
Example 2
shutter -s=100,100,300,300 -e
Example 3
shutter --window=.*firefox.*
Example 4
shutter --web=http://shutter-project.org/ -e
Capture Mode Options:
-s, --select=[X,Y,WIDTH,HEIGHT]
Capture an area of the screen. Providing X,Y,WIDTH,HEIGHT is
optional.
-f, --full
Capture the entire screen.
-w, --window=[NAME_PATTERN]
Select a window to capture. Providing a NAME_PATTERN (Perl-style
regex) ist optional.
-a, --active
Capture the current active window.
--section
Capture a section. You will be able to select any child window
by moving the mouse over it.
-m, --menu
Capture a menu.
-t, --tooltip
Capture a tooltip.
--web=[URL]
Capture a webpage. Providing an URL ist optional.
-r, --redo
Redo last screenshot.
Settings Options:
-p, --profile=NAME
Load a specific profile on startup.
-o, --output=FILENAME
Specify a filename to save the screenshot to (overwrites any
profile-related setting).
Supported image formats: You can save to any popular image
format (e.g. jpeg, png, gif, bmp). Additionally it is possible
to save to pdf, ps or svg.
Please note: There are several wildcards available, like
%Y = year
%m = month
%d = day
%T = time
$w = width
$h = height
$name = multi-purpose (e.g. window title)
$nb_name = like $name but without blanks in resulting strings
$profile = name of current profile
$R = random char (e.g. $RRRR = ag4r)
%NN = counter
The string is interpretted by strftime. See "man strftime" for
more examples.
As an example: shutter -f -e -o './%y-%m-%d_$w_$h.png' would
create a file named '11-10-28_1280_800.png' in the current
directory.
Application Options:
-h, --help
Prints a brief help message and exits.
-v, --version
Prints version information.
-d, --debug
Prints a lot of debugging information to STDOUT.
--clear_cache
Clears cache, e.g. installed plugins, at startup.
--min_at_startup
Starts Shutter minimized to tray.
--disable_systray
Disables systray icon.
-e, --exit_after_capture
Exit after the first capture has been made. This is useful when
using Shutter in scripts.
fbgrab。sudo apt-get install fbcat来安装它。$ sudo fbgrab my_screenshot
my_screenshot保存在当前目录下。
my_screenshot的格式是什么?如何查看它? - Ciro Santilli OurBigBook.comxwd -silent -root | convert xwd:- screenshot.png
xwd -silent -root | convert xwd:- -crop 1920x1080+0+0 test.png
xwd -silent -root | convert xwd:- -crop 1920x1080+1920+0 +repage test.png
xwd ... | convert xwd:- ...。至少在我的Debian Strech安装中,使用IM 6.9.6-2时是必需的。 - Sylvain Leroux#!/bin/bash
curDate=$(date)
imgExtension=".png"
imgName=$curDate$imgExtension
imgDirectory="/path/to/desires/save/directory/"
imgSavePath=$imgDirectory$imgName
gnome-screenshot --file="$imgSavePath"
screenshot.bash 的文件中,放在任何你想放的地方。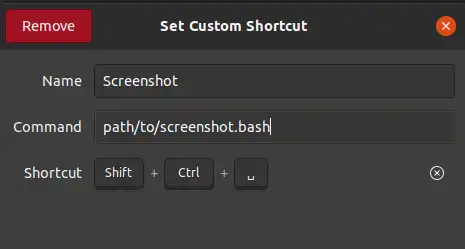
flameshot gui -g以获取区域坐标
3. 验证截图,可能是CTRL+C
4. 然后一次完成所有操作,无需交互:flameshot gui --region 1771x1019+1940+120 -s -p pipo.png
说明:
gui 启动图形界面模式--region 裁剪在第2步中从-g获得的屏幕区域-s 不等待用户验证,自动保存-p 文件或文件夹的路径以保存。⚠️ 它不会覆盖文件名,但你会得到一个带有后缀的pipo_1.png(以此类推)。生成的文件名将打印在stderr上玩得开心。
#!/bin/bash
computer='JohnBrownsBody@10.0.0.11'
password='LiesAMoulderingInTheGrave'
path='/tmp/'
file='peepshow.png'

[ "$(whereis sshpass | cut -d: -f2)" == "" ] && sudo apt install sshpass
[ "$(whereis feh | cut -d: -f2)" == "" ] && sudo apt install feh

sshpass -p "$password" ssh $computer "export DISPLAY=:0; scrot $path$file;"
sshpass -p "$password" scp -r "$computer:$path$file" $path
# gpicview "$path$file"
feh "$path$file"
echo "... and his soul is marching on in $path$file! Peek at it!"
gnome-screenshot是Unity上默认的截图工具。 - Avinash Raj