确保您使用的是先前或更高版本,因为
grub 2.04中存在一个错误。
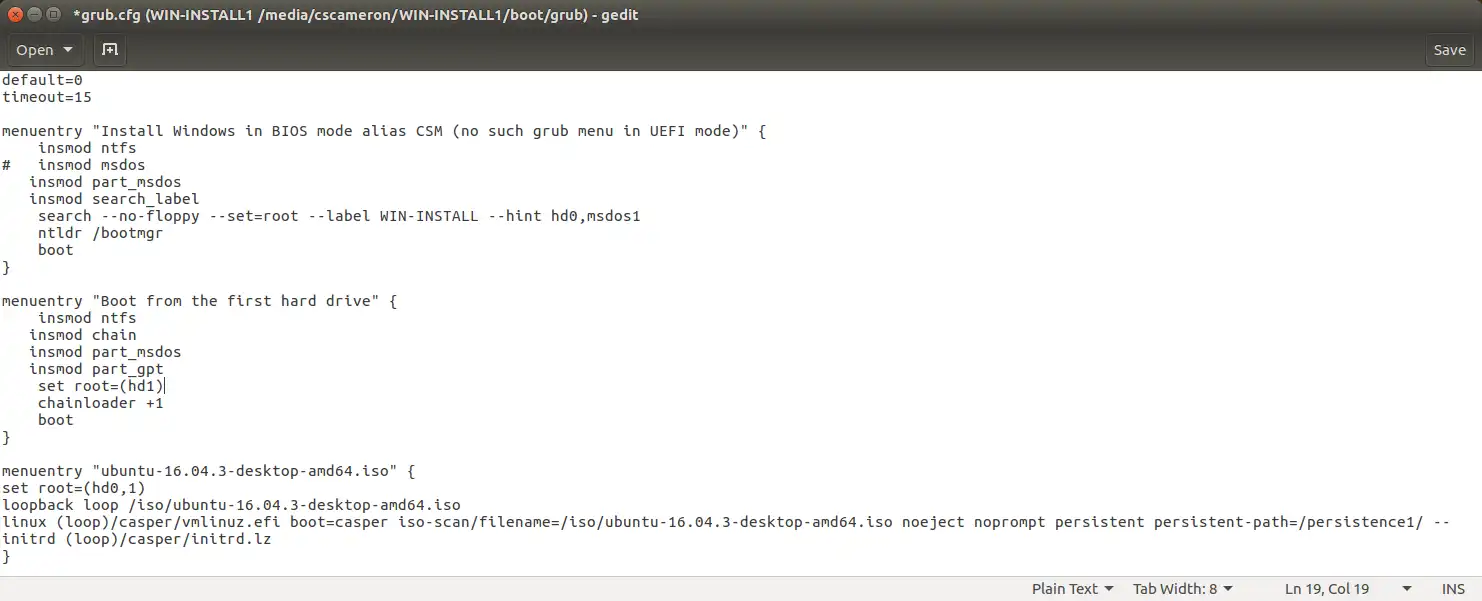
嗯,将ISO文件添加到grub的基本步骤对于UEFI和BIOS机器是相同的:编辑
/etc/grub.d/40_custom文件,在文件底部添加一个
menuentry项(此示例中使用GParted)。
menuentry "GParted Live ISO" {
}
现在我们要添加一个变量,其中包含我们存储ISO的目录(到目前为止,与BIOS机器没有任何区别:还不错)。
menuentry "GParted Live ISO" {
  set GPartedISOFile="/opt/Live-ISOs/gparted-live-0.31.0-1-amd64.iso"
}
我使用
/opt来存储这些文件,因为我不喜欢在我的机器根目录下创建目录,而根据
Linux文件系统层次结构,可选软件应该放置在那里。
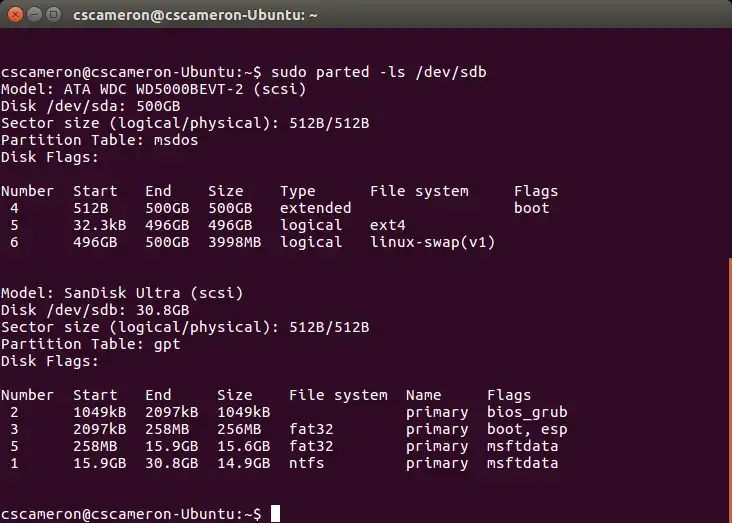
在添加
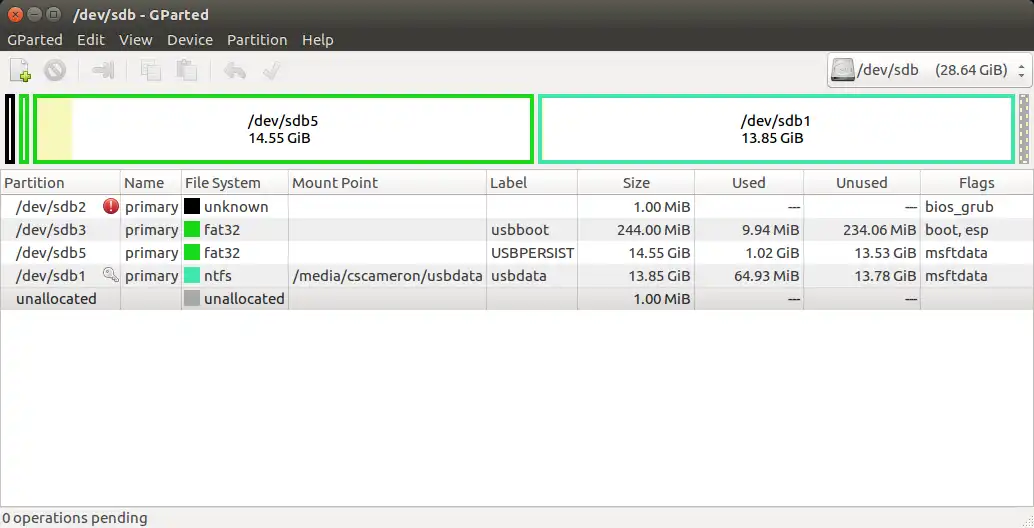
loopback变量之前,我们需要找出文件存储在哪个硬盘上,所以我们执行以下命令:
df --output=source /opt/Live-ISOs/gparted-live-0.31.0-1-amd64.iso | tail -1,在我的机器上输出结果是:
/dev/sdb2。
然而,grub使用(hdX,Y)表示法,这就是UEFI和BIOS机器之间的区别所在!现在重新启动您的机器,
进入grub菜单并按下
C:这将带您进入grub命令提示符,其中包含
与您习惯的不同的命令,但您只需要一个命令:ls。
在我的机器上,输出结果是:
(hd0) (hd1) (hd1,gpt3) (hd1,gpt2) (hd1,gpt1) (hd2) ... (hd3) ...
哎呀?4个驱动器?我只有3个!而且在BIOS中不是`(hd1,4)`这一行,而是在UEFI中是`(hd1,gpt3)`,而且`(hd0)`根本没有分区!
嗯,显然当NVRAM的一部分被用作存储并显示为`(hd0)`时,你需要从1开始编号你的驱动器!而所有关于引导ISO文件的信息都说你必须从0开始编号(在BIOS机器上这总是正确的,但在某些UEFI机器上不一定如此!)
所以`loopback`的值变成了`(hd2,gpt2)$GPartedISOFile`,因为我的机器上的ISO文件是`/dev/sdb2`(第二个驱动器`hd2`,第二个分区`gpt2`):
menuentry "GParted Live ISO" {
  set GPartedISOFile="/opt/Live-ISOs/gparted-live-0.31.0-1-amd64.iso"
  loopback loop (hd2,gpt2)$GPartedISOFile
}
另一个区别是在BIOS机器上,
linux和
initrd被称为UEFI机器上的
linuxefi和
initrdefi,这就是我们的最终结果。
#!/bin/sh
exec tail -n +3 $0
# This file provides an easy way to add custom menu entries.  Simply type the
# menu entries you want to add after this comment.  Be careful not to change
# the 'exec tail' line above.

menuentry "GParted Live ISO" {
  set GPartedISOFile="/opt/Live-ISOs/gparted-live-0.31.0-1-amd64.iso"
  loopback loop (hd2,gpt2)$GPartedISOFile
  linuxefi (loop)/live/vmlinuz boot=live components config findiso=$GPartedISOFile ip=frommedia toram=filesystem.squashfs union=overlay username=user
  initrdefi (loop)/live/initrd.img
}
现在保存文件,并使用以下命令更新 grub:
update-grub
在完成上述操作之后,重新启动,
进入GRUB菜单,选择
GParted Live ISO,您现在可以轻松地启动ISO,而无需再次寻找USB闪存驱动器!
:-)
menuentry "CloneZilla ISO" {
  set ISOFile="/opt/Live-ISOs/clonezilla-live-20170905-zesty-amd64.iso"
  loopback loop (hd2,gpt2)$ISOFile
  linuxefi (loop)/live/vmlinuz boot=live components config findiso=$ISOFile ip=frommedia toram=filesystem.squashfs union=overlay
  initrdefi (loop)/live/initrd.img
}